Introduction
2025-02-01: Reddit has suspended my account
As you may know, I used to spend a lot of time on the /r/reMarkableTablet subreddit, answering questions for people. I did this because I genuinely enjoy sharing my knowledge with others, and because it wasn't something I had to do as part of my day job.
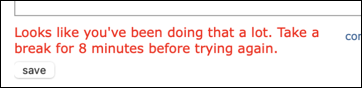
On 2025-01-30, while I was looking at a picture somebody had submitted to illustrate a problem, I noticed a red banner behind the picture saying something like "this account has been suspended". At first I thought it was talking about the account which had posted the picture, but then I started noticing the same red banner at the top of every new page I opened. And when I checked my email, I found a message from reddit saying ...
Hi u/kg4zow,
At Reddit, we’re always watching out for your privacy, safety, and security. Recently, after detecting some technical irregularities on your u/kg4zow account, we took the extra precaution of locking your account.
To unlock your account, reset your password now.
We recommend choosing a new password that you haven’t used on Reddit or another website or app before.
To prevent your account from potential misuse, you won’t be able to take part communities or update the majority of your settings while your account is locked. Also, when you log in you’ll see a red warning and a security message like this one asking you to reset your password.
If you have have questions about locked accounts or your Reddit security, check out our FAQs:
I reset my password (changed from one long 1Password-generated string of random characters to another one), but after that I started seeing warnings like this whenever I tried to answer a question:
At the time I opened a "support ticket" with reddit about this, but I never heard back.
Today I received an email from another reddit user, asking why I had cancelled my reddit account. I reloaded my browser window and was still logged in, so I found a new question that I was able to help with. I typed up an answer and submitted it, and when I look at the question in my browser it shows my answer at the bottom ... but if I look at the same question from a browser that isn't logged into my account, my answer isn't there.
So apparently my account is still suspended, and reddit is "hiding" the fact from me while telling the rest of the world about it. (This sounds a lot like a "shadow ban" to me, even if it has nothing to do with politics.)
I just opened a second ticket with them about this, asking for a second time, what SPECIFICALLY I did that triggered all this.
Until reddit decides to fix this, I'm not able to use it. Which means that if anybody has questions that I could help with, I'm not able to do so.
In the meantime
If you have questions that I might be able to help with, I recommend the following:
-
I'm not going to stop maintaining this site - when I have time. Of course, this means you need to come back and check the site every so often, but if you use
 RSS, I have an RSS feed which is updated every time I publish a new version of this web site.
 -
I'm also not going to stop maintaining my programs on Github - again, when I have time. If you have questions about scripts in the rm2-scripts repo, or about the rmweb program, feel free to ask there. (I just turned on the "Discussons" feature for both repos, I've never used them before so it might take a bit for me to figure out how they work.)
-
The remarkable.guide site has answers to many of the questions that show up regularly on reddit. They tend to be a lot shorter than the "books" that I typically write - they focus only on "how" to do something, rather than "why" you do it that way. My brain doesn't work that way, but a lot of people seem to prefer that.
-
The Community Discord has people who are able to answer a lot of the questions that show up on reddit. They're also able to answer questions that are a LOT more technical than anything that shows up on reddit. I am
kg4zowthere as well, although I'm not as active there as I was on reddit. -
The Feedback section below tells how to best reach me directly.
Introduction
I am the owner of four reMarkable tablets - one rM1, two rM2's, and now an rMPP. The first one arrived on 2023-06-27. I'm using the original rM2 as my "primary" tablet, while the others are being used for experimentation (so I can try things which might be dangerous, without any risk to my real notes).
I'm using this site as a way to record the information I learn about them, and the things I do to customize them. I'm doing this for two reasons:
-
So that I will have a reference to look back on in the future, in case I need it. (I find that the act of writing documentation helps me to organize the details in my head.)
-
So that others who may find this information useful will have access to it as well.
I plan to add information over time, especially with the release of the rMPP.
ℹ️ In Progress
Some of the items in the Table of Contents menu may not actually link to pages yet, and some of the pages which exist may not be complete. I'm writing this in my spare time, and
$DAYJOBdoesn't give me a whole lot of that. If you're paying attention, you'll probably notice there are more updates on the weekends. Please be patient.
RSS feed - if you use an RSS reader, this feed contains a post for each commit in the git repo where I track the site's source files. (The git repo is stored in Github, and the web site is hosted using Keybase Sites.)
Similar Sites
This site is becoming "known" in the reMarkable community ... which is cool I guess, but I'm not really trying to become "the one site" for everything relating to reMarkable tablets. There are other sites out there with more/better information, and/or which cover things I haven't covered (and may never cover) on this site.
-
remarkable.guideis run by some of the same people who maintain Toltec, which is "a community-maintained repository of free software for the reMarkable tablet". These guys do a LOT more low-level hacking on the tablets than I do, including modifying or replacing the software entirely. I would probably be doing the same thing if I had more time, but$DAYJOBkeeps me pretty busy.The
remarkable.guidesite has been around longer than my site (the one you're reading right now). Most of the pages there seem to be quick little "what to do" articles, which is cool if you just want to "do the thing" and aren't interested in why you need to do it, or in what's actually happening under the covers.I've always been more curious and want to understand things in more detail, so I tend to write longer, more detailed pages - especially because I use this site myself. I can't remember every little detail about everything I'm interested in, which is why I write it all down - so I can refer back to it later. (The
jms1.infosite is the same idea, but not focused on reMarkable tablets. And it also suffers from the same "not enough time" problem.) -
remarkablewiki.com❌ not working - When I first got my first tablet, this site had a similar collection of articles. The site has since been taken down, the current page is a generic "this web site is not available" page from a web hosting company in Germany. The domain's registration information was last updated on 2023-11-10.My guess is that whoever started the site, stopped paying for the hosting, and the hosting company took over the domain. I'm not aware of any mirrors out there, but from what I remember, the site was fairly useful. I wish they had announced ahead of time that they were shutting down the site, I could have hosted it myself (and I'm sure half a dozen other people can say the same thing).
Created with mdbook
This "book" is being created using a program called mdbook, which allows me to write the content using Markdown and have it converted to an HTML format that I think looks nice, especially with a few minor customizations.
And rather than making the same customizations every time I start a new "book" (I have several, both at work and for non-work), I created a template containing a newly created book with my customizations already in place.
⇒ https://github.com/kg4zow/mdbook-template/
Keybase
I make use of Keybase on a very regular basis.
-
This site's "source code" was originally tracked in a Keybase git repo. It's now being tracked in Github so people can "watch" the repo.
-
The site is being served using Keybase Sites.
The web hosting function could be replaced (by Github, or by my own web server) however I prefer using Keybase in general (again, privacy), so I plan to leave it where it is unless there's a good reason to move it.
Feedback
I would appreciate any feedback you may have to offer about this book. This especially includes if you spot any typos, if you see any information which is incorrect or incomplete, or if there's something you'd like to see me cover.
-
I am also
kg4zowon Keybase, however I only use that account for amateur radio stuff. If you try to contact me using that username, there's a good chance I won't see it for several months. -
reMarkable Community Discord:
kg4zow(I'm not in there very often) -
Email:
jms1@jms1.net
License

This web site is licensed under a Creative Commons Attribution 4.0 International License.
Short version, you're free to use, copy, and re-share the information, including commercially, as long as you tell people that I originally wrote it, provide a link back to where you found it (i.e. this web site), and if you're sharing a modified version, make it clear which parts you modified.
Exception
The .hbs files in the git repo's theme-template/ directory, whose contents make up part of every generated HTML page, were copied from the mdbook source code and then modified. As such, these files are covered by the Mozilla Public License 2.0, as noted in their repo's LICENSE file.
Definitions
While reading other pages about the reMarkable tablets, I've noticed that some words seem to mean different things to different people.
I think it may be helpful for me to write down some of these terms, what I think they mean, and what they mean when you see them on this web site.
Notebooks
A notebook is a collection of pages. I've also seen them called "native notebooks", "documents", or "files". This is the digital version of a paper notebook.
The pages within a notebook are an "ordered set", meaning they exist in a specific order (i.e. page 1, page 2, page 3, and so on). This is normally the order in which the pages are created, however you can re-arrange them in whatever order you like.
Internally, each notebook is stored as a collection of files. The file structure is explained in more detail on the Filesystem page.
Pages
Pages are the individual surfaces that you write or draw your notes on. This is the digital version of a sheet of paper.
Each page has two or more "layers". Layers are logically ordered from the "bottom" to the "top". When you're looking at a page on the screen, you're seeing the contents of all of the layers "stacked" on top of each other. It draws the layers "from the bottom up", so things on a higher layer will "cover up" things on lower layers.
The "lowest" layer of each page contains a template. You cannot change the contents of a template, however you can change which template is used for each page.
The things you write or draw with the stylus are stored as a series of pen strokes. You may also see these referred to as lines or strokes. Each layer's pen strokes are stored separately.
Templates
A template is an image file used in conjunction with a page in a notebook. This is the digital version of the lines on graph paper, the dots on dotted paper, the lines and words on a "form" that you fill out, or in general, the pre-printed elements on any page which doesn't start off totally blank.
The reMarkable software comes with a collection of templates, which can be used on any page in a notebook. The reMarkable template files have both PNG and SVG versions.
The reMarkable software doesn't offer any way to upload your own templates, however you can use SSH (or a utility like RCU which uses SSH) to upload your own template files into the tablet and make the reMarkable software use them.
The Templates section of this web site has more information about how to do this, as well as some simple templates that I've designed for myself. (Fair warning, I'm a computer programmer, not a graphic designer, so don't expect anything super-pretty.)
Cover Pages
A cover page is "Page 1" in a notebook whose "Notebook cover" setting is set to "First page".
Some people like to make custom cover pages for their notebooks. I do this by making a template which looks like a book cover, with a space in the middle where I can draw or write the title of that notebook. It looks like this:

The Simple Cover Page page has more information about this, and includes the script I used to create the template image.
Quick Sheets
A "Quick sheet" is a page in a notebook called "Quick sheets".
The reMarkable tablet's "file browser" has a "⊕ Quick sheets" link at the top of every screen. Tapping this link will ...
-
Create a notebook called "Quick sheets", in the "My files" root directory in the tablet's folder structure, if it doesn't already exist.
-
Create a new page at the end of this notebook.
-
Open that page, ready for you to start writing.
The idea is, if you just need to quickly write something down, you can put it on a quick sheet and then later move that page to the notebook where it belongs.
The "Quick sheets" notebook is just like any other notebook, except that ...
-
The "file browser" will not allow the user to rename, move, or delete the notebook.
-
The reMarkable software's "⊕ Quick sheets" link is hard-coded to use it.
PDF and EPUB Files
The reMarkable tablets allow you to upload PDF and EPUB files, and will show them on the screen like a big "book reader" device, with the added bonus that you can make your own annotations on top of the original file.
This is actually one of the reasons I bought my tablet in the first place. In addition to taking notes all day long for work, I sometimes use it as a "book reader", especially for PDF files formatted for US 8½"x11" paper (or A4, for the rest of the world), and therefore don't "look right" on a smaller screen like an iPhone, or the Kobo Libra 2 I read while falling asleep (also without connecting it to their cloud service).
PDF vs EPUB
The reMarkable tablet treats PDF and EPUB files similarly, however the files are very different.
-
PDF files contain pages. Each papge may include a list of directions like "draw a line from coordinates (100,500) to (250,800)" or "draw the text 'Hello' in a box from coordinates (850,400) to (950,450)". The location of each "thing" (line, image, letter, etc.) on the page is contained in the PDF file itself, so they can't move. If a page was designed for 8½"x11" paper and you look at it on a smaller screen, you would see a blown-up version of one part of the page.
Many people who create PDF files, do so because it locks the position, size, and appearance of the elements on the page. For example, a calendar wouldn't be very useful if the numbers in each box were positioned anywhere else on the page.
-
EPUB files contain text. They include instructions on how to format the text (i.e. this word should be italicized, these words should be bold, and so forth), however they do not dictate where the words should appear on the page ... or have anything to do with "pages" at all.
The location of the text is controlled by the program or device which displays the text. This allows the text to be shown on different sized screens, using different fonts and font sizes, and "flowed" around images or other elements which may need to be shown along with the text.
I'm not going to claim that either format is inherently "better" than the other. They are both useful, but they are meant for different purposes.
The tablet presents the document as a series of pages, organized to make it look like a notebook. The contents of each page are used as a "bottom layer", similar to how notebooks use templates. One or more drawing layers are added above it, to hold the pen strokes for whatever annotations you might make on that page.
This means that you cannot change the "templates" for pages in a PDF file. Even if you "insert a blank page" in the file for taking notes, the reMarkable software won't allow you to choose a template for that page - you get a blank page and that's it.
ℹ️ When an EPUB file is uploaded to a reMarkable tablet, the tablet generates a PDF file internally.
The original EPUB file is kept, however it looks like once the internal PDF file is generated, the PDF version is what the software actually uses when showing the file on the display.
⚠️ This EPUB-to-PDF conversion process is not perfect, at least not in reMarkable firmware 3.0.5.56. So far I've found two different books where the original EPUB file has pictures in certain places, and those pictures are missing when I look at the book on the tablet, and they're missing from the generated PDF file in the tablet.
So for now, my plan for EPUBs is to use Calibre to convert them to PDF, and transfer the resulting PDFs to my reMarkable tablet.
PDF vs Template
This is probably the single biggest point of confusion I've seen. A lot of people use the term "template" when talking about a PDF file, or talk about "using a PDF as a template".
PDFs and templates are NOT the same thing. The main differences are ...
-
Templates can be assigned to individual pages within a notebook.
-
Templates cannot be assigned to pages within a PDF file. Even if you insert a blank page in a PDF document (to write your own notes), you cannot assign a template to the page.
I don't have a dictionary in front of me, but part of the meaning of the word "template" is that it's reusable. In this case, it means that it can be re-used for as many notebook pages as you like. If you're using a PDF file to simulate a template, the only way to use that "PDF template" more than once is to duplicate the original PDF.
Example
For work, I keep a notebook for every month, where I write down the things I work on each day. I sometimes also add pages for different tickets, usually right after the "daily list" for the day when I work on them.
If I wanted to use a PDF for this, I would need to generate a new PDF for every month, and I would only be able to add blank pages between the "daily" pages.
Because I'm using templates, I am able to organize the notebook the way that works for me. What I do is ...
-
At the beginning of each month, I create a new notebook, assign a "cover page" template for page 1 and write in the month/year. Then I add a page, assign a "calendar" template for page 2, and write in the numbers.
-
Every morning I add a new page to the notebook, assign the "daily work" template to that page, and start writing things down.
-
If I need one or more "extra" pages for that day, I add them after the current "daily" page, and use whatever template makes sense for each of those pages. Sometimes I use what I call the "Basic Page" template, sometimes "Lined medium", sometimes "Dots S", sometimes "Blank" ... whatever makes sense for the information I need to write.
-
Most days I'll add an extra page at the end to use as "scratch paper" (for things I need to write down for a few minutes, but I know I'm not going to need permanently), then delete the page when I no longer need it.
Using templates allows me to use whatever "form" I need for each page in the notebook, without having to know exactly which "form" is going to be needed ahead of time (i.e. while creating a PDF on a computer).
The correct use of the word "Template"
It's up to you how you want to use the word "template".
-
I think of it a specific term, referring to an image that can be used as the background for pages in reMarkable notebooks, and which can only be updated using SSH (or a third-party utility like RCU which uses SSH).
-
Others may think of it in the generic sense, referring to a "background" that you can write over. A PDF file can be thought of in this way.
When you see the word "template" on this web site, this is what I'm referring to.
I'm not going to insist that others stick to my terminology. All I ask is ...
-
When you see the word "template" on this web site, or if you're talking to me and I use the word, be aware that I mean it in the specific sense explained above.
-
If you're talking with me and you use the word "template", please be very clear about which sense of the word you mean.
Static Screens
The reMarkable software comes with several images which are shown for special purposes.
The one most people want to change is suspended.png, aka the "Sleep screen". This is shown when the tablet is sleeping. The suspended.png file in the reMarkable firmware is an almost empty page with this in the middle.

These screens can be replaced by uploading a new file with the same filename as the one you want to replace.
These files are covered in more detail on the Filesystem page.
Move scripts to Github
I've created a Github repo to host the scripts and track their changes over time. Some of the scripts are already there, others are being added as I have time.
⇒ https://github.com/kg4zow/rm2-scripts
TODO
Create dirctories in the Github repo for each already-existing script on this site.
-
convert each scripts page on this site, to a
README.mdfile in each script's directory -
for template scripts, write/test individual
generatescripts to make sure samples and thumbnails look right in the Github web interface -
update pages in this book to point to Github for each script, so I don't have to keep maintaining two sets of documentation.
Frequently Asked Questions
I read r/RemarkableTablet on Reddit, and sometimes I answer peoples' questions. I've noticed a few questions that people seem to ask, over and over again, and I've gotta be honest, explaining the same things over and over again gets really old.
If you're also reading there and you have a question, do yourself a favour and read through the existing questions and comments. There's a good chance that somebody has already asked and/or answered the same question.
The pages in this section will provide the answers that I normally provide when these questions come up.
Cases and Folios
I see a lot of questions about cases and/or folios for the reMarkable tablets.
reMarkable Folios
The folios that reMarkable sells attach to the tablet using magnets. It's a cool idea, however the magnets themselves aren't particularly strong, and it's fairly easy for the tablet to fall out of the folio if you aren't careful.
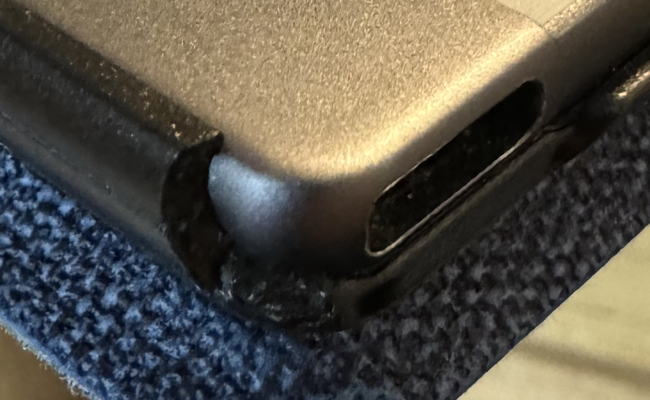
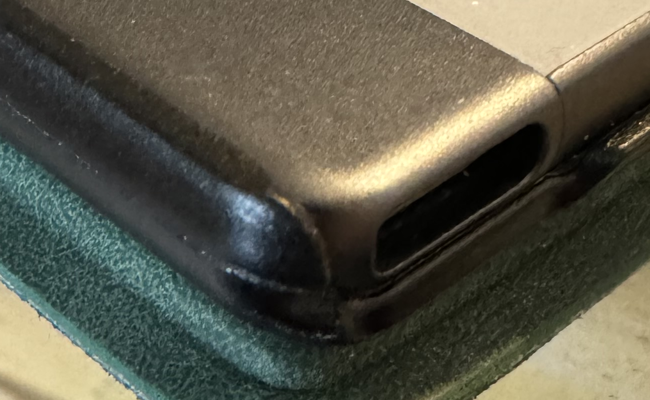
The folios also have no protection for the corners and edges of the tablet, which is unfortunate - damage to the top left corner can make the power button "stick" and you won't be able to turn it on or off, and damage to the lower left corner can deform the USB-C connector and you won't be able to charge it.
I had one instance where my tablet fell out of the Gray "Book Folio". Luckily it fell less than a foot (30cm), and it landed on an open book, so it wasn't damaged. But that was enough for me to seek out other alternatives.
The reMarkable tablets don't have enough of a market presence for OtterBox to make cases for them, but if they did, that's what I would be using.
What I use
I ended up buying two CoBak Case for Remarkable 2 Paper Tablet - one "Fabric Blue" and one "with stand Emerald". They attach to the tablet mechanically, using plastic "lips" that wrap around the left and right sides, along with part of the top and bottom. They also have a cut-out on the right side for a reMarkable stylus, position in the right place to allow the stylus's magnetic attachment to the tablet to work properly.
The plastic lip on the left isn't as sturdy as I would like. One of the curved corners snapped off of while I was removing the tablet (trying to find the serial number, which is there, but it's printed so small, in a colour which is almost identical to the rest of the back, that you can't read it).
The cases also have a small compartment to store extra nibs. It holds 4-5 of them, but you still need a way to remove a "dead" nib from the end of the stylus without damaging it. The titanium nibs I bought came with a "tool" to remove nibs, but I think if I ever needed to swap out a nib and didn't have that tool with me, I could use the pliers from my pocketknife to pull the old one out - I would just need to be careful to pull only the nib, without accidentally pulling part of the stylus itself as well.
One other thing to mention ... the "with stand" versions have magnets inside the front cover to hold the stands closed when they aren't being used. Magnets can cause problems for e-ink screens, both in calibration (i.e. lines drawn around a specific part of the screen will "bulge" a little) and in possible "dead spots" (the display may not be able to detect the stylus around certain parts of the screen). My "with stand" case is on the "experimenting" tablet, and every few weeks I test the screen by using a plastic ruler to draw straight lines, and make sure the lines are actually straight on the screen.
The reMarkable Cloud Service
reMarkable's cloud service, reMarkable Connect, is designed to store copies of your documents. This allows other clients, such as the reMarkable apps and web site, to work with documents without having to access the tablet directly.
When you edit a document on your tablet, the tablet immediately updates the cloud service with whatever you changed. If another client (desktop/mobile app, or the my.remarkable.com web page) uploads a change to the cloud, your tablet will update itself with that change as soon as it receives it from the cloud servers. If the tablet is connected to wifi and able to reach the cloud servers, that update may happen within just a few seconds.
🛑 The reMarkable cloud service is not a backup service.
It's a sync service.
The reMarkable desktop and mobile apps all work by talking to a cloud account, and relying on the tablet to sync any changes when they happen. In particular, anything you delete on the tablet will also be deleted from the cloud, and anything deleted from the cloud will also be deleted from the tablet.
Think of it as a mirror of your tablet.
reMarkable's overall system was designed around the idea that the tablets would be connected to the Cloud service. The cloud servers handle talking to third-party systems, such as Dropbox, Google, and Microsoft's file storage services, and MyScript to perform handwriting recognition.
I think part of the reason it was structured this way is because the rM1/rM2 tablets have limited room for software. If the cloud servers talk to these systems, the software on the tablets doesn't need to include code to talk to each of these systems directly.
I'm a visual thinker, I find it easier to understand things when I can see them, so I made a quick diagram showing my understanding of how everything talks to each other.
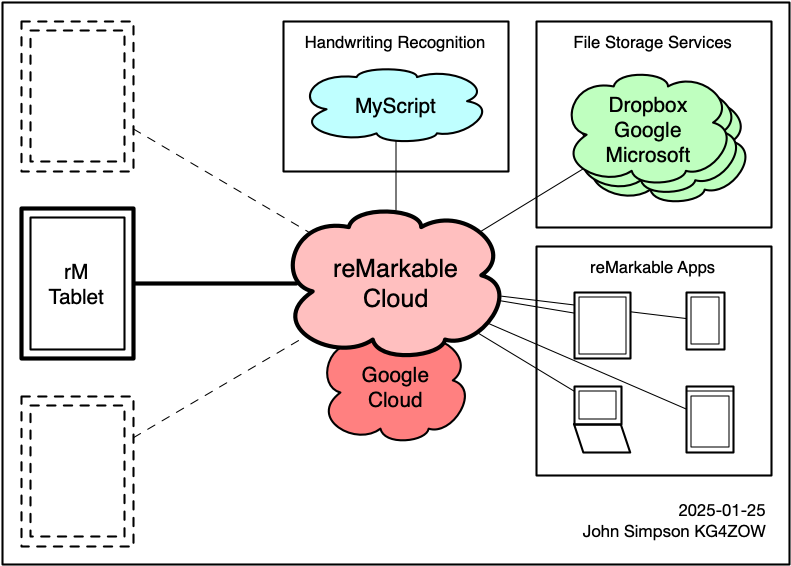
The only things the tablets talk to other than the reMarkable cloud servers are ...
- Your local network's router (and DHCP server, if it's on a different machine) to get IPv4 and IPv6 addresses for its wifi interface.
- Google's NTP servers, to synchronize its clock. If the DHCP server tells the tablet to use different NTP servers, the tablet ignores those instructions and uses Google's servers anyway. (The Clock page explains how to change which NTP servers it uses.)
- reMarkable's update servers, to check for and download software updates. Note that there are two different sets of update servers - one for 3.11 and earlier, and one for 3.12 and later.
- In software version 3.12 and later, the tablet also connects to Memfault to send telemetry and analytics. Memfault's web page also says they can handle software updates, but it isn't clear whether reMarkable is using Memfault for this.
Levels of the Cloud Service
reMarkable's documentation doesn't make this very clear, but there are three "levels" of the cloud service - paid, free, and none.
Paid Service - "Connect Subscription"
Rather than try to explain everything that the paid subscription gives you, I'll refer you to reMarkable's web site, which has a good explanation. To be honest, the service is not overly expensive compared to other "cloud" services I've seen - it's currently USD $3 per month, or $30 per year if you pay for a whole year up front.
I probably would use their cloud service, if it weren't for the problems I explain below.
Free Service
As with the paid service, reMarkable's web site explains the differences between the paid subscription and the free service, however it's set up as a list of things you can do, rather than a list of things you can't do.
From what I've read, the limitations are:
-
Any document which is not edited for 50 days or more, will stop sync'ing with the cloud servers.
The documents will still exist on your tablet and in the cloud, but they will have a "Not syncing" flag on them. Once a document enters this state, any edits you make on the tablet will not sync up to the cloud, and updates made using other clients will not sync down to your tablet. They still appear in the cloud's web interface, but the cloud won't have any updates you've made on the tablet. Even if you go back and edit it, that document will not start sync'ing again.
-
Some functionality in the desktop and mobile apps will be blocked. I don't know the details specifically (I've never used the reMarkable apps), however I seem to remember people saying that you can edit documents using the desktop/mobile/web apps if you have a paid account, but not a free account.
Otherwise, everything else works the same as with a paid account, including handwriting recognition and third-party file transfers.
Working around the 50-day limit
If you have documents showing the "Not syncing" flag and you need them to "start syncing" again, there are two ways to do it:
-
Start paying for a subscription. Once you have a paid account, the whole 50-day restriction goes away and those documents will resume sync'ing again.
-
Duplicate the document. The copy will be seen as a new document and start its own 50-day timer. Once it uploads to the cloud, you can delete the original, non-sync'ing document.
Keep in mind that this is "cheating the system". reMarkable is providing the cloud service, and it does cost them money to pay for the servers, storage, and peoples' salaries to keep it all running. If you're using the cloud service and you have the means to do so, it's worth paying for the cloud service.
No Service
This is exactly what it sounds like - your tablet is not linked to a cloud account, and does not talk to reMarkable's cloud servers at all. Any functionality which requires the cloud service, including the reMarkable desktop, mobile, and web apps, handwriting recognition, and access to third-party "cloud storage" services, will not be available.
This is how I use my own tablets ... without the cloud service.
ℹ️ One testing tablet
This is no longer true. I own four tablets - rM2 and rMPP purchased new from reMarkable, and rM1 and rM2 bought used from people on Reddit. The original rM2 is my "primary" tablet, and contains my real documents, the ones I don't want shared with others.
I did create a cloud account using an Apple "Hide My Email" address, and have one of the "testing" tablets connected to it.
Why I don't use the Cloud Service
I am NOT connecting my primary tablet to the "reMarkable Cloud" at all. I'm doing this for a few reasons.
Privacy
Privacy is very important to me. Not that I have any great secrets, I just don't like the feeling of somebody (or thousands of somebodies) watching everything I do over my shoulder, especially if they are using that information against me (by targeting ads, training AI models, or whatever else they do with it), without my permission or knowledge.
reMarkable has pretty much designed the tablet's software to keep everything synchronized to their "cloud", which is hosted on Google's "cloud" in Europe.
There are some benefits in doing it this way.
-
If your tablet is damaged or lost, you can buy another tablet and sign it into the same account, and your documents will sync back from the cloud. (As long as the documents haven't "disappeared" from the cloud.)
-
It allows the reMarkable apps on your computer or phone to access the cloud and work with documents on the tablet, without needing to connect to the tablet itself.
-
If you own multiple tablets, it's the easiest way to synchronize documents between those tablets.
However.
Synchronizing the tablet to the cloud means that copies of all of your content - every notebook, every "quick sheet", every PDF or EPUB file you upload into the tablet - are uploaded to their cloud. There is no way to choose which documents are or are not uploaded, it's "all or nothing" - and the only way to choose "nothing" is to not connect to the cloud at all.
The files in the cloud are encrypted before being written to Google's disks. However, it's not clear who holds the keys for it, reMarkable or Google. Whoever it is, it means that your files can be read by reMarkable (and maybe Google) employees, along with any government agencies (from any country) who ask, along with any random anklebiter who manages to hack into reMarkable's (or maybe Google's) systems. (Because as we all know, large companies who pay obscene amounts of money for dedicated security staff never get hacked.)
These people can also change what's in the cloud, and your tablet will happily download those changes, changing or deleting the content on your tablet, however somebody else wants.
It IS possible to structure a cloud service in such a way that the files in the cloud are "end-to-end" encrypted, with the encryption keys only available to the devices and apps attached to the account. (Keybase is a good example of this, each device has its own encryption keys.) reMarkable didn't structure their cloud service this way, and as a result, any files created or side-loaded on a reMarkable tablet which connects to the cloud service are available to hundreds of reMarkable (and maybe Google) employees, thousands of government employees (for various values of "government"), and unknown hordes of "hackers".
Security of Third Party Services
reMarkable offers integrations with third-party file storage services, currently including Dropbox, Google, and Microsoft. The file transfers to/from these services are done by the reMarkable cloud servers. Your tablet never talks to these other services directly.
Part of setting up each file-sharing integration involves generating a security token that gives the reMarkable servers access to your accounts on these other providers. These tokens are held on reMarkable's servers.
reMarkable employees, government agencies, or random hackers who get into reMarkable's systems are able to access those tokens, and are therefore able to access everything in your accounts on these other services, whether it has been copied to your tablet or not.
Compliance/Legal
The US has a law called the Health Information Portability and Accountability Act, or HIPAA, which governs how healthcare information is handled. Part of this law says that companies who have peoples' healthcare information are not allowed to share that information with others except under specific circumstances.
My current $DAYJOB is with a company in the healthcare industry. My particular job (software development, system and network administration, "DEVOPS", and other related "technical" things) doesn't involve regular exposure to PHI (protected health information), however I do sometimes need to deal with log files containing small bits of PHI. This means that if I were using the reMarkable cloud, I would have to be careful about writing down any information from those log files, because legally that information cannot be shared with outsiders (including reMarkable or google).
HIPAA has a provision where companies having others' healthcare information can sign a Business Associate Agreement (or BAA) with another company, where the second company agrees to be equally liable with the first company in case of a breach. Without a BAA in place, it is not legal for a US healthcare worker to write any patient information into a tablet connected to the reMarkable cloud service.
If you are a healthcare worker in the US and you don't have a BAA with reMarkable, it is a HIPAA violation to write any patient information in a reMarkable tablet which is linked to a reMarkable cloud account. If there is a data breach in reMarkable's servers, or in the Google storage servers which hold reMarkable's data, you can be fined for it - just the same as if you had left a copy of a patient's records sitting on your desk and another patient saw them.
For several years reMarkable offered to execute a BAA with any customer who asked, but in 2024-02 they removed this offer from their Terms and Conditions page. Section 7 used to have an entire paragraph which explained how to execute a BAA with them, and included a link to download a PDF of the BAA itself.
The fact that they had this but then removed it, suggests to me that they finally realized that their cloud service is not HIPAA-compliant, and they are no longer willing to take the chance of being liable in case of a breach.
They have not, however, notified existing customers who have a BAA, that those agreements will be cancelled at some point.
Functionality
The news is full of stories about companies who design their products to connect to a "cloud" service of some kind, and then when the company later decides to stop providing the cloud service (or goes out of business entirely), those products suddenly stop working.
When I buy a product, I expect that product to still be able to do its job if the manufacturer goes out of business.
In the case of the reMarkable tablet, I figure if I don't connect to their cloud service in the first place, it won't matter if the cloud service suddenly isn't available anymore.
How I don't use the Cloud Service
There are certain things I can't do without the cloud service, but I have found work-arounds and/or other tools which provide the functionality I need.
Backups
I have no need for a "sync service", however I do need to be able to back up my documents on a regular basis.
The Backing Up the Tablet page has more details about the programs I've written to back up reMarkable tablets.
Uploading Documents
The tablets have a built-in web interface which allows you to upload and download documents. It can import PDF, EPUB, and .rmdoc files. reMarkable's directions for how to enable and use this interface are on this page - click "How to enable USB transfer on your reMarkable" near the bottom of the page.
I have used the web interface to upload documents in the past, however there have been a few times when uploading a file just plain didn't work, and I had to reload the browser window and try again. (Once or twice I've had to reload the browser window up to three times before an upload worked.) I haven't tried it enough to be able to track it down to a specific tablet or a specific USB cable.
RCU
RCU is a third-party program for managing the contents of your tablet. It can ...
- Upload and download notebooks (documents).
- Upload and download custom templates (background images which can be assigned to individual pages in a notebook).
- Upload custom splash screens (sleeping, powered off, overheating, etc.)
- Manually install new software images.
- Provide a "virtual printer" on the computer. Any program on the computer can "print" to it, and the output shows up as a PDF-backed notebook on the tablet. (I use this fairly regularly.)
It connects to the tablet using SSH, so if you have an rMPP it requires that the tablet be in "devloper mode".
rmfakecloud
rmfakecloud is a project which duplicates most of the "cloud sync" functionality, but hosted on a server that YOU control.
This includes handwriting recognition, by talking to MyScript (the same third-party service that reMarkable uses to perform handwriting recognition for cloud users). If you do this, you do have to get your own service with MyScript if you plan to use the handwriting recognition functionality. MyScript's service charges based on the number of "recognition events" you perform each month.
My guess is that reMarkable has some kind of volume discount with MyScript. reMarkable pays MyScript for all handwriting recognition requests made by all tablets connected to the reMarkable cloud service. If your tablet is connected to rmfakecloud and you use the handwriting recognition function, you would need to make your own arrangements with MyCloud to pay for that service.
This page contains what little they're willing to say about pricing - basically the first 2000 requests each month are free, and after that, "contact us". An old message on their developer support forum mentions the pricing beyond that as $10 per 1000 requests, I have no idea if that's still accurate or not.
I have not played with rmfakecloud yet, however it is on my list of things to check out.
Also, it's worth pointing out that rmfakecloud uses the original cloud API. The last I heard, the tablet software was capable of using either the old or new version of the API, but it's possible that versions released after reMarkable changed their servers to use the newer API are no longer able to "speak" the older API. This means you might need to downgrade your tablet to an older OS if you want to use rmfakecloud.
The reMarkable Eraser
Every once in a while I see somebody mention using the "Eraser" function, either using either the "non-pointy" end of a stylus, or the on-screen eraser tool:

The behaviour of this tool is different based on the tablet's OS version.
Prior to 3.8
The eraser tool does not erase pen strokes.
It works by drawing a large "white" line above whatever pen strokes you're covering. You can see this when you use the selection tool to highlight that part of the screen:
I think of it like using "white-out" or "tipex" liquid on paper - it covers up whatever is below it, but it doesn't erase anything.
You can see this in the following video:
3.8 and later
In the 3.8 software, reMarkable updated the tool so the eraser removes pen strokes rather than just covering them up.
File Types
I've seen a few different mis-conceptions about the file types used on the reMarkable tablets.
Templates
The word "template" has a couple of different meaning.
In general, the word refers to a "page layout" which can be re-used. For example, the paper form you might fill out to apply for a drivers license is a kind of template. Each finished form has a different person's information on it, but they all have the same layout - each person's name, address, date of birth, and other information are all in the same place on the form.
"Real" Templates
On reMarkable tablets, the word "template" specifically refers to a "background image" which can be used with pages in a notebook. The OS comes with several dozen templates built in, everything from basic lines and dots up to sheet music, day planner pages, and perspective guides used when drawing.
The reMarkable software doesn't offer a way to add your own templates, however you can do this using SSH. Many people (myself included) prefer to use a third-party program like RCU to do this.
.png and .svg files
Technically, a template is a 1404x1872 pixel PNG or SVG image. The templates that come with the reMarkable OS come in both formats. The first templates I uploaded by hand were in PNG format only, and the reMarkable software used them without any problem. When I later uploaded my templates using RCU, it created SVG versions of them and uploaded both formats.
I don't know for sure, but I think the SVG files are used to repeat a pattern when "extending" a template on an "infinite scrolling" notebook page.
PDF files as Templates
I've seen a lot of people use the word "template" when talking about a PDF file.
While this might fit the dictionary's definition of the word, it can be confusing because using PDF files in this manner involves a totally different set of workflows than using "real" templates.
-
In a PDF file, you cannot assign a template (a "real" template) to a page, because the content from the underlying PDF page is the template for that page.
-
If you want to use the same "template" on multiple pages, either the PDF needs to have the correct "templates" for each page before you upload it to the tablet, or you have to create duplicate pages within the PDF.
-
If you want to use the same PDF as the "template" for multiple documents, you have to create multiple copies of the document containing the PDF. If you didn't create a "master copy" when you uploaded the PDF, this means copying an existing document and erasing the pen strokes on every page in the copy before you can use it.
Using PDFs in this way can be useful. A common example is a "day planner" file, with pre-made pages for every day, week, or month. You can make PDFs whose pages have "links" to other pages, so if you're looking at a monthly calendar and tap on the 15th, it will jump directly to the page for the 15th rather than having to scroll through pages or use the "page selector" tool.
However, if all you need is a "template", it's usually better to stick with real templates, since they can be assigned to as many pages as you like, and the UI to do this is built into the reMarkable software.
.rmt files (RCU)
If you're using RCU, you can download templates as .rmt files. The computer won't be able to do much with these files, but you can use RCU to upload them back to the tablet (or to a different tablet.)
The file itself is an "archive" containing the .png and/or .svg files, along with a .json file containing the template's metadata (display name, selected categories, and selected "icon").
You can use a command like "tar tvf xxx.rmt" to see the contents of the archive.
Documents
A "document" is a collection of pages that you can write on. reMarkable tablets have two major types of document: notebooks and PDFs.
Each document is stored as a set of files within the tablet. The names and structures of thes files are explained on the Filesystem page.
Notebook
A "notebook" is a document created on a reMarkable tablet. It has no content other than the text or pen strokes added by the user.
Each page in a notebook has its own template, selected from the list of templates in the tablet.
Pages in a notebook can be added, duplicated, re-ordered, and deleted as needed.
PDF files
When you upload a PDF file, the tablet creates a document "around" that PDF. The original PDF file is held in the tablet, un-modified, and any pen strokes you add "on top of" those pages are stored in the same pen-stroke files used for regular notebooks.
The big difference is that the contents of each PDF page are used as the templates for each page in the document. When you're "reading" a PDF on the tablet, you're actually looking at a collection of blank pages (i.e. no pen strokes) with the PDF contents as the template "underneath" each page. This is how you're able to write "on top of" a PDF file.
As with other documents, pages can be duplicated and re-ordered, and the template (the PDF content) for each page "follows" the pages as you would expect. However, if you add a new page to the document, the new page won't have a template - it'll just have a blank background, and (as of the 3.8.2 software) the reMarkable software won't allow you to choose a normal template for those "added" pages.
EPUB files
When you upload an EPUB file, the tablet converts it to a PDF. When you're working with the document on the screen, you're actually working with the PDF, and everything mentioned above about the features and limitations of PDF files will apply.
Re-formatting
The tablet provides a way to change the formatting of EPUB files (i.e. the font, font size, margins, etc.) When you do this, the tablet generates a new PDF.
When the new PDF is generated, the content of each page may change. Text from the EPUB file may end up being moved to entirely different pages, especially if you make the text larger or smaller.
Pen strokes are "tied to" the page where they are created. For example, if you circle a word on page 30 and then change the formatting to use a larger font, the word you circled might now be on page 36, but the circle you drew will still be on page 30, circling a totally different word (or nothing at all). This is why the tablet warns you before changing the formatting of an EPUB document, because if you have any pen strokes, there's a good chance they will end up on the "wrong" page.
.rmn files (RCU)
If you're using RCU, you can download documents to the computer. It downloads them as .rmn files. These are containers which have all of the files from the tablet's filesystem which make up the document. The computer won't be able to do much with this file, but you can use RCU to upload this .rmn file back to the tablet (or to a different tablet).
This is important because, if you "export" a document to a PDF file, your pen strokes will be "burned into" the PDF. You can later upload that PDF back into a tablet, but the earlier pen strokes will now be "permanent", and you won't be able to edit them.
When you use .rmn files, the pen strokes remain as pen strokes, and when you upload it back to a tablet, they will be just as edit-able as they were before you downloaded the file.
Nibs
The term "nib" refers to the pointed tip on a stylus that comes in contact with the tablet's screen while you're writing.
The nibs are replacable, because they are designed to be replaced.
When you write on the screen, it generates friction. Over time, the friction will "wear down" the nib, and the pointed tip on the nib will become deformed. This will happen overtime, and will happen faster or slower for different people, depending on how hard they press down while writing.
This is a close-up of the nib on one of my stylii:
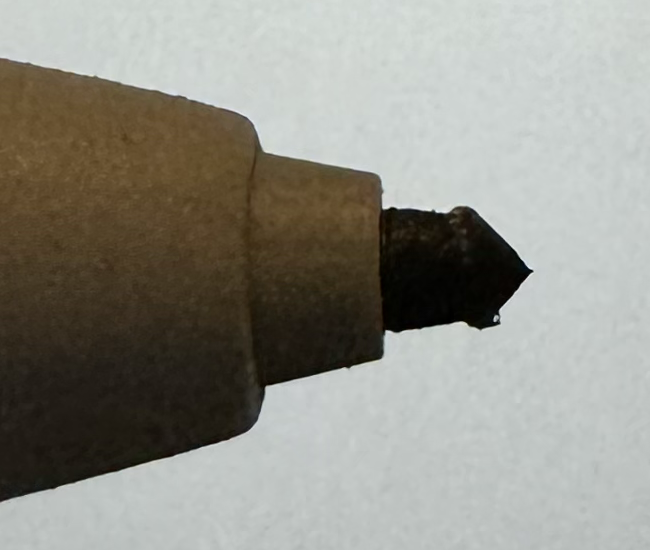
This is an original reMarkable nib that I've been using for about 2½ months. Even shaped like this, I find that the stylus is still fairly accurate when writing on the tablet.
Different people press down harder than others while writing, and as a result, nibs will last longer for some people than others. I figure this particular nib will be good for at least another month or two before it will need to be replaced.
In addition, the shape of the deformity will vary depending on whether you hold the stylus exactly the same way every time you use it. I usually hold it at the same angle relative to the screen, but the stylus itself may be rotated in any direction in my hand (i.e. sometimes the "reMarkable" label will be facing up, sometimes down, and sometimes at an angle in between), so the wear on this nib seems to be about the same "all the way around".
Metal Nibs
A lot of people seem to be interested in using nibs made of a metal, especially titanium. The idea is that metal nibs are supposed to be better because won't wear down over time.
Whenever two things rub against each other it creates friction, which causes one (or maybe both) of those things to wear down over time, usually whichever thing is softer. In the case of a reMarkable tablet, the nib and the screen rub against each other when you write. Normally the nib is softer than the tablet's screen, so the nib is what wears down.
However.
If the nib is harder than the screen, then it will be the screen that wears down. Or more specifically, the coating that reMarkable puts on the screen which gives it the "paper-like" feeling, will wear down, and then if you keep going, it could start wearing down the screen itself.
Manufacturer's warning
The touch screen portion of the reMarkable tablets uses technology from Wacom, who provides this warning about titanium nibs:
3rd party nibs used with Wacom product is not recommended as warranty of your Wacom product cannot guaranteed. Wacom nibs are specifically designed to work with Wacom displays and tablets and under normal conditions provide a smooth and scratch free experience. Use of 3rd party nibs such as Titanium alloy, steel or other plastic material may cause damage and will be considered at users own risk.
Thanks to the author of this Reddit post for the pointer.
My own experience
I bought two titanium nibs for my stylii, and tried using one for three days. To me felt a little bit "smoother", more like writing with a ball-point pen than with a pencil. I didn't notice any degradation on the screen coating, but under the theory of "better safe than sorry", I don't use them anymore.
I also picked up 30 plastic nibs, and have had one of them in the stylus in my "experimentation" tablet for the past few months. To me it "feels" the same as writing with a reMarkable nib.
Longevity
Each reMarkable stylus came with one nib installed and nine extras. These, along with the 30 that I purchased, makes a total of 50 nibs. If each one lasts me three months, that gives me 150 months' worth of writing. That's 12½ years. I don't expect the tablets to last that long.
Conclusion
For me it made more sense to spend $12 for "all the nibs I'll ever need", than to spend $19 for two nibs that may or may not end up damaging the tablet. I tried to return the titanium nibs, but I guess it would cost Amazon more to ship them back to a warehouse than they made in profit, because they refunded my money and said to just throw them away.
Information
Background info about the tablet as a whole
Other Sources of Information
I'm not trying to make this site into "the ultimate reMarkable reference site" or anything like that. I don't have the time for that, plus there are already several other sites like that out there.
Some of those other sites are ...
-
remarkable.com- reMarkable AS's official home page, and where to go to purchase a reMarkable tablet from them. -
github.com/reMarkable/- contains a collection of reMarkable's public source code, including their custom version of the Linux kernel. -
awesome-reMarkable - List of "hacks" (which seems to be the term people use for making the tablet do anything other than run the built-in software), programs, and other information that people have written for/about the reMarkable tablets.
-
reMarkableWiki - Wiki site with links and info about the reMarkable tablets.
Things to Investigate
-
ReCalendar - Browser-based calendar generator, creates PDFs containing "day planner" pages. All work happens in the browser, nothing gets uploaded anywhere.
It's a cool idea, and from a privacy standpoint I like the fact that it doesn't upload any information anywhere. It's just not something that I personally need.
-
RCU, reMarkable Connection Utility - this is a GUI for managing the RM1/RM2 tablets. I'm using this to manage my own tablet.
⇒ RCU
-
Templates are like "background images" for notebook pages, providing a guide for where to write things on the page. The tablet comes with a collection of them, including blank, lined paper, graph paper, "dot" paper, musical staves, and pre-made forms for different organizational schemes.
It is possible to make your own templates (they're just
.pngimages), the tricky part is loading them into the tablet and making the reMarkable software use them. Luckily, the details of how to do this were figured out long ago, and as a long-time Linux user, it was actaully pretty easy to do.
Wish List
Tablet software
-
Better (or any?) support for tablets which don't synchronize with the cloud service.
- Desktop Manager that works over SSH (RCU is good)
-
Rename pages within a notebook ... pages could have titles like "Table of Contents", "Chapter 1", that kind of thing. Page titles should be search-able.
-
File manager
-
Sorting options (new-to-old, old-to-new, alpha, etc.)
-
Sort order stored for each folder, i.e. for some directories I want alpha, for work/notes I want new-to-old, etc.
-
-
Software Updates
-
Allow the user to control when their tablet updates, other than a single "yes or not" switch.
This means several things:
-
Show the user a LIST of available updates, and provide a clear list of what changes are made by each update. This should include a list of bugs fixed by each update, as well as any changes which would make it impossible to "downgrade" after a certain upgrade is installed (due to things like internal data format changes, where no process exists to reverse the change.)
-
Provide an "install now" button, rather than leaving it up to random chance when the tablet, or the cloud, decides when to update.
-
Let the user decide which update(s) they want to install. Specifically, this means that if a tablet is "three versions behind", allow the user to choose which of the three updates they want to install.
If this is unwise because of known security issues with one of the versions, say that in the output and don't allow the user to choose that one, but still show the versions, so the user has a full list of updates and bug fixes between the version they're on now, and the version they're about to update to.
-
-
Provide an official way to download and install firmware updates without wifi.
Also provide an official archive of past firmware versions. Ideally this should include ALL versions, even those with known security issues (with notes saying "security issue XXX exists" and links to pages explaining each issue), even if the built-in upgrade process doesn't allow upgrading to that particular version.
I say this because there are a few users who may legitimately need to install these versions, if only to research how to support their own programs running on these versions of the firmware.
-
-
Show ALL available options.
This includes showing things like the "automatically download and install firmware updates" setting (which I have never seen, because my tablet has never been connected to a wifi network). All settings which exist should be visible, even if they won't do anything. If it doesn't make sense to change a certain setting, add a note below that setting's title explaining why not, but sill allow the user to turn it on and off anyway.
The overall idea is, the user paid the money, they own the hardware, they should be able to fully control it. If this includes turning on/off a switch which doesn't do anything, explain that it won't do anything, but let them do it anyway. It doesn't affect reMarkable at all, and it allows users like me to make sure that the settings are how we want them, before going online for the first time.
-
TEXT HANDLING
The way the tablet currently handles text (as of firmware 3.0.5.56) is horrible. I can sorta see the logic in wanting "typed" text to automatically "flow" around lines that the user has drawn, but ... that isn't something I would need or want on every single page.
For a lot of my notes, I'd like to be able to type a "title" at the top of the page, and use handwriting (not "recognized", just a bag of lines) for the rest of the page ... but the software doesn't seem to allow you to position "real text" at the very top of the screen (i.e. the first 120 pixels at the top of the page, where a "title" would go), even though you can draw there with the stylus.
I'm hoping this has improved in later firmware versions, if so it would be the first real reason I've found to want to upgrade.
-
Add Keybase as a file-sync service. ⇒ Keybase
Even better (and I know this is a "pipe dream") ... use Keybase as the "backing store" for the cloud-sync process. Users would be able to access their own files, but nobody else - not google, not reMarkable, and not anybody who hacks into those companies' systems - would be able to.
reMarkable web site
-
More detail about the different connectivity "levels"
- Never connected to any network at all
- obviously no data is sent anywhere
- no NTP, and the GUI provides no way to set the clock, so timestamps on files will not be accurate
- my own tablet was about three minutes "fast" when I took it out of the box, SSH'd in and used
datecommand, thenhwclock -wto "save" it
- my own tablet was about three minutes "fast" when I took it out of the box, SSH'd in and used
- "deleted" files are not really deleted
- telemetry files build up forever
- Wifi but no cloud
- NTP - ???
- if not, what is the expected mechanism to keep the tablet's clock in sync with the real world?
- are "deleted" files actually deleted?
- are telemetry files sent anywhere?
- NTP - ???
- Cloud but no paid service
- reMarkable web site description
- current info is okay, but it reads like advertising copy for the paid service
- more detail about the "50 days" thing
- scope: does the 50-day limit apply to entire notebooks, or to individual pages within notebooks? (i.e. if somebody has a "daily journal" notebook with new pages every day, will the older pages stop sync'ing?)
- which actions reset the 50-day timer? (people have resorted to manually duplicating notebooks to make it start sync'ing again, would adding a line to a page be enough to make it start sync'ing again?)
- if a note was over the 50-day limit but then the user edits the note, does that note start sync'ing again?
- Paid service
- again, a lot of it reads like ad copy
- Never connected to any network at all
-
Make it plain that handwriting recognition is cloud-based and done by a third party, and that it's only available with the paid service (because the third party charges reMarkable AS for each query).
Privacy
From everything I'm seeing, it looks like reMarkable designed the software around the idea that every tablet will be connected to their "cloud", which is physically stored in google's cloud, in Europe.
According to their web site, users' data is stored in google's cloud, encrypted using keys which are managed by google. This means that google holds the keys, and is able to decrypt the files, read/analyze them, and feed the results into their advertising engine. This includes running their own OCR (optical character recognition, aka "convert handwriting to text") against hand-written notes.
Think about that for a minute. If you have a free cloud account, YOU won't be able to convert your hand-written notes to text, but google can.
I HATE the thought of an outside company, especially the world's biggest advertising company, being able to read my files, regardless of whether there's anything private in them or not, so for now I'm not planning to connect to their cloud.
This may change. I don't have anything super-secret in my notes, and as much as I hate to sound defeatist, the truth is that google is going to try and show me ads either way, and I'm going to continue to block them either way. For now, I want to continue figuring out just how much I can do to maintain my privacy.
HIPAA
Another factor is, $DAYJOB is with a US-based company in the healthcare industry. It doesn't happen very often, but in my own job I do occasionally come across information which is protected by HIPAA (the US law protecting privacy of healthcare information). I try as hard as I can to avoid coming in contact with this kind of information, and I have no interest in keeping any of it, especially on a reMarkable tablet, however it is something I'm supposed to keep in the back of my mind all the time.
However, some of the people I work with are exposed to PHI (protected health information) every day. If they were using a reMarkable tablet to replace paper notebooks, it's possible that they might need to write down somebody's PHI, even if it's just temporarily. And it's possible that that information could be sync'ed up to the reMarkable cloud.
According to reMarkable's web site, reMarkable is willing to execute a Business Associate Agreement with a user. This agreement makes them liable in case of a data breach which is tracked back to a problem on reMarkable's part (such as, the fact that users' files in the reMarkable cloud can be ready by reMarkable employees, google employees, and anybody who manages to "hack into" either company's systems.)
The fact that they are willing to sign these agreements, makes me feel a little bit better about using their cloud service. (Still not totally confident about it, but not immediately against it either.)
GDPR
reMarkable AS is a European company, so they are required to follow GDPR rules as well. I live in the US so I'm not as familiar with GDPR's rules, but according to an email that I got back from reMarkable support when I asked them about this ...
Our device and services have not been specifically designed to be HIPAA compliant, but we do comply with the GDPR which in our understanding is at least as strict as HIPAA regulations.
If you are a customer using our Cloud Service, and you need a Business Associate Agreement pursuant to the HIPAA regulation in the US, you may download our standard Business Associate Agreement that is available through our terms and conditions https://support.remarkable.com/s/article/Terms-and-Conditions-for-Connect The Business Associate Agreement becomes legally binding if and when you return a fully executed version to privacy@remarkable.com.
Please also note that you may have full control over the processing of content by deactivating the cloud service, although it, unfortunately, means that you lose some functionality such as handwriting conversion. You can find more information on how to transfer files by using the USB cable here https://support.remarkable.com/s/article/Transferring-files-using-a-USB-cable.
The GDPR governs EU companies (such as reMarkable AS) regardless of whether the data subject (myself, or a potential patient whose PHI somehow ended up being stored in my tablet) is in the EU or not, so ... there's that.
Summary
My own concerns have more to do with the privacy of my own information, and the ability of others to use that information for their own benefit, without my knowledge, permissions, or ability to also benefit from it.
I don't see myself ever storing PHI, even my own, in a reMarkable tablet anyway, so I doubt HIPAA/GDPR would ever be an issue for me to begin with. I just feel like, whatever steps reMarkable is taking to follow the rules about HIPAA/GDPR, probably also fall under the category of "good security" to start with - especially GDPR (since HIPAA is limited to healthcare-related information).
My biggest concern is the fact that google is holding the encryption keys for the data-at-rest. If it isn't obvious, I don't trust google at all. (I also don't trust amazon or microsoft, so changing cloud providers wouldn't help things any.)
Backing Up the Tablet
reMarkable's cloud service is a SYNC service, not a BACKUP service. A lot of people treat it like a backup service, and it can be used as kind of a backup if you're careful, however ...
-
If somebody or something deletes a document from the cloud, even by accident, that file is gone. And as soon as your tablet checks in with the cloud, the tablet will delete its copy of that document as well.
-
The "somebody or something" which deletes documents from the cloud is normally another reMarkable tablet or app, but it could also be a malicious "hacker" who breaks into reMarkable's or Google's servers, or who gets the password for your cloud account.
-
People have reported documents suddenly being deleted with no warning, and no way to get them back. I think I've heard about this three times over the past year and a half, and to be fair it's possible that these problems could all be attributed to human error, but unless I can be 100% sure, I don't recommend relying on it.
Whether you use the reMarkable cloud or not, I encourage you to make real backups of your documents, as .rmdoc files, on a regular basis. You may also want to make backups as PDF files as well, since this allows you to view or print the documents from your computer.
File Types
Files can be backed up in a few different formats. The most common formats are:
-
PDF files are a standard file format for presentation-ready pages. They contain directions for how to "draw" a series of pages, either on a computer screen or on a printer. Most operating systems include programs to view and print PDF files.
If you download a reMarkable notebook as a PDF, any pen strokes you've added "on top of" the original PDF will be "burned into" the downloaded PDF. If you later upload that PDF back to the tablet, you will find that your original pen strokes are no longer edit-able.
-
RMDOC files are what reMarkable calls "Archives". You can think of them as ZIP file containing all of the individual files from the tablet's internal filesystem which make up that document, because that's exactly what they are.
Because they contain the actual files from the tablet's internal filesystem, if you uplod them back to a tablet, the original pen strokes will still be pen strokes, and will still be edit-able.
-
RMN files are the same basic idea as RMDOC files, however they use TAR instead of ZIP as the container format. These files are used with RCU, a third-party program which
The rm2-backup script
One of the first things I did when I got my first reMarkable tablet was figure out how to make a backup of everything stored in the tablet. I started by copying a script I've been using to back up Linux servers for 25+ years. It saves disk space by building a series of directories whose names are timestamps of when the backup started. Files which haven't changed since the previous backup are stored as "hard links" to the same file in the previous backup.
I removed a few details which aren't necessary for backing up a tablet, and added some comments so that people reading the script should be to follow along with what the script is doing.
The script itself is documented in more detail on this page.
The rmbackup script
After a few people started using rm2-backup, somebody on reddit suggested tracking successive backups as commits in a git repo, rather than in timestamped directories. I thought this was a great idea, so I wrote an entirely new backup script which also uses rsync to copy the files, but without the options to create timestamped directories.
It can also ...
- create
.rmdocand/or.rmnfiles from the backed-up raw files - download PDF files from the tablet's built-in web interface
- track the backed-up files in a git repo
- push that repo to a remote server
This is the "big brother" of rm2-backup, and is the one I use to back up my primary tablet every day.
⇒ Github
The rmweb program
This is a backup program which uses only the tablets' built-in web interface. I started it as a side project, to get some experience with Go. When the rMPP was announced and "developer mode" was explained, I realized that people whose tablets were not in "developer mode" would still need a way to make backups, so I got the program into a working state, figured out how to make "releases" on Github, and started telling people about it.
It isn't able to back up the internal files from the tablet's filesystem, but it can download .rmdoc and PDF files.
⇒ Github
The Tablet's Clock
The Linux kernel in the reMarkable tablet keeps track of the current time. It does this the same way any other Linux machine does it - by counting milliseconds in the background while it's running.
Most machines, including the reMarkable tablet, have a real-time clock, or "RTC". built into them. When the Linux kernel starts (i.e. when the machine boots), it reads the RTC to initialize the kernel clock. After that, the kernel clock's accuracy depends on the accuracy of the "interrupt" signal generated 1000 times every second which makes it increment the counter. I mention this because on some systems, the timing and handling of these "interrupts" can be affected by things like the temperature, or by how busy the system is. Over time, this can make the kernel clock "drift", and become faster or slower than real-world time.
Most systems run a program which talks to "time servers" (aka "NTP servers", since the NTP protocol is the "language" they're speaking) on the internet, and keeps the kernel clock accurate with the time in the real world. On the reMarkable tablets, this program only runs while the tablet is connected to wifi. For tablets which never connect to wifi, this service never runs at all, so the only "accurate" source of time is the hardware clock, and that only stays accurate while its battery is working. (Some systems have a separate battery for the hardware clock, I'm not sure how the reMarkable tablets handle this.)
It's important to note that the RTC in the reMarkable tablet does not appear to have its own battery, so it can only keep accurate time when the main battery is not entirely empty. This means if your tablet's battery is totally drained, the RTC will also lose track of time. When the battery is charged back up enough, the RTC will try to do its job, but it will probably have some random value for the current time, so it won't be accurate until the tablet's NTP client gets the real time from an NTP server and sets the RTC to the correct time (which presumably happens at the same time it sets the kernel clock).
Why is the clock's accuracy important?
There are several reasons, however the most important ones have to do with the SSL process that happens when connecting to an https:// web site. The reMarkable software makes a lot of connections to https:// servers when talking to the reMarkable cloud, and if the clock is not accurate, the tablet won't be able to connect.
Also for me persontally, I interact with the files on the tablet enough that it bothers me if the timestamps on the files aren't correct.
The timedatectl command
The reMarkable tablet has a program called timedatectl to manage most things involving the system clock, time zone, and synchronization. (The same program exists on some other Linux machines as well.)
ℹ️ The examples below assume that you are SSH'd into the tablet. See the SSH page for more details.
Check clock status
The timedatectl status command shows the status of the system clock.
root@reMarkable:~# timedatectl status
               Local time: Sat 2023-09-16 20:08:19 UTC
           Universal time: Sat 2023-09-16 20:08:19 UTC
                 RTC time: Sat 2023-09-16 20:08:19
                Time zone: Universal (UTC, +0000)
System clock synchronized: yes
              NTP service: active
          RTC in local TZ: no
This shows you the following:
-
Local time= the Linux kernel time, in your local timezone. -
Universal time= the Linux kernel time, in UTC. The Linux kernel's clock always stores UTC time. Programs which need the local time will add or subtract the appropriate number of seconds, depending on the time zone. -
RTC time= the time reported by the RTC. -
Time zone= the tablet's time zone. As you can see, mine is set to UTC, which is why the "Local time" and "Universal time" values are the same. -
System clock synchronized= whether the Linux kernel thinks the clock has been synchronized since booting up. -
NTP service= the state of the NTP service, which on this system is thesystemd-timesyncdservice. (On most of my other systems, this is thentpdservice.) -
RTP in local TZ= whether the RTC stores "Local time" or "Universal time".
Set time zone
The reMarkable software doesn't show the time anywhere, so unless you use SSH to interact with the tablet on a regular basis, there may not be any reason to set the tablet's timezone.
However if you want/need to change the timezone
Find the right Time Zone code
Use timedatectl list-timezones to show a list of all time zone names that the tablet's OS knows about.
root@reMarkable:~# timedatectl list-timezones
This shows the list using the scaled-down version of less which is part of busybox. It supports scrolling up and down, but does not support searching within the text.
- ↑ moves up one line
- ↓ (or ENTER) moves down one line
- SPACE moves down one page
Bmoves up a pageQexits the program
The time zones are generally named after a continent and a major city in each time zone. For example, "US Eastern" is called America/New_York.
Also note that UTC does not have any kind of "daylight saving" time, unlike Europe/London which does.
Set the time zone
Use timedatectl set-timezone to set the correct time zone.
root@reMarkable:~# timedatectl set-timezone America/New_York
root@reMarkable:~# timedatectl status
               Local time: Sat 2023-09-16 17:52:11 EDT
           Universal time: Sat 2023-09-16 21:52:11 UTC
                 RTC time: Sat 2023-09-16 21:52:12
                Time zone: America/New_York (EDT, -0400)
System clock synchronized: yes
              NTP service: active
          RTC in local TZ: no
Use timedatectl set-timezone UTC to set the tablet back to UTC. Note that OS upgrades will also reset the tablet back to UTC.
Enable or disable NTP
The timedatectl set-ntp command will enable or disable NTP synchronization.
-
To enable NTP:
root@reMarkable:~# timedatectl set-ntp on -
To disable NTP:
root@reMarkable:~# timedatectl set-ntp off
The systemd-timesyncd program
This program runs while the tablet is connected to wifi. It talks to one or more NTP servers and updates the Linux kernel clock as needed, to keep it accurate.
By default, the tablet synchronizes its clock against four NTP servers owned by google. Many Linux systems which use DHCPv4 to set an interface's IPv4 address, also have the ability to get a list of NTP servers from the DHCP server. I tried to set up my "test tablet" this way, but the scripts which are supposed to configure systemd-timesyncd with the NTP servers received from the DHCP server are not there ... so even if the DHCP server sends a list of NTP servers (as they do on my home network), the DHCP client on the tablet doesn't do anything with it.
Since my own tablets are only allowed to connect to my home network (my firewall has rules to prevent them from connecting to anything outside that network), I configured my tablets with the IPv4 address of my home network's NTP server, and that seems to work.
Check clock synchronization
The timedatectl timesync-status command shows the status of clock synchronization.
root@reMarkable:~# timedatectl timesync-status
       Server: 192.168.4.1 (192.168.4.1)
Poll interval: 34min 8s (min: 32s; max 34min 8s)
         Leap: normal
      Version: 4
      Stratum: 2
    Reference: 81060F1E
    Precision: 2us (-19)
Root distance: 47.667ms (max: 5s)
       Offset: -1.666ms
        Delay: 5.008ms
       Jitter: 1.134ms
 Packet count: 3
    Frequency: -6.507ppm
The important values are ...
-
Server= the NTP server that the tablet synchronized with -
Poll interval= how often the NTP service talks to the NTP server and adjusts the local clock. -
Stratum= a rough estimate of "how accurate" the NTP server is. As a quick explanation ...-
A "Strata 1" NTP server will have an atomic clock attached to it, or have some other super-accurate clock.
-
A "Strata 2" NTP server synchronizes against one or more Strata 1 servers. (In my case, the NTP server is my home router, and it's configured to synchronize against three different Strata 1 servers.)
-
A "Strata 3" NTP server synchronizes against one or more Strata 2 servers.
-
... and so forth.
Note that NTP servers stay running 24/7, continuously monitor the stability and latency of the links to the NTP servers it synchronizes against, and uses a ridiculously complex algorithm to figure out how accurate it is and which of its peers (the "upstream" NTP servers that it synchronizes with) are the most accurate. The reMarkable tablet doesn't do this, it just does a one-time sync with one of its NTP servers every half hour, which is usually good enough to be accurate to within a few milliseconds.
-
-
Precision= how accurate it thinks the system time is. In this case, it thinks the clock is accurate to within two microseconds of "real time".
Manually set the NTP server(s)
Edit the /etc/systemd/timesyncd.conf file.
The
vi,vim, andnanotext editors are installed on the tablet.
Find the line starting with "NTP=", un-comment it (i.e. remove the "#" from the beginning), and put the NTP server's IPv4 address on the line.
-
Before:
[Time] #NTP= -
After:
[Time]
NTP=192.168.4.1
Note that you can also use a hostname, however that makes systemd-timesyncd have to do a DNS query to find the IP address every time it syncs. Unless you're using a "pool" address that will change on a regular basis, you should use the IP address here.
After changing the NTP servers, you need to restart the systemd-timesyncd service.
root@reMarkable:~# systemctl restart systemd-timesyncd
Manually set the system time
If your tablet never connects to wifi, or connects to a network which doesn't have (or allow) access to the outside internet, and doesn't have its own NTP server, it won't be able to synchronize its clock. In this case you should disable NTP and set the clock by hand.
This is how I configured my primary reMarkable tablet (which doesn't connect to any wifi networks, or to the reMarkable cloud).
root@reMarkable:~# timedatectl set-ntp off
root@reMarkable:~# timedatectl set-time '2023-09-16 21:35:20'
root@reMarkable:~# timedatectl status
               Local time: Sat 2023-09-16 21:35:22 UTC
           Universal time: Sat 2023-09-16 21:35:22 UTC
                 RTC time: Sat 2023-09-16 21:35:22
                Time zone: Universal (UTC, +0000)
System clock synchronized: no
              NTP service: inactive
          RTC in local TZ: no
Notes:
-
The
timedatectl set-timecommand sets both the system clock and the RTC. -
The
timedatectl set-timecommand won't work if NTP is enabled.root@reMarkable:~# timedatectl set-time '2023-09-16 21:41:30' Failed to set time: Automatic time synchronization is enabled
Controlling the Network
When I first got my reMarkable tablets, I didn't connect them to wifi at all. I did this because I didn't want there to be any chance of the tablet connecting to the outside world without my knowledge. Later, I set up my home network so that the tablets are able to talk to other devices within my home, but cannot connect to the outside world.
This page will explain how I configured my network.
Networking Equipment
The examples on this page will be specific to the networking hardware I use for my network. I don't use a normal consumer-grade router, because most of them cannot be configured to do the things I'm doing with my home network. I've been managing networks since 1996, up to and including several ISPs in Florida, and there are things I'm used to being able to do, which most consumer routers don't provide a way to do.
My home router, access point, and a few other secondary routers that I use for experimentation, are all made by MikroTik. I like their equipment because it is VERY configurable, and because it's affordable. They use the same "RouterOS" software across their entire line of routers and access points, so the same commands I know from one router will work with any of them, whether it's my home router, access point, or one of their smaller routers. They all use the exact same software, and are capable of doing everything described below (although some of the smaller routers probably wouldn't be able to process the packets as quickly as the bigger ones).
The examples below use the MikroTik command line interface. MikroTik routers do have a web interface, but I rarely use it - I've been administering systems for a long time and I find it easier to do things from a command line. Plus, it's a lot easier for me to just show the commands and responses than it is to type out lists of "go to this web page, click this link, open this menu, click this checkbox" over and over. Eerything below can be done using the MikroTik web interface, but I don't normally use the web interface (other than looking at traffic graphs) so I can't really offer specific directions for how to do this using the web interface.
If you're following along with a MikroTik router, the directions below assume that you are SSH'd into the router, as a user with admin rights.
IPv4 vs IPv6
There are two versions of the IP protocol in general use today.
-
IPv4 uses 32-bit addresses, usually written as four decimal numbers with dots between them, like "
198.51.100.37". There are a total of 2³² possible IPv4 addresses, and some are reserved for specific purposes and cannot be used, so the total number available is around 4 billion.These addresses have been in use since the early 1970's. As I'm writing this (2024-02-04), almost all available IPv4 addresses in the world have been allocated. North America is totally out of them, and has a waiting list for new IPv4 addresses. Other RIR's have imposed strict rules about how many IPv4 addresses can be requested and/or held by any one company or person.
-
IPv6 uses 128-bit addresses, normally written as a series of hexadecimal numbers with colons between them, like "
2001:db8::dead:beef:c0:ffee". There are a total of 2¹²⁸ (340,282,366,920,938,463,463,374,607,431,768,211,456, or over 340 trillion trillion trillion) possible IPv6 addresses. This is enough addresses that I couldn't find a web site who was willing to even guess when we would start running out of IPv6 addresses.
The ISP who provides my home's connection to the internet doesn't offer IPv6, however Hurricane Electric's free Tunnelbroker service is routing a block of "real" IPv6 addresses into my home network. This allows me to connect to services which are only available via IPv6 (such as the ipv6.jms1.net site, which I originally set up as a way to test IPv6 connectivity and just haven't bothered to remove).
MikroTik routers can block outbound IPv6 traffic from specific devices, however it needs to be done differently because IPv6 handles dynamic address allocation differently than IPv4 (it uses SLAAC instead of DHCP).
Blocking IPv4 Traffic
When a device (like a reMarkable tablet) connects to wifi, it uses a protocol called DHCP (Dynamic Host Configuration Protocol, detailed in RFC-2131) to request an IPv4 address. This request is sent as a "broadcast" packet, meaning that every other device on that network segment will see it. This request is basically saying "Hey everybody, I'm here, can somebody tell me what IPv4 address to use?"
If another device on the network is running a "DHCP Server", it will respond to these requests with a message saying "use this address and subnet mask, and here are some other useful settings, for this amount of time". When the client receives this response, it configures its network interface, routing table, and (usually) DNS resolver with the values from that response, and starts talking to the world.
Most DHCP servers are configured with a "pool" of IPv4 addresses, available to be assigned to any client who asks for one. Many (but not all) DHCP servers can also be configured with "reservations". A reservation is a rule which says that if a particular client asks for an IPv4 address, it should always give them a specific address, and it should never give that address to any other client.
ℹ️ Reservations vs Static Addresses
Reservations are set up in the DHCP server. The client performs the same DHCP request process it normally would, the difference is that it always happens to get the same answer.
Static Addresses are configured on the device itself, and don't use DHCP. When the interface starts up, the computer already knows the correct IPv4 address, subnet mask, and other setting to use, so it just configures those and starts talking.
Find the Tablet's MAC address
DHCP reservations require two pieces of information: the MAC address of the client, and the IPv4 address to assign to that client.
Clients are identified using MAC addresses. These are unique identifiers for every hardware interface (i.e. ethernet port, wifi radio, etc.) MAC addresses are assigned during manufacturing and generally cannot be changed. They are normally written in a format which looks like "12:34:56:AB:CD:EF". They are not case-sensitive, i.e. if they have any letters, they may be written using upper- or lower-case, without changing the meaning.
If you're SSH'd into the tablet, you can find the wifi interface's MAC address like so:
root@reMarkable:~# ip link show dev wlan0
3: wlan0: <BROADCAST,MULTICAST,UP,LOWER_UP> mtu 1500 qdisc pfifo_fast qlen 1000
    link/ether 12:34:56:ab:cd:ef brd ff:ff:ff:ff:ff:ff
In this example, 12:34:56:ab:cd:ef is the MAC address. (Obviously I changed it for this web page.)
If not, you can see the MAC address of the wifi interface by going to:
- Setttings
- Help
- Copyrights and licenses
At the bottom of this page, below the root password, will be a list of the tablet's IPv4 and IPv6 addresses. The MAC address of the wifi interface will be the last item on this list.
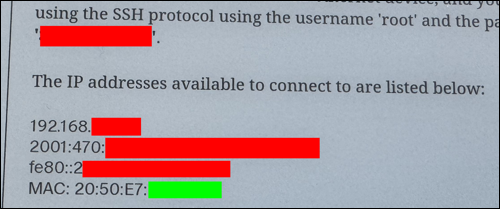
I've obfuscated the specific values from my own tablet, however the green box at the bottom of the picture is what you're looking for. Note that your tablet may not look exactly like this - in particular, you may not have any IPv6 addresses on your list, and if you aren't connected to wifi, you won't have an IPv4 address either. However, the MAC address should always be there.
If Converting from Dynamic to Reserved
If you don't really care what the tablet's IPv4 address is, your router may offer a way to convert its current lease from dynamic to reserved. (Your router may call this something else, possibly with the word "static" in it. If it's asking for a MAC address, they're talking about a reservation, which is different from a static address.)
To do this with a MikroTik router ...
-
Make sure the tablet is connected to wifi. You should see the wifi logo at the bottom of the tablet's screen while you're in a "file browser".

-
Find the tablet's current DHCP lease. (Use the tablet's MAC address in the command shown below.)
[admin@MikroTik] > /ip dhcp-server lease print where mac-address="12:34:56:AB:CD:EF" Flags: X - disabled, R - radius, D - dynamic, B - blocked # ADDRESS MAC-ADDRESS HOS... SERVER RAT... STATUS 0 D ;;; reMarkable tablet rm2b 192.168.1.202 12:34:56:AB:CD:EF internal bound -
Note the number at the beginning. If you used "
when mac-address="..."" this should be0. -
Change the reservation from dynamic to static. (The number at the end of the command is the number from the list above.)
[admin@MikroTik] > /ip dhcp-server lease make-static 0 -
If you look at the lease again, the "
D" flag after the number should be gone.[admin@MikroTik] > /ip dhcp-server lease print where mac-address="12:34:56:AB:CD:EF" Flags: X - disabled, R - radius, D - dynamic, B - blocked # ADDRESS MAC-ADDRESS HOS... SERVER RAT... STATUS 0 ;;; reMarkable tablet rm2b 192.168.1.202 12:34:56:AB:CD:EF internal bound
If Manually Choosing the IPv4 Address
If your router doesn't offer a way to convert a dynamic lease to a reservation, or if you don't want to do this, you can choose the IPv4 address yourself.
I actively manage the IP space within my home network. I do have DHCP pools available, but any device that I might ever need to connect TO, has either a static or reserved IP address. Since the reMarkable software didn't include a way to set static IPs for different wifi networks, I had to set up DHCP reservations on the router for each of my tablets.
Choose the IPv4 Address
In my case, I already had ranges of IPs allocated for different types of devices, so I knew what IPs I wanted for each tablet. I'm not going to go into a bunch of detail about how to manage IP networks, but in general if you're assigning an IP to a new device, you're going to need an IP address which is ...
- within the appropriate subnet
- not within the DHCP pool
- not being used by any other devices
As an example, if ...
- the router's internal network is
192.168.1.0/24 - the DHCP pool is
.100to.199 - the router itself is using
192.168.1.1 - other Linux servers are using
.10through.23 - a printer is using
.250 - all other devices on the network use DHCP, so they have addresses in the
100to199range.
In this example, I might choose 192.168.1.201 for the tablet, since it's in the correct subnet, it's not within the DHCP pool, and it's not being used by any other devices. (I'll use this address in the examples below.)
Set up the DHCP reservation
-
Find the name of the correct
dhcp-serverprocess. (If the router is acting as a DHCP server for multiple interfaces, it will have a different process for each interface.)[admin@mikrotik] > /ip dhcp-server print Flags: D - dynamic, X - disabled, I - invalid # NAME INTERFACE RELAY ADDRESS-POOL LEASE-TIME ADD-ARP 0 internal internal internal 1d 1 guest guest guest 1d 2 iot iot iot 1dIn this example, there are three different network segments for which the router provides DHCP, so there are three DHCP server processes. In this case, the server we're going to add the reservation to is called "
internal". -
If the tablet is currently connected, disconnect and "forget" the network.
-
If the tablet was previously connected, delete its current lease.
-
First find the lease(s) ...
[admin@MikroTik] > /ip dhcp-server lease print where mac-address="12:34:56:AB:CD:EF"
Flags: X - disabled, R - radius, D - dynamic, B - blocked
 #   ADDRESS            MAC-ADDRESS       HOS... SERVER    RAT... STATUS
 0 D 192.168.1.201      12:34:56:AB:CD:EF        internal         bound
Note the number at the beginning of the line, in this case
0. -
Then delete the lease.
[admin@MikroTik] > /ip dhcp-server lease remove 0
-
-
Add the DHCP reservation.
/ip dhcp-server lease add \
    server=internal \
    mac-address=12:34:56:ab:cd:ef \
    address=192.168.1.201 \
    comment="reMarkable Tablet"
(This is one long command, I use backslashes (the "
\" characters) to "wrap" the command so it's easier to read. You can copy/paste this into the MikroTik command line, it handles backslashes the same way that most other command line interfaces do.) -
Connect the tablet to the network.
Make Sure it Worked
Go to "Settings → Help → Copyrights and licenses" and check the tablet's IP. It should have the IP you added to the DHCP reservation.
DNS Entry
I also have my own DNS servers for my internal network. Because my tablets all have reserved IPv4 addresses, I was able to add DNS entries for each of their hostnames, and now I can SSH into them without having to remember what their wifi IPv4 addresses are.
$ ssh rm2b
reMarkable
╺━┓┏━╸┏━┓┏━┓   ┏━┓╻ ╻┏━╸┏━┓┏━┓
┏━┛┣╸ ┣┳┛┃ ┃   ┗━┓┃ ┃┃╺┓┣━┫┣┳┛
┗━╸┗━╸╹┗╸┗━┛   ┗━┛┗━┛┗━┛╹ ╹╹┗╸
root@reMarkable:~# exit
List of Restricted IPv4 Addresses
This section involves setting up a list of IPv4 addresses whose traffic will be blocked from accessing the outside world.
One option for this is to add a separate rule which blocks traffic from each IP address. However, my network has over a dozen devices that I don't want talking to the outside world, so instead I created a list of IPv4 addresses whose traffic is restricted, and then added a single firewall rule to block traffic FROM the IPs on this list, TO the "external" interface.
Create or Add to the List
This will create an IP address list called "restricted", with the IPs of my three tablets as members. (If such a list already exists, it will add the IP addresses to it.)
/ip firewall address-list add \
    list=restricted \
    address=192.168.1.201 \
    comment="reMarkable tablet rm2a"
/ip firewall address-list add \
    list=restricted \
    address=192.168.1.202 \
    comment="reMarkable tablet rm2b"
/ip firewall address-list add \
    list=restricted \
    address=192.168.1.203 \
    comment="reMarkable tablet rm1c"
On my home network, I already had a restricted list with the IPs for several other devices, such as light switches that I can control using Apple's "Home" app, and a network-enabled printer that I don't want "phoning home" without my knowledge. Talking to other devices inside my home is fine, but talking to anything outside my home is not.
When I got the tablets, all I had to do was set up their DHCP reservations and add their IPs to this list, before allowing them to connect to wifi for the first time.
Block Outbound Traffic
The last step is to add a firewall rule which either rejects or drops packets from an IP on the restricted list, to the outside world.
ℹ️ Reject vs Drop
If the router REJECTs a packet, it sends a "not allowed" message of some kind back to the source of the packet.
If the router DROPs a packet, it doesn't tell the sender anything. The sender won't be told that the packet was not delivered, the packet just won't go anywhere.
Either way, the tablet won't be able to talk to the outside world - the difference is whether it knows it's being blocked or not.
Get External Interface Name
We're going to need the name of the interface which connects to the outside world. This will usually be obvious by looking at the IPv4 addresses of the router's interfaces, because only one of them will have a "real world" IP address (i.e. one that isn't in the 10.x.x.x, 172.(16-31).x.x, or 192.168.x.x ranges).
> /ip address print
Flags: X - disabled, I - invalid, D - dynamic
 #   ADDRESS            NETWORK         INTERFACE
 0   192.168.88.5/24    192.168.88.0    internal
 1 D x.x.x.146/24       x.x.x.0         uplink
 2   192.168.1.1/24     192.168.1.0     internal
 3   192.168.2.1/24     192.168.2.0     iot
 4   192.168.3.1/24     192.168.3.0     guest
On my router, I've assigned better names to the interfaces so I don't have to remember which router ports are connected to which network segments.
-
The
internal,iot, andguestinterfaces are bridges, each containing a collection of the appropriate ethernet ports and VLANs. (The ethernet port connecting to my wifi access point is special - it carries several VLANs, and the AP connects different VLANs to different SSIDs.) -
As for the
uplinkinterface, I just renamedether12touplinkso I don't have to keep in the back of my head which port is connected to the ISP's equipment.
In this case, uplink is the name of the interface which connects to the outside world.
Figure out where to put the rule
The firewall rules exist in a specific order. Each packet which enters the router is evaluated by these rules, and the first rule which matches the packet controls what the router does with that packet. The rules are numbered, and when you add a rule, you can specify where the new rule should be in the order. If you don't specify where to put it, the router will put it at the end of the list.
When a MikroTik router is brand new or is reset, it configures a default set of firewall rules that work similar to a typical home router, i.e. with one port as an "uplink" and all of the others bridged together as a single internal network. This includes the necessary firewall and NAT rules to allow internal machines to reach the outside world, but no traffic inbound from the outside world. These rules all have "defconf:" at the beginning of the description.
In many cases, this rule will need to be added immediately after those defconf: rules.
For example ...
[admin@MikroTik] > /ip firewall filter print
Flags: X - disabled, I - invalid, D - dynamic
 0  D ;;; special dummy rule to show fasttrack counters
      chain=forward action=passthrough

 1    ;;; defconf: accept ICMP
      chain=input action=accept protocol=icmp

 2    ;;; defconf: accept established,related
      chain=input action=accept connection-state=established,related

 3    ;;; defconf: drop all from WAN
      chain=input action=drop in-interface=uplink

 4    ;;; defconf: fasttrack
      chain=forward action=fasttrack-connection
      connection-state=established,related

 5    ;;; defconf: accept established,related
      chain=forward action=accept connection-state=established,related

 6    ;;; defconf: drop invalid
      chain=forward action=drop connection-state=invalid

 7    ;;; defconf:  drop all from WAN not DSTNATed
      chain=forward action=drop connection-state=new
      connection-nat-state=!dstnat in-interface=uplink

 8    ;;; FORWARD: certain guest devices are allowed to print
      chain=forward action=accept src-address-list=can-print
      dst-address-list=printers

 9    ;;; FORWARD: guests cannot access internal network
      chain=forward action=reject in-interface=guest out-interface=internal
...
On this router, the rule needs to be between 7 and 8.
Add the rule
To add the rule ...
/ip firewall filter add \
    place-before=8 \
    chain=forward \
    action=reject \
    src-address-list=restricted \
    out-interface=uplink \
    comment="FORWARD: restricted devices cannot get out"
If you list the rules again, you should see the new rule, in the correct order.
[admin@MikroTik] > /ip firewall filter print
...
 7    ;;; defconf:  drop all from WAN not DSTNATed
      chain=forward action=drop connection-state=new
      connection-nat-state=!dstnat in-interface=uplink

 8    ;;; FORWARD: restricted devices cannot get out
      chain=forward action=reject src-address-list=restricted
      out-interface=uplink

 9    ;;; FORWARD: certain guest devices are allowed to print
      chain=forward action=accept src-address-list=can-print
      dst-address-list=printers

10    ;;; FORWARD: guests cannot access internal network
      chain=forward action=reject in-interface=guest out-interface=internal
...
Once the rule is in place, the reMarkable tablets (and any other devices whose IPs are on the restricted list) will not be able to "talk to" anything which is only reachable via the uplink interface ... namely, anything outside the home network.
Blocking IPv6 Traffic
IPv4 and IPv6 traffic are handled entirely separately from each other. Even if a device (like a reMarkable tablet) isn't able to reach the internet via IPv4, it may still be able to reach it via IPv6, so we also need to block IPv6 traffic coming from the tablet.
IPv6 devices will generally self-assign their IPs, using a prococol known as SLAAC (Stateless Address Autoconfiguration, RFC-4862). The reMarkable tablet does this, and it doesn't have a way to set a static IPv6 address, so this is the only way it can get an IPv6 address.
The IPv6 address assigned via SLAAC itself is predictable, however there are "privacy extensions" which will make the tablet choose a random IPv6 address instead of, or in addition to, the SLAAC address. Because of this, the only reliable way to filter traffic coming from the tablet is to match based on the MAC address instead of any IPv6 address. (This is one of those things that most ritters cannot do.)
We can't add MAC addresses to an address-list, so instead we'll need to make the router "mark" each packet when it arrives from the tablet's MAC address, and then refuse to forward packets with this "mark" to the outside world.
ℹ️ Marks
These "marks" are just extra tags which are attached to the packets while they're in the router's memory. They are not sent along when the packet leaves the router.
The mark itself can be any string you like, I use "
internal-only" for this.
Mark Packets from Restricted Devices
The first part of this is to add an "internal-only" mark to all packets arriving from the MAC addresses of the restricted devices. (The mark itself can be anything, I used "internal-only" so it's obvious what it's being used for.)
/ipv6 firewall mangle add \
    chain=prerouting \
    action=mark-packet \
    new-packet-mark=internal-only \
    src-mac-address=12:34:56:AB:CD:EF \
    comment="reMarkable tablet rm2b"
Each MAC address whose IPv6 traffic needs to be restricted, will need a rule like this.
Block the Marked Packets
If your router has real-world IPv6 connectivity, you should already have IPv6 firewall rules in place. If not, MikroTik's Building Your First Firewall page has information about how to set up reasonable firewall rules for both IPv4 and IPv6.
I'm assuming you have rules in place, and just need to add the rule which blocks packets from the restricted devices. That rule will look like this:
/ipv6 firewall filter add \
    chain=forward \
    out-interface=uplink \
    packet-mark=internal-only \
    action=reject \
    comment="FORWARD: reject outbound packets with internal-only mark"
Note that the out-interface= should match the interface through which the outbound IPv6 traffic leaves the router. On my router this is the 6to4 tunnel interface which connects to the tunnelbroker.net service.
Traffic is controlled
After adding these rules in the router, the tablet can connect to wifi and speak with other devices on the local network, but cannot reach the outside world.
This has allowed me to experiment with clock synchronization, I have a Linux server at home which is able to pull backups from the tablet every hour (not that there's a lot to save, but as a concept it works), and it will also make it possible for me to set up rmfakecloud in the future.
Telemetry
The tablet's filesystem has a /home/root/.cache/remarkable/xochitl/telemetry/ directory, containing an ever-growing collection of files containing what appears to be a collections of strings containing just 1 and 0.
When I've seen "telemetry" files in the past, it was because the device was uploading information somewhere, usually to the hardware or OS manufacturer, about what the machine was doing. As a rule I'm not comfortable with uploads happening without my knowledge or consent, especially when I can't tell what information is being sent.
I asked about these files on the rcu-develop list (for RCU users who are more "technically minded"). A few people were aware of them, but nobody had any real information about what they were used for or what information they contain.
I did notice that, after connecting to wifi for the first time, the tablet did try to open a connection to 34.36.20.125, which is used by "a Google Cloud customer" - probably reMarkable but without knowing the hostname which resolved to this IP, I can't really be sure. Also, I don't know that this connection was related to these telemetry files or not, it's possible this was something totally unrelated.
I've tried setting up a packet sniffer on the router to capture all traffic to/from the tablet, but this particular connection hasn't happened again. I'm hoping that if it does, there will be a DNS request just before it tries to connect and the hostname it's querying for will tell me something.
The reMarkable Tablet's Filesystem
Document Storage
The reMarkable software presents the user with a collection of notebooks, organized into folders. The overall structure is very similar to how a computer stores files within directories.
Under the covers, notebooks and folders are actually stored as sets of files in the /home/root/.local/share/remarkable/xochitl/ directory. Every notebook or folder has an internal ID number, formatted as a UUID. Each item has one or more files associated with it.
The files I've seen, and my guesses about what they're used for, are ...
UUID.metadata
This file exists for every notebook or folder. If this file doesn't exist, the UUID "doesn't exist", and the reMarkable software will ignore any other files relating to that UUID.
This is a JSON file containing an object with the following keys ...
-
visibleName- (String) The item's name, as shown in the reMarkable UI. -
type- (String) "CollectionType" for folders, "DocumentType" for notebooks. If other values are possible, I haven't seen them. -
parent- (String) The UUID of the item (folder) which "contains" this item.-
For items in the "top level" (not in any folder) this is an empty string.
-
For items moved to the Trash, this is "
trash".
-
-
deleted- (Boolean) iftrue, the item has been deleted.Note that "in the trash" and "deleted" are different conditions. See the section below about deleted files for more details.
-
pinned- (Boolean) Iftrue, the item is marked as a "Favourite".
The following keys appear to be used when synchronizing files with the reMarkable Cloud. I don't use the cloud, so I don't know for sure.
-
lastModified- (String) contains a string of digits. Appears to be a UNIX timestamp, with three extra digits that I'm assuming are milliseconds. From the name I'm guessing this records the last time the notebook's content was modified. -
metadatamodified- (String) same aslastModified, but it records the last time the notebook's metadata was modified. -
modified- (Boolean) I'm guesing this is a flag which tells if the item has been modified since the last time the item was sync'ed. -
synced- (Boolean) I'm guessing this is a flag which tells if the item has ever been sync'ed. -
version- (Integer)
This list only contains the keys I've seen in the files, along with my guesses about what they're for.
UUID.content
This file exists for every notebook or folder.
This is a JSON file containing information about the item.
-
For folders, this appears to be just a list of tags.
-
For notebooks, this contains information about each page within the notebook, along with settings relating to the drawing tools (i.e. the current pen, stroke width, colour, and so forth).
Note that pages which have been deleted are still listed in this file, however it looks like the files containing the page's contents are deleted. I'm guessing this is so that, the next time the tablet synchronizes with the cloud, it can tell the cloud to delete its copy of that page.
UUID.local
Every one of these files is exactly four bytes, containing a JSON empty object.
{
}
If I had to guess, I would say this has something to do with synchronizing with "the cloud", and these files on my tablets are all empty because I've never sync'ed with the cloud.
UUID.pagedata
For notebooks, this appears to contain the name of the "template" used when creating new pages.
For folders, if the file exists, it appears to contain a bunch of newlines. No idea why.
UUID.epub
For documents which were uploaded as EPUB files, this appears to be the original .epub file, renamed to the UUID. The tablet keeps this around so that if the user changes the formatting, it can create a new PDF.
UUID.epubindex
Looks like a list of the individual files contained within an EPUB file, stored in some kind of 16-bit encoding.
00000000  00 00 00 1a 00 72 00 4d  00 20 00 65 00 70 00 75  |.....r.M. .e.p.u|
00000010  00 62 00 20 00 69 00 6e  00 64 00 65 00 78 00 00  |.b. .i.n.d.e.x..|
00000020  00 01 3f f0 00 00 00 00  00 00 40 5f 40 00 00 00  |..?.......@_@...|
00000030  00 00 bf f0 00 00 00 00  00 00 00 00 00 08 ff ff  |................|
00000040  ff ff 00 00 00 00 00 00  00 28 00 00 00 2a 00 4f  |.........(...*.O|
00000050  00 45 00 42 00 50 00 53  00 2f 00 68 00 74 00 6d  |.E.B.P.S./.h.t.m|
00000060  00 6c 00 2f 00 63 00 6f  00 76 00 65 00 72 00 2e  |.l./.c.o.v.e.r..|
00000070  00 68 00 74 00 6d 00 6c  00 00 00 00 00 00 00 01  |.h.t.m.l........|
00000080  00 00 00 00 00 00 00 01  00 00 00 28 00 4f 00 45  |...........(.O.E|
00000090  00 42 00 50 00 53 00 2f  00 68 00 74 00 6d 00 6c  |.B.P.S./.h.t.m.l|
000000a0  00 2f 00 70 00 72 00 30  00 31 00 2e 00 68 00 74  |./.p.r.0.1...h.t|
000000b0  00 6d 00 6c 00 00 00 01  00 00 00 29 00 00 00 01  |.m.l.......)....|
000000c0  00 00 00 03 00 00 00 2a  00 4f 00 45 00 42 00 50  |.......*.O.E.B.P|
000000d0  00 53 00 2f 00 68 00 74  00 6d 00 6c 00 2f 00 74  |.S./.h.t.m.l./.t|
000000e0  00 69 00 74 00 6c 00 65  00 2e 00 68 00 74 00 6d  |.i.t.l.e...h.t.m|
000000f0  00 6c 00 00 00 2a 00 00  00 03 00 00 00 04 00 00  |.l...*..........|
...
I'm guessing this file is generated when an EPUB file is uploaded and converted to PDF, and then just not deleted afterward?
UUID.pdf
For documents which were uploaded as PDF files, this appears to be the original .pdf file, renamed to the UUID.
For documents which were uploaded as EPUB files, this is a copy of the ebook, converted to PDF. This PDF file is what the reMarkable software actually shows on the screen when you're "reading" an EPUB file.
UUID.tombstone
In firmware version (3.5?) and later, the reMarkable firmware creates one of these files whenever a document is "deleted from the trash", and deletes all of the other files which made up the document. If you "empty the trash", this happens for every document in the trash at the time.
The file itself contains a timestamp showing when the file was deleted.
reMarkable: ~/ cd ~/.local/share/remarkable/xochitl/
reMarkable: ~/.local/share/remarkable/xochitl/ ls -la *.tombstone
-rw-r--r--    1 root     root            24 Jul 30 20:16 033f139e-d2c9-479f-944e-8c9ae86a3aea.tombstone
-rw-r--r--    1 root     root            24 Jul 30 20:16 7a483e59-be38-4bec-b899-d2c874ec51ab.tombstone
-rw-r--r--    1 root     root            24 Jul 30 20:16 895bdd6d-1b2e-4c3c-b3c4-48030c26591c.tombstone
-rw-r--r--    1 root     root            24 Jul 30 20:16 d67b9d2c-82bf-4448-bc6f-2f8e9384dc6e.tombstone
-rw-r--r--    1 root     root            24 Jul 30 20:16 d864c483-9115-4e0f-9168-d11e179b40f2.tombstone
-rw-r--r--    1 root     root            24 Jul 30 20:16 f1a69b0c-aec3-400a-bb37-d258cd77de49.tombstone
reMarkable: ~/.local/share/remarkable/xochitl/ cat f1a69b0c-aec3-400a-bb37-d258cd77de49.tombstone
Sun Jul 30 20:16:23 2023
See "Deleted Files" below for more details.
UUID/ (Directory)
This directory contains UUID.rm files for each page. These files contain the actual pen strokes you've written on each page.
Found a reddit post with a link to a blog post which details the file format. Looks like earlier verisons stored the pen strokes for all pages in a single file, while file format v3 stores each page's pen strokes in a separate file.
Note that the page's UUIDs are different from the notebook's UUID. The UUIDs for the individual pages are stored in the UUID.content file (see above).
UUID.thumbnails/ (Directory)
This directory contains thumbnail images for each page. These files use the same per-page UUIDs as the "lines files" in the UUID/ directory.
The thumbnails are 280x374 pixel .jpg files.
Deleted Files
The reMarkable UI offers a way to logically delete files by moving them to a "Trash" folder. This offers a way to "un-delete" files which may be deleted by mistake. This is similar to the "trashcan" or "recycle bin" used by many other desktop environments.
The contents of the "Trash" folder can be seen by tapping "Menu" at the top left, and selecting "Trash" near the bottom of the menu.
While viewing the Trash folder ...
-
At the top right will be an "Empty trash" option. Selecting this will "permanently" remove everything in the Trash folder.
-
If you long-press on an item (folder or notebook), there will be options at the top right for ...
-
Restore - this will move the item back into whatever folder it was originally deleted from.
-
Delete - this will "permanently" delete the item.
-
Depending on the firmware version, permanently deleting an item may or may not remove the files from the tablet's filesystem.
-
Prior to (3.5?), this would add a
"deleted": truekey to theUUID.metadatafile, which tells the desktop environment to never show the file. None of the files which make up the document were actually deleted until the next time the tablet sync's with the cloud.This provides a way for the tablet to tell the cloud that the document should be deleted there. If this didn't happen and the cloud has a copy of the document, the next sync would download the document from the cloud to the tablet.
-
In firmware (3.5?) and later, the files are deleted, and a
UUID.tombstonefile is created. This also allows the tablet to tell the cloud to delete the document, but doesn't require keeping a full copy of the entire document on the tablet.
If your tablet synchronizes with "the cloud" on a regular basis, this is fine, and it's actually a good idea - if the files were deleted from the tablet without the cloud knowing about it, the next synchronization would "restore" the files to the tablet, which rather defeats the purpose of deleting the files in the first place.
Tablets which do not sync
For tablets which never synchronize with "the cloud", this means that deleted items will never truly be removed from the tablet. At some point, the tablet's internal storage will fill up, and if you only ever use the reMarkable UI, you're pretty much stuck.
Some might say that reMarkable deliberately designed the tablets to force people to connect them to "the cloud", and that anybody who doesn't link their tablet to the cloud deserves what they get. I don't know that I would go that far, I think it's more likely that they designed the system to provide a useful set of features, and didn't spend a whole lot of time thinking about users who can't, or don't want to, use a cloud service. (The fact that they later added the UUID.tombstone files would seem to indicate that this is the case.)
Whatever the cause, the fact remains that for tablets like mine which never talk to "the cloud", items which are "deleted" are not actually deleted, and eventually the internal storage will run out.
I first noticed this when I was looking through the various UUID.xxx files from a backup, and found that a few sets of UUID files contained "dummy notes" I had created when the tablet first arrived and I was looking at what each of the "pens" looked like. I knew I had deleted these notebooks, and then later "emptied the trash" so they weren't showing up there anymore, but they were still were, taking up space on the filesystem.
I also saw this issue mentioned when I was browsing through the awesome-reMarkable list, and looked at reMarkable CLI tooling, which includes a Python script called reclean.py that deletes all files for UUIDs whose .metadata files say they have been deleted.
I was pleasantly surprised to find that RCU recognizes these files, and if the tablet isn't linked to a "cloud account", will offer to permanently delete them for you.
Templates
The /usr/share/remarkable/templates/ directory contains all of the built-in template files.
Templates are "background layers" which can be used with notebooks, to provide a "guide" for your handwriting, or to create an on-screen "form" that you can fill out. The tablet comes with templates which look like lined paper, quad-ruled graph paper, and "dot paper", as well as things like musical staves and pre-made day-planner pages.
The directory also contains a templates.json file, which tells the reMarkable software what templates are available, what their names are (the name shown in the reMarkable software is not the same as the filename in this directory), what orientation they should use (portrait or landscape), and what icon to show the user in the "template picker" screen.
The reMarkable software doesn't provide a way to add more templates, but if you SSH into the tablet you can add your own templates, and if you edit the templates.json file you can make the reMarkable software use your templates along with the built-in templates.
Notes
-
⚠️ Every OS upgrade will reset the contents of this directory.
RCU works around this by ...
- uploading the files to
/home/root/.local/share/remarkable/templates/(which is NOT reset by OS upgrades) - creating symlinks in the
/usr/share/remarkable/templates/directory, pointing to the actual files in/home/root/.local/share/remarkable/templates/.
It also stores an individual JSON file for each template in
/home/root/.local/share/remarkable/templates/, containing that template's attributes, while at the same time adding that information to the globaltemplate.jsonfile.After an OS upgrade, RCU can "re-add" your custom templates by re-creating those symlinks and adding the items from each template's JSON file back to the global
template.jsonfile. - uploading the files to
-
According to a Reddit comment by the author of RCU ...
There is another way, which isn't officially supported and which very little information exists about. If you make a
templates.jsonfile in~/.local/share/remarkable/templates/customand put your files there, they ought to persist through software updates.I haven't tried this myself, however I did notice that on my tablet, RCU created this directory but hasn't stored anything in it. My guess is that the author is exploring this as an easier way to store custom templates (i.e. without having to create symlinks or edit the built-in
templates.jsonfile).This now makes me want to run
stringsagainst thexochitlexecutable (aka "the reMarkable software") to see what other directories the software uses. Hrmmmmm...
Splash Screens
The /usr/share/remarkable/ directory contains the graphics files shown on the screen when the tablet is sleeping, rebooting, starting up, and so forth. Most of the filenames make it obvious what each file is used for.
-
batteryempty.png- From the name, I'm guessing the tablet shows this screen when the battery is too low to keep working. Because e-ink screens don't consume power unless the display is changing, it can show this image as the last thing before doing a total shutdown, and the image will stay on the screen forever (or until the user presumably charges the battery enough for the tablet to boot again). -
factory.png- This is the image that was on the screen when I first took the tablet out of the box, before I powered it on. -
overheating.png- There is a temperature sensor inside the tablet, I guess it shows this when the tablet gets too hot? -
poweroff.png- This is shown when you power the tablet all the way off. -
rebooting.png- This is shown while the tablet is rebooting. -
releasenotes.png- ? -
releaseupdates.png- ? -
restart-crashed.png- I guess the tablet can show different images for reboots because the user requested it and reboots because of a software crash? This is a symlink torebooting.png, which means the same image is used in both cases. -
starting.png- This is shown while the tablet is starting up. -
suspended.png- This is shown while the tablet is sleeping. This is the one most people seem to want to customize.
You can replace these files to change the screens shown by the tablet. Your custom files need to be .png files, 1404x1872, with 8-bit greyscale colour space.
Notes
-
The directory contains more than just these graphics files. Be very careful not to delete, rename, or otherwise modify anything by accident.
-
These files will be replaced with reMarkable's original files whenever the tablet's OS is upgraded. As with templates, you may want to store your custom files under
/home/root/somewhere, and create symlinks in the/usr/share/remarkable/directory which point to your custom files.
First Impressions
Notes and impressions from the day the unit arrived, 2023-06-27.
Physical
Packaging
The tablet, folio, and stylus arrived in a box that was a bit smaller than I had expected. The boxes containing the folio and stylus happened to fit together and be the same size as the box containing the tablet, which I thought was a nice touch. It's obvious that they planned the packaging with the intent of selling the tablet, stylus, and folio as a bundle.
One thing I noticed is that the sticker on the tablet's box with its serial number, doesn't have the MAC address. This is important to me because I create DHCP reservations in my home network, so that devices like this will always have the same IP while I'm at home. This lets me also add DNS records on my internal network (such as "rm2.internal.") pointing to those IPs, to make it easier to access them over the network when I need to.
I was able to get the MAC address by SSH'ing into the unit over the USB cable and running this command.
ip link show
reMarkable 2 Tablet
The tablet itself is nice. My absolute first impression when I took it out of the box was how thin it is.
The display is not backlit, and the contrast doesn't seem to be adjustable, which makes some of the built-in templates (particularly the "Dots S" template) hard to see when the room isn't very well-lit. The display's usable area has a "margin" of about 1cm on the top, left, and right sides, and about 2.5cm on the bottom.
The screen has a textured surface which, when combined with the plastic tip on the stylus, feels almost exactly like using a pencil to write on paper. (This is probably obvious, it's one of the biggest selling points on their web site.) There are four little rubber "dots" on the back of the tablet, which prevent the tablet from sliding around on a tabletop, or which fit into indentations on the folio if you have one.
There is a power button on the top edge, and a USB-C connector on the bottom edge, both at the far left side of the tablet. There is also a 5-pin POGO connector (little "dots") on the left edge. Internally, these "dots" have the same electrical connections as a USB port. I've seen POGO-pin connectors on other devices, including on the back of my iPad, I'm assuming that the folios with keyboards have five little pins in the correct spots to line up with these "dots" when the folio is attached.
From the reading I did online before the tablet arrived, I know that these five "dots" have the electrical connections to act as a USB port, which is used not only to connect to a keyboard folio, but also used in case you need to recover from a "bricked" tablet. I wouldn't be surprised if somebody were to make a 3D-printed thingy which clamps on to the tablet, positions five pins over the dots, and ... I dunno, maybe has a female USB-A or USB-c connector that a keyboard or other device can plug into?
Stylus - "Marker Plus"
The stylus is the size and shape of a normal writing pen. It has a coating on the outside, similar to the tablet screen, which keeps it from slipping in my hand. There are no buttons on the side. There is a small indendation down the length of the stylus, which is where it contacts the tablet when connected. There's also a small indentation near the back end on the other side, with a "reMarkable" logo engraved in it.
The "back end" (away from the tip) seems to be some kind of insert. There's a small gap around the circumference where you can see some kind of metal shining through, and the "cap" which makes up the back end of the stylus has a tiny amoount of "give" to it (i.e. if you press down on it, it moves just a little bit). I'm not sure if the cap is supposed to move a little or not.
The stylus attaches magnetically to the right side of the tablet. There seem to be several different magnets involved, both in the stylus and on the tablet. The stylus's "hold" on the tablet is stronger or weaker based on its position and orientation. I found the strongest "hold" when the stylus is pointing "down", with the top of the stylus about 7mm from the top of the tablet. When you get the stylus near the right spot, it will magnetically "jump" into this position on its own.
Folio - "Book Folio", Grey
I got the basic grey fabric folio, because (1) I don't really intend to use a keyboard with it, and (2) from the pictures on the web site, it looked like the outside surface was a coarse-grain fabric which I would be able to grip better than a smooth leather surface. I don't know about the comparison, but I was right about the texture - it is something I'll be able to hold a grip on.
The folio has a metal "bar" inside the spine, which attaches to the tablet magnetically. The magnets are the only thing holding the tablet into the folio, and the magnets aren't that strong - the tablet almost fell out of the folio twice in the first few days of using it.
The front cover folds all the way around to the back of the tablet, and forms a little round section on the left side. This makes it a bit more stable when holding the tablet with your left hand, however the tablet can easily fall out of the folio when you're doing this.
Third Party Folio
I have an iPad cover which has rubber bumpers that fully surround the top, bottom, and sides of the iPad. I have NEVER had the iPad fall out of the cover.
I ended up buying a third-party folio for my reMarkable tablet. (Mine is dark blue, that's not currently listed as an option so maybe they ran out?) It has hard plastic "clips" along the left and right sides, including around the top and bottom corners on the right. I've been using it for a few weeks now, and haven't had any cases where the tablet tried to "fall out of" the folio.
The case is made of a rubberized plastic, with a texture on the outside which is similar to the fabric on the grey reMarkable folio. It's also "grippy" enough that it hasn't slipped in my hand while I was carrying it.
Neither folio has a feature where it puts the tablet to sleep when the cover is closed. Which makes sense - the e-ink display only consumes power while the display's contents are being changed, so there's no real harm in not putting the unit to sleep.
Software
Built-in software
Items on the screen can be selected using both the stylus and your finger.
The "main screen" is a file manager of sorts, which lets you create and navigate through a folder structure, and shows you the various objects stored in the tablet. There are a few types of objects available.
-
Folder: a container that you can put other objects into. You can create folders within folders.
-
Notebook: a document containing one or more pages.
-
Quick sheets: single-page documents, stored in a notebook called "Quick sheets". This notebook is created automatically in the "top level" of the storage, the first time a "Quick sheet" is created. The notebooknd cannot be moved.
Tapping on a folder will open that folder and show those items on the screen.
Tapping on a notebook will open the most recently edited page within the notebook.
While a notebook page is being edited, you can tap the the "Notebook Options" icon (at the very bottom) to change...
-
Under "Notebook settings", which page is used as the notebook's "cover image" in the file browser. Options are "Last page visited" or "First page".
-
Which orientation (portrait or landscape) should be used when working with the notebook.
- (later) It didn't occur to me at the time, but I'm not sure if the orientation is per-page or per-notebook. I'll have to try that and see what happens.
While a page is being edited ...
-
There will be a ◉ icon at the top left. Tapping this will show or hide the menu bar down the left side of the screen. (The dot within the circle will also move.)
-
There will be an ⓧ icon at the top right. Tapping this will close the current page and return to the file browser.
Built-in web interface
While the unit is connected to a computer via USB, you can use a browser on that computer to visit http://10.11.99.1/. (Be careful that your browser doesn't automatically convert this to "https://".)
This will provide a very simple interface which can be used to navigate the folder structure, and download and upload files.
PDF and EPUB files can be uploaded. This is done by navigating to the folder you want to upload into, and then dragging-and-dropping the file from a Finder window into the browser window. The process can take a few seconds to several minutes, depending on the size of the file. The UI doesn't show any kind of "working" indicator while the upload is happening.
Downloaded notebook files will be converted to PDF. If the original document was an uploaded PDF and you've added your own annotations "on top" of it, the PDF you download will have your annotations "burned into" the file, with no (easy) way to remove them if you need the original PDF back.
Reading uploaded PDF/EPUB files
You can tap on them like any other file. The drawing tools are active, so you can add your own annotations "on top of" the file as you see fit. Your annotations are saved as a separate "layer" on top of the file, so within the tablet you can open the PDF/EPUB and edit them if needed.
You can also use a PDF as a "template" of sorts, by making a new copy of the PDF file for each notebook where you want to use it. It's not the same as using an actual template, but it does work.
Disk layout
Random notes from the first time I SSH'd into the tablet.
reMarkable: ~/ df -h
Filesystem                Size      Used Available Use% Mounted on
/dev/root               257.7M    234.2M      6.0M  98% /
devtmpfs                325.3M         0    325.3M   0% /dev
tmpfs                   485.8M         0    485.8M   0% /dev/shm
tmpfs                   485.8M    644.0K    485.2M   0% /run
tmpfs                   485.8M         0    485.8M   0% /sys/fs/cgroup
tmpfs                   485.8M      8.0K    485.8M   0% /tmp
tmpfs                   485.8M         0    485.8M   0% /var/volatile
/dev/mmcblk2p1           19.9M    166.0K     19.8M   1% /var/lib/uboot
/dev/mmcblk2p4            6.6G     21.8M      6.2G   0% /home
reMarkable: ~/
reMarkable: ~/ mount
/dev/mmcblk2p2 on / type ext4 (rw,relatime)
devtmpfs on /dev type devtmpfs (rw,relatime,size=333096k,nr_inodes=83274,mode=755)
sysfs on /sys type sysfs (rw,nosuid,nodev,noexec,relatime)
proc on /proc type proc (rw,relatime)
securityfs on /sys/kernel/security type securityfs (rw,nosuid,nodev,noexec,relatime)
tmpfs on /dev/shm type tmpfs (rw,nosuid,nodev)
devpts on /dev/pts type devpts (rw,relatime,gid=5,mode=620,ptmxmode=000)
tmpfs on /run type tmpfs (rw,nosuid,nodev,mode=755)
tmpfs on /sys/fs/cgroup type tmpfs (ro,nosuid,nodev,noexec,mode=755)
cgroup2 on /sys/fs/cgroup/unified type cgroup2 (rw,nosuid,nodev,noexec,relatime,nsdelegate)
cgroup on /sys/fs/cgroup/systemd type cgroup (rw,nosuid,nodev,noexec,relatime,xattr,name=systemd)
debugfs on /sys/kernel/debug type debugfs (rw,nosuid,nodev,noexec,relatime)
tmpfs on /tmp type tmpfs (rw,nosuid,nodev)
fusectl on /sys/fs/fuse/connections type fusectl (rw,nosuid,nodev,noexec,relatime)
configfs on /sys/kernel/config type configfs (rw,nosuid,nodev,noexec,relatime)
tmpfs on /var/volatile type tmpfs (rw,relatime)
none on /run/gadget-cfg type configfs (rw,relatime)
/dev/mmcblk2p1 on /var/lib/uboot type vfat (rw,relatime,fmask=0022,dmask=0022,codepage=437,iocharset=iso8859-1,shortname=mixed,errors=remount-ro)
/dev/mmcblk2p4 on /home type ext4 (rw,relatime)
reMarkable: ~/
reMarkable: ~/ fdisk -l
Disk /dev/mmcblk2: 7456 MB, 7818182656 bytes, 15269888 sectors
238592 cylinders, 4 heads, 16 sectors/track
Units: sectors of 1 * 512 = 512 bytes

Device       Boot StartCHS    EndCHS        StartLBA     EndLBA    Sectors  Size Id Type
/dev/mmcblk2p1    32,0,1      671,3,16          2048      43007      40960 20.0M 83 Linux
/dev/mmcblk2p2    672,0,1     95,3,16          43008     595967     552960  270M 83 Linux
/dev/mmcblk2p3    96,0,1      543,3,16        595968    1148927     552960  270M 83 Linux
/dev/mmcblk2p4    544,0,1     1023,3,16      1148928   15269887   14120960 6895M 83 Linux
reMarkable: ~/
Fonts
Several people have asked how to install custom fonts on a reMarkable tablet. This page will explain what I've figured out.
Background
The reMarkable tablets come with a collection of font files pre-installed. The xochitl program (aka the "reMarkable app" running on the tablet) was written specifically to use these fonts, so one thing you absolutely don't want to do is delete these files.
Built-in Fonts
The tablet comes with two font families installed.
Noto is used for most text. Font files are available for just about every human-readable language on the planet.
EB Garamond is used for "fancy" text. It has a limited set of fonts available for languages which don't use latin characters. In particular, none of the languages I searched for (Arabic, Chinese, Hebrew, Japanese, or Korean) have font files available.
Missing Glyphs
One problem you may run into is that the font files don't contain glyphs (the "shapes" you see on the screen for each letter) for every possible character in every possible language. This is especially true for text in languages which don't use "normal" Latin characters.
It is possible to add font files to the tablet. If you do this, and the tablet needs to display those characters, it will use glyphs from those font files rather than showing a generic "box" in place of each character it can't draw.
 Without a Korean font installed
 With the Noto Serif KR font installed
Custom Fonts
The tablet uses the fontconfig library to manage fonts. Any font which fontconfig knows about, will be available for use by xochitl if needed.
The tablet can use .ttf or .otf font files. It might be able to use other formats, I haven't tried. All of the fonts I've needed have been available in one of these two formats.
Font Storage Directory
The fontconfig library is configured with a list of directory names which, if they exist, may contain font files. This list is:
/usr/share/fonts//home/root/.local/share/fonts//home/root/.fonts/
The /usr/share/fonts/ directory is in the OS partition, which means it will be replaced if the OS is upgraded. You can add custom font files here, but I don't recommend it.
The other two directories are under /home/, which is the user data partition. These files will NOT be overwritten when the OS is upgraded.
There is a note in the /etc/fonts/fonts.conf file which says that ~/.fonts is deprecated and will be removed in a future version (not sure if this means a future version of fontconfig or a future version of xochitl), so to be on the safe side, I'm storing the custom font files on my own tablets in the /home/root/.local/share/fonts/ directory.
If it doesn't already exist, you can create this directory using this command:
mkdir -f /home/root/.local/share/fonts
You can create other sub-directories under this if you like, the fc-cache program (below) will scan all sub-directories looking for font files.
Font Cache Directory
Rather than having to scan potentially hundreds of font files in several directories, the fontconfig library uses a database of which fonts exist in which files.
Programs which use the fontconfig library to draw text are able to just use a font name, size, and style, rather than having to manually search through a list of directories and find the actual file which contains the font they want to use. The library also provides substitutions, so if the program asks for a font which isn't installed, the library will use a font which is "close" to what was requested.
This database is stored in the /var/cache/fontconfig/ directory.
Whenever font files are added, updated, or removed from the system, you need to run the fc-cache program to rebuild these cache files.
reMarkable Paper Pro
On the rMPP, the /var/cache/ directory tree is set up to be "non-persistent", meaning that any changes made to it will disappear when the tablet reboots. This is done in two ways:
-
The
/filesystem is mounted read-only. Any attempt to write to any files there will fail, with a "read-only filesystem" error. -
There is an "overlay" filesystem mounted as
/var/cache/. This uses a RAM disk to hold any files which are written to the/var/cache/directory, and makes them "appear" instead of the files which are physically in thevar/cache/directory in the/filesystem (and therefore read-only).
Because of this, fc-cache is able to do its job, however the updated font cache files only exist in the RAM disk. When the tablet reboots, those updated font cache files are gone. So if we want the updated font cache to survive a reboot, we need to do two things:
-
Un-mount the overlay filesystem, so that
/var/cache/is the actualvar/cache/directory on the/filesystem -
Make the
/filesytem writable.
Note that we don't want to leave the / filesytem writable. The reMarkable startup scripts make it read-only for safety reasons, and while there are times you may need to make it read-write for a specific purpose (like updating the font cache files), as a rule it should say read-only in order to prevent accidental damage.
Updating Fonts
Adding Font Files
Upload your custom font files to the /home/root/.local/share/fonts/ directory. You may need to create this if it doesn't already exist.
mkdir -p /home/root/.local/share/fonts
You can then use any SSH file transfer program to do this, I normally use the scp command line client. For example ...
scp filename.ttf root@10.11.99.1:/home/root/.local/share/fonts/
If you need to update or remove any custom font files, update or remove those files now as well.
Rebuild the Font Cache
Any time you add, remove, or update font files, you need to rebuild the font cache files.
-
rMPP: If you want the updated font cache files to be persistent, you'll need to expose the real
/var/cache/directory and make it writable.-
If the
/var/cache/overlay is mounted, un-mount it. This only needs to be done once after the tablet reboots.umount -l /var/cacheNote: this is a lowercase "L", not an uppercase "i" or a digit "one".
-
Make the
/filesystem writable.mount -o remount,rw /
-
-
All tablets: Run this command to rebuild fontconfig's cache files.
fc-cache -fvThe
-foption tells it to rebuild the cache files for directories which were previously cached.The
-voption tells the command to show more information about what it's doing. Specifically, it shows you each directory it's processing.# fc-cache -fv /usr/share/fonts: caching, new cache contents: 0 fonts, 1 dirs /usr/share/fonts/ttf: caching, new cache contents: 0 fonts, 2 dirs /usr/share/fonts/ttf/ebgaramond: caching, new cache contents: 12 fonts, 0 dirs /usr/share/fonts/ttf/noto: caching, new cache contents: 13 fonts, 0 dirs /home/root/.local/share/fonts: caching, new cache contents: 0 fonts, 1 dirs /home/root/.local/share/fonts/NotoSerifKRFont: caching, new cache contents: 7 fonts, 0 dirs /home/root/.fonts: skipping, no such directory /usr/share/fonts/ttf: skipping, looped directory detected /home/root/.local/share/fonts/NotoSerifKRFont: skipping, looped directory detected /usr/share/fonts/ttf/ebgaramond: skipping, looped directory detected /usr/share/fonts/ttf/noto: skipping, looped directory detected /var/cache/fontconfig: cleaning cache directory /home/root/.cache/fontconfig: not cleaning non-existent cache directory /home/root/.fontconfig: not cleaning non-existent cache directory fc-cache: succeededThe "looped directory" messages are harmless, they just mean that
fc-cachehas already scanned that directory and is refusing to scan it a second time. -
rMPP: Make the
/filesystem read-only again.mount -o remount,ro /
Restart xochitl
After rebuilding the font cache, you need to restart xochitl. This is because it doesn't automatically re-read the font cache files every time they get rebuilt, it only reads them once when it starts up.
systemctl restart xochitl.service
If you're watching the tablet's display, you'll see the screen go black and then see the "loading" message while the software starts up.
Once this is done, the new fonts will be available as needed.
Renaming Notebooks
You can also change notebooks' "display names" to include characters in these alternate fonts.
However. You can't do this using xochitl (the software running on the tablet itself), because neither the on-screen keyboard, nor the "type folio", have the ability to type arbitrary characters in languages other than the ones supported by the software.
A user on Reddit reports that the reMarkable desktop and/or mobile apps are able to rename folders and documents to include emoji in the title, and that those emoji carried over to the tablet. I can't use their desktop or mobile apps because I don't use the reMarkable cloud, so I have no way to verify this, however it does make sense - if the computer, tablet, or phone where the app is running provides a keyboard with full unicode support, it can "type" unicode characters (such as emoji).
They also reported that, even though they have an rMPP with a colour screen, the emoji they were using appeared in colour on the computer, but in greyscale on the tablet. I suspect this is because their computer had a font file containing colour glyphs for those emoji, but the tablet has a font file with greyscale glyphs.
If this is also not an option for you, the other option is to edit the document's metadata file.
⚠️ Be very careful.
Making the wrong kind of typo here can cause problems. At the very least, it can make the document "not work" on the tablet, or it's possible that it could crash the software entirely. I don't know, because I've been editing JSON file for 20+ years, and I've always been really careful when working with files directly on the tablet, especially when editing their contents.
If you're not 100% sure what you're doing, PLEASE don't try to do this.
Identify the document's UUID
reMarkable documents are stored in the tablet's filesystem as collections of files, each with a UUID for the name.
ℹ️ UUID
A UUID is a "Universal Unique IDentifier". It's a 128-bit number, normally written using hexdecimal digits. The idea is, every document must have a unique identifier, and the chances of the tablet choosing a UUID which is already being used are very small (technically, it's a one in 2128 chance).
This is because the tablet will allow you to give multiple documents the same "display name", if you really want to so do. (I don't recommend it, there's no obvious way to tell which document is which on the tablet's display - unless they have different numbers of pages or something.)
You will need the UUID in order to identify which file to edit. What I normally do is this:
-
In the tablet's UI, rename the document to something unique. (I like to use
xyzzyfor this, but use whatever you like. It just needs to be unique across all documents in your tablet.) -
In the tablet, search the
UUID.metadatafiles to find the one containing that name.# cd /home/root/.local/share/remarkable/xochitl/ # grep -i 'xyzzy' *.metadata 9cc3f363-8076-4ecc-aeb7-ebddbfeaad8c.metadata: "visibleName": "xyzzy"In this example,
9cc3f363-8076-4ecc-aeb7-ebddbfeaad8cis the document's UUID.
It should only find one file. If it finds more than one, go back and rename the document to something unique and try again.
Edit the UUID.metadata file
There are a few ways to do this.
-
The tablet has
viandnanobuilt in. If you're familiar with one or both of them, you can use them.# cd /home/root/.local/share/remarkable/xochitl/ # nano 9cc3f363-8076-4ecc-aeb7-ebddbfeaad8c.metadata -
You can also download this one file using
scp, edit the file on your computer, and upload it back to the tablet.If you do this, be sure you're using a TEXT EDITOR which can use (and save) files having only LF (aka
\n) characters at the ends of the lines. DO NOT use a "word processor". You must, Must, MUST make sure that the file you upload back to the tablet contains nothing but JSON.
However you edit the file, you're going to need to either use an editor which allows you to type Unicode characters (vi and nano on the tablet do not), or you're going to have to manually look up the Unicode "code point" values for each character. (This is what I did, to make the Korean and Hebrew filenames you see in the examples on this page.)
Assuming you're entering the Unicode code points directly, you'll need to encode each non-latin character as \uXXXX, where XXXX is the code point number in exactly four hexadecimal digits. For example ...
| Language | String | Encoded |
|---|---|---|
| Korean | 안영 하세요! | \uC548\uC601 \uD558\uC138\uC694! |
| Hebrew | Shalom שלום | Shalom \u05E9\u05DC\u05D5\u05DD |
Before you save your changes ...
-
Be aware that some languages (such as Hebrew or Arabic) are written as "right-to-left" text. The tablet will show strings of these characters in right-to-left on the display. Be careful to enter their code point values in right-to-left order as well.
For example,
שis "ש". It's the first character in the string in the file, but it appears at the far right when the word is shown on the screen. -
DO NOT edit anything other than the value on the
"visibleName"line. -
MAKE SURE the string has double-quotes before and after the title.
-
If the line you edited DID HAVE a comma at the end, don't remove it.
-
If the line you edited DID NOT HAVE a comma at the end, don't add one.
{
    "createdTime": "1728093402780",
    "lastModified": "1728094480054",
    "lastOpened": "1728095240368",
    "lastOpenedPage": 0,
    "parent": "",
    "pinned": false,
    "type": "DocumentType",
    "visibleName": "Shalom \u05E9\u05DC\u05D5\u05DD"
}
ℹ️ Different file formats
This example is from an rM2 running 3.14.1.9. Different versions of the reMarkable software may include more, less, or "other" keys than the ones shown here.
As long as the
"visibleName"line is the only one you edit, you should be fine.
Once you're sure that the file is correct, save your changes.
Restart xochitl
After renaming a document by hand, you need to restart xochitl to make it re-read the documents' names from the disk.
systemctl restart xochitl.service
Assuming you did everything correctly, you should see the document's new name in the file browser.
Issues with reMarkable
After contacting reMarkable support to report an incorrect statement on one of their support web pages, I received an email asking me to take a survey. Very simple, the usual 1-10 NPS (net promoter score), plus an open text entry field to explain why I chose the score I did.
I have a whole list of things that I could tell them, and usually these fields have a limit on how much text you can enter, so I figured I would type it up and put the list online, and just give 'em the URL.
Then it occurred to me, other people may want to see the list, and suggest other things to add to it, so ... I'm putting that list here.
Last updated: 2023-11-11
General
No information about internals
My biggest issue is probably the fact that they designed the reMarkable tablets with the ability to SSH into it, but then just stopped. There is no documentation about what people will find if they do this, or why they might want (or not want) to do this. In addition, any time people have asked reMarkable about it, their questions have gone un-answered.
A lot of people, including myself, have figured out bits and pieces of how things work. I started a web site where I'm documenting what I'm finding, and others have used this information (not necessarily from my site, but the same kinds of information) to write their own utilities to manage the tablets, separately from reMarkable's official tools.
However. Regardless of what anybody has figured out, there's always the fact that reMarkable could change any or all of it, at any time, without notice. I've spoken (through Reddit) to a few people who have some cool ideas for programs, either on the tablet or on a computer which talks to a tablet, but they don't want to spend a bunch of time developing it, only to have it suddenly stop working every time a new firmware version is released.
Having some kind of policy statement from reMarkable about this would help. For example, "this file's format is guaranteed to stay the same for all 3.x firmware versions, but may change in 4.x".
Limited sleep options
The tablet has an "Auto sleep" function where, if you don't interact with it for 20 minutes, the tablet will put itself to sleep. The time should be configurable, either as a list of options (with "one hour" as one of the options), or as an entry field where the user can enter how many minutes (where I would enter 60.)
Limited security options
The tablet has a feature which allows you to set a four-digit PIN number to unlock it. This should be more configurable.
Ideally it should allow the user to create an arbitrary-length password, and the "correct' password should be stored as a hash (like what most Linux machines store in the /etc/shadow file) so that if somebody finds a backup, they won't be able to just read the password out of the xochitl.conf file like they can with the current four-digit PIN.
If that's too hard, then at least allow arbitrary length numeric PIN codes - maybe with a minimum of four digits, but allow longer numbers. As an example, the code I currently use to unlock my phone is ten digits, and at one point in the past it was 17 digits.
Cloud service
Required
The software on the tablet seems to have been designed around the idea that every tablet would be connected to the cloud service. It doesn't look like a whole lot of thought went into tablets that don't connect to the cloud.
-
Some people are not ALLOWED to connect to the cloud, because of corporate policy or legal compliance reasons.
One example of this would be HIPAA, the US law covering privacy of healthcare records. I know it's possible to sign a BAA which would make reMarkable liable in case of a breach due to their cloud systems, but (1) even with a BAA in place I wouldn't want to take that chance with healthcare information in the first place, and (2) there are other reasons, such as lawyer/client confidentiality, which would preclude people from using the cloud service.
-
Others, like myself, don't WANT to connect to the cloud.
In my case, it's because the cloud is hosted with google, who I absolutely do not trust at all. Their core business is advertising, and I don't trust them not to scan through copies of the sync'ed files from my tablets and use them to build or refine an "advertising profile" against me, or to write their own handwriting recognition program to convert pen strokes to text - again, to feed their ad-targeting database.
This is a problem because some parts of the tablet's functionality require the cloud service.
-
The third-party sync functionality with Dropbox, google, and microsoft, was designed to work through the cloud.
When you create a link to these services, the authentication tokens are held on reMarkable's cloud servers. The tablet itself never talks to these services - when you exchange files with them, the cloud servers are actually doing the work, and the tablet picks up the changes through the sync mechanism it already uses.
This is definitely a simpler design to implement, but it means that reMarkable employees, and anybody who hacks into reMarkable's servers, have access to those authentication tokens, and therefore have access to your accounts on these third-party services. It's possible for them to read, add, delete, or change any files that you have access to on those other services, whether you interact with the files through the reMarkable tablet or not. (I'm not saying that reMarkable employees would do this, but ... How often do you read in the news about these "ransomware" jokers selling millions of peoples' data on the "dark web"?)
The software which talks to these external services could have been designed to run directly on the tablet, either by building their clients into the tablet software, or even better, through a documented "plug-in" interface, which would allow others to write file-exchange plug-ins that could also run on the tablet. In my case I have no interest in Dropbox, google, or microsoft, but I would be VERY interested in using (or maybe writing?) a plug-in to exchange files with Keybase.)
-
The handwriting recognition is performed by a third-party company called MyScript. When you ask for handwriting to be "recognized", the tablet sends the pen-strokes to a reMarkable cloud server, which then forwards the information to MyScript.
In a way this makes sense. I'm sure reMarkable is paying for an API key with MyScript, which it uses for all of the handwriting recognition requests from all reMarkable tablets, and they don't want their API key to exist on the tablets where "hackers" like me could find it and use it for handwriting recognition requests from other devices or programs.
I do wish they had built in an option for users to get their own API key from MyScript, and have the tablet send handwriting recognition requests directly to them, but ... to be fair, that would mean two totally different "code paths" for handwriting recognition, which would make the software harder to maintain and support.
-
I feel like I'm forgetting something, like there was some other functionality on the tablet which requires the cloud service. If I think of it I'll update this document.
Not encrypted
(This is the big one.)
The files stored in the cloud are not encrypted.. If they were, and the encryption keys were only available to the endpoints (tablets, desktop/mobile apps, etc.), it would mean that reMarkable (and google, and random governments or government-ish groups around the world who can create "legal orders" of some flavour or another) would not be ABLE to read peoples' documents.
A "master copy" of each account's encryption key could also be stored in the cloud, in a file which is itself encrypted using the user's login password (or even better, using a separate passphrase), so that only people who know the password would be able to access the encryption key to access the files, or to set up a new device on the account.
Encrypting the files in such a way that nobody other than the user (including reMarkable, google, intelligence agencies, and random anklebiters who manage to hack into any of their systems) can read the files stored in the cloud, would go a LONG way towards making people like myself, and companies who currently don't allow reMarkable tablets to be used, trust the cloud service.
Tablet software
The software running on the tablets is actually pretty good, but like anything else, there's room for improvement.
I know the tablet was designed around the idea of being a "minimal" experience, with just the minimum functionality needed to simulate writing in a paper notebook, but there are things that I almost immediately felt were missing ... and after spending some time on Reddit, it's clear to me that I'm not the only person who feels this way.
Templates
The reMarkable software comes with a collection of "templates", which serve as a "background layer" for each page.
Different people have different needs. In my case, some of these templates are useful (lines, grids, dots, and "blank") but most of the others (sheet music lines, perspective grids for art, storyboards, half-page variants of lines/grids/dots, etc.) are just "taking up space", and there's so many of them that it feels like they're in the way when I need to choose the template for a new page.
Also, I have created several "custom templates" that I use every day. I normally use a third-party program called RCU to upload my own templates to the tablet, but I also can upload them by hand and manually edit the templates.json file so xochitl knows about them.
I really wish the tablet had a built-in way to manage templates.
This would include ...
-
Adding a way for the built-in web server, and for the "cloud", to handle uploading custom template files.
This would need to include verifying that the uploaded files are valid templates (i.e. 1404x1872 PNG/SVG files), and rejecting invalid uploads (with an error message sent to the browser, rather than just silently failing like invalid document uploads do).
-
Storing user-supplied template files, and the
templates.jsonfile itself, under/home/root/somewhere, so they don't "disappear" when the firmware is updated. -
Updating the UI on the tablet to allow the user to hide or un-hide the built-in templates, and rename or delete custom templates. (Built-in templates should not be deleted or renamed, only "hidden vs shown" when selecting a template for a page.)
-
Allowing the "icon" for each template (shown when choosing a template for a page) to be customized. For some of the templates (graphs, dots, etc.) it makes sense to have a zoomed-in portion of the page, but for others it would make sense to use a miniature version of the entire page. (It may be worth adding a way to upload custom icon files for templates?)
The current implementation uses a collection of "icons" which is fixed into a custom font file, making it very difficult (although probably not impossible, I haven't looked in detail yet) to customize. These should be actual thumbnail images, generated on the fly the first time they're needed, and then stored (like you already do with notebook page thumbnail images).
-
Providing documentation on what makes a file usable as a template.
In particular, explain how the "repeating background" thing works for the built-in templates, so that people who design their own templates which should logically repeat when a page is extended downward (or to the right), can design them accordingly. Specifically, how does the tablet know how many rows of pixels to repeat at the bottom of the template when "extending" a page downward?
Splash screens
Everything I said above about templates, also applies to the "splash screens", specifically the following files in the /usr/share/remarkable/ directory:
batteryempty.pngfactory.pngoverheating.pngpoweroff.pngrebooting.pngrestart-crashed.pngstarting.pngsuspended.png
The software could provide a way for users to upload their own versions of these files, or at least suspended.png and poweroff.png (again, via the built-in web interface and/or the "cloud").
The documentation should also explain how many pixels to reserve at the bottom of the image to leave room for the "owner information" to be overlaid when the "Personal information" setting is enabled. For my own sleep screen I guessed and it worked out okay, but it would have been nice not to need to guess.
Text
The way the tablets handle text right now is ... I don't know any other way to say it, it's horrible. It's like whoever designed the feature, figured that every page should be either text or handwriting, but not both at the same time ... and that text pages should always be laid out exactly the same way.
I don't know for sure what the "right way" to handle text might be. The only times I've dealt with text as part of a GUI was using gimp or Graphic Converter, both of which treat text as an "object" which exists "above" the canvas, and gets "flattened into" the image when saving the file to an image file which doesn't support "layers".
So my suggestion is this ...
-
Text would be contained in "text objects".
-
Each object would have a font, font size, and alignment setting. All text within the object would use the same font, size, and alignment.
-
Text will support modifiers (bold, italic, underline, strike-through, and super/subscript) for character ranges within the text.
-
Each object would have its own position on the page, totally independent of other objects or pen strokes.
In particular, if text objects end up overlapping with each other or with pen strokes, or if a user draws pen strokes "on top of" an existing text object, that's what the user wants, so allow it to happen. Don't try to "move text out of the way", or automatically enforce weird margins to try and make text avoid pen strokes or other text objects. People are going to want to add text and then manually circle or highlight that text using the stylus.
-
Each object's width would be resizable. The height would be automatic, based on how much text is in the object. Each object would have a minimum height of one line of text, based on the object's font size.
-
If an existing text object is resized, the text within the object would automatically "re-flow" to use the new area of the object. If an object contains more text than the size of the object, the object's height would be adjusted accordingly. (And if this adjustment makes it necessary to extend the lower edge of the page, the page would be adjusted as well.)
-
Each object can optionally be drawn with a border, and with "padding" between the border and the text. The user should be able to select whether a border is used or not, and if so, adjust the colour and width of the border, the line style (i.e. solid line, dashes, dots, etc.), the corner style (sharp corner, curved corner, etc.) and the amount of padding between the border and the text.
Drawing tools
Tools to draw simple shapes would be awesome. This would include things like circles/ellipses, squares/rectangles, and generic polygons. The shapes could be solid (filled) or empty (outline only).
Also, maybe a setting of some kind that, if enabled, would ensure that all lines are either "always straight", or "always straight and aligned with the nearest 45° angle". (This would only affect lines above a certain length, to preclude interfering with normal handwriting.) I'm not sure if this is already happening in the 3.8.2 release or not, but if so, that's something you could have mentioned in the release notes.
And, a "fill" tool that would flood an area with "ink".
Image support
It would be nice if the tablet had a way to handle images - maybe as "image objects", similar to the "text objects" I suggested above, which would contain a raster image.
Images could be created by allowing images to be selected and copied from existing documents, either "from the current layer only", or "from all visible layers", and then pasted as a new "image object". If a user needs to upload an image, they can use a PDF and then copy/paste the image from the PDF.
Once pasted into a page, image objects could be moved and resized. There would be a setting where the user can choose either allow or not allow the aspect ratio to be changed while resizing.
Image objects, text objects, and pen strokes should be allowed to freely overlap with each other. Don't try to move things around to avoid this, trust the user to know what they want to do.
Ideally, images should support transparency. This means real transparency, not "faking it". In particualr, white pixels should "cover up" whatever is "below" it with white, like the eraser tool used to do before 3.8.0.
Interoperability
I've been advocating for open-source software for over twenty years now. reMarkable built these tablets on a foundation of Linux and other open-source software, I think it would have only been fair if they had designed things to be as "open" as possible, including documented mechanisms to operate in conjunction with other software.
A few examples ...
-
They could have implemented third-party upload/download functionality on the tablet itself, using a "plug-in" mechanism that allows new services to be added without a full operating system update, using a documented API that would allow people to write their own plug-ins to work with other file storage services.
They could have included plug-ins for standard services like SMB, NFS, WebDAV, and
sshfs, so people could upload/download files to local file servers at their home/office.Adding this now would be a huge effort. I'm not pushing for this, I'm just saying that I wish it had been designed this way to begin with.
-
They could have added a signal handler, or maybe an API server listening on
http://127.0.0.1:nnn/, so other processes on the tablet could tell the software to re-scan its file storage after documents (or templates) are added, deleted, or modified.This actually wouldn't be a huge effort to add in now, especially if it's just a signal handler. If I had access to (and was familiar with) the source code I could probably have a pull request ready in a day or two for the signal handler idea, or maybe a week or two for the API server idea (which could later be used to support other operations as well).
#justsayin -
They could publish the API used by the cloud service, and commit to not making any breaking changes to it. This would make it easier to write programs with interact with the cloud, and it would also make it easier to write things like rmfakecloud, which can provide the same "cloud" functionality, so that companies (and people) don't have to worry about their data leaving their own systems.
This would require the tablet to have a new configuration item for "sync server hostname", but otherwise the end user experience would be the same.
Don't get me wrong, I realize that the way they're doing it is perfectly legal according to the various software licenses involved. I have no reason to believe that the reMarkable is violating any licenses, that's not what I'm saying at all.
What I am saying is ... it seems like such a waste. There are so many things that people could be doing with these tablets, if reMarkable had designed some "hooks" into the software to allow other programs to "play nice" with it. Obviously they can put a bunch of disclaimers on their web site (and on the tablet) saying that they don't provide support beyond a certain point, and maybe even make the user tap an "I agree" button on the tablet before showing them the root password for the first time.
But the community, probably the existing community, would end up helping each other out and "providing support" for people who want to customize things.
Actually ...
While I was writing the section above, it occurred to me that reMarkable could also release their own "private cloud server" program, that a company could run on a Linux server in their own datacenter (or a person like me, in their home or on a VPS). Customers could use this to ensure that their tablets' data would never leave their network, which could bring in more tablet sales from people who like the idea but can't allow their data to leave systems under their own control.
Handwriting recognition would be an issue. The customer could ...
- Get their own API key with MyScript
- reMarkable could include an API key as part of a paid service contract
- Configure the server to not perform handwriting recognition at all
I would suggest making the program itself free, and charging a subscription based on how many tablets are sync'ing against it, with the first one or two tablets for free. Pricing should be lower than the reMarkable Connect service offering, since the customer would be providing the resources that the "cloud" runs on.
This could also open a new revenue stream, selling support contracts for these private servers. (My "finders fee" for the idea would be one lifetime server license with unlimited tablets, with the agreement that I won't be selling it as a service.)
Updates
The "official" mechanism works by "just waiting for the update to show up". This might work for some people, but some users want or need to control when the firmware on THE TABLET THEY OWN is updated.
Under the covers, the actual filenames containing the firmware updates appear to be deliberately obfuscated, most likely to prevent people from being able to manually download the files and use third-party software like remarkable-update to install them on their tablets.
People who are inclined to manually install firmware updates, are generally able to do so.
Especially if there's a simple and documented way to do so, such as using scp to upload the firmware file, then running a command like "install-firmware FILENAME" on the tablet.
PLEASE stop hiding the firmware update files.
If something about the current software requires the non-predictable portion of the filename, then publish a web page with the filenames and download links, and keep it updated whenever new releases, normal or beta, are released.
Support
I haven't had to interact with reMarkable's support people very much. When I have, the people are always polite and professional, but I haven't always been able to get a good answer.
To be honest, I tend to have this problem just about every time I need to contact a company's "tech support" department. I've been programming computers since 1981, and I used to build and run ISPs for a living. In many cases I already know what the problem is, and just don't have access to fix it myself.
No escalation (?)
Most companies have a way to escalate questions to a "senior" person, and then if necessary, to an "engineer" of some kind. As examples, my ISP, my credit union, and a global computer company who I'm not allowed to identify, have all given me alternate contact methods which bypass the normal support queues, after realizing that I'm never going to call with something simple. (The real trick is, I know how to do my own troubleshooting before calling "tech support".)
The impression I've gotten about reMarkable is ...
-
Their support people seem to have a collection of canned responses they're supposed to use.
For most users this may be okay, but I'm not "most users".
-
Either they don't have a way to escalate issues, or they're under orders to avoid using it.
It would be nice if there were a way for users with "more advanced" questions to talk with somebody who can provide "more advanced" answers, rather than just "that's all we can tell you, have a nice day".
To be fair, part of my opinion here is based on what other people have described on Reddit. I've only ever had to contact reMarkable support twice, with the second time being to let them know that something on one of their support web pages was wrong (see below).
Hopefully they do have a way to escalate calls, and I've just never had a reason to find out.
Answering the wrong question
On 2023-11-08 I sent in a report about this page on the support.remarkable.com web site , which at the time was giving out incorrect information (that pages could be freely moved between PDFs, EPUBs, and regular notebooks).
The first response I received tried to explain how to do something or other with the Text tool (which I don't use, and certainly didn't ask about), and then included a link to a support page explaining how "gestures" work (which I already know, and also didn't ask about). Nothing about the response had anything to do with my original report.
I responded and repeated the original problem. I didn't hear back from that, but when I looked today (2023-11-11) the page had been updated. However, I feel like there's still room for improvement.
Right now the page says ...
Tapping Move in a notebook will allow you to either move pages within that notebook, or from one notebook to another. In PDFs or ebooks, you can move note pages within the document or into an existing notebook.
(Emphasis on "note pages" is mine)
I think the page should clarify that the term "note pages" refers to extra blank pages that people can add to PDF/EPUB files, for the purpose of adding their own notes. It should also plainly state that pages which originally came from a PDF or EPUB file, cannot be moved to other documents.
SSH Access
The reMarkable tablets are designed to allow users to easily access the internal software. In addition to charging the battery, the USB-C port acts like an ethernet interface when you connect it to a computer. It also runs a DHCP server, which assigns an IP address to the computer and allows the computer to access the tablet.
The tablet allows incoming SSH connections from the computer, as the root user. When the tablet starts for the first time, it makes up a random password for this user. You will be able to find the password in the settings screen.
Creating an SSH key pair
If you want to be able to SSH into your tablet (or any other Linux machine) without a password, you will need to generate an SSH key pair. Having a key pair allows you to authenticate to the tablet without having to type a password every time.
There are probably thousands of pages on the net which explain how to create a key pair, so I'm not going to go into a whole lot of detail about it. The quick version is ...
$ ssh-keygen -t rsa -b 2048
Generating public/private rsa key pair.
Enter file in which to save the key (/Users/jms1/.ssh/id_rsa):
Enter passphrase (empty for no passphrase):
Enter same passphrase again:
Your identification has been saved in /Users/jms1/.ssh/id_rsa
Your public key has been saved in /Users/jms1/.ssh/id_rsa.pub
The key fingerprint is:
SHA256:6HXEMxPkVDSoTHWfYXZJybczcMmzrzkkVaHYMxDt4ZA jms1@laptop.local
...
BE SURE TO USE A STRONG PASSPHRASE. Not just a password, but a passphrase. This is because if anybody manages to steal a copy of your secret key file, this passphrase will be the only thing keeping them from being able to use it.
This will create two files in your $HOME/.ssh/ directory.
-
The
id_rsafile will contain the SECRET key, encrypted using whatever passphrase you entered. This file should never be shared with anybody, or copied to any machine that you don't have physical control over. -
The
id_rsa.pubfile contains your PUBLIC key. This can be shared with others, and in this case will be copied to the tablet. Below when it talks about a public key file, this is the file it's talking about.
Note that if you have an ED25519 key pair, the files will be named id_ed25519 and id_ed25519.pub.
Accessing the tablet via SSH
Configure your SSH client
The tablet's SSH server is dropbear, which uses the RSA algorithm for the Host Key.
The ssh client that comes with macOS and Linux is OpenSSH.
The RSA algorithm has been around for many years now, and there are newer algorithms out there. The idea of using RSA host keys is slowly moving towards deprecation, so the newest versions of OpenSSH don't support them by default, although they can be configured to allow it.
In order to be sure that your OpenSSH will be able to connect to the tablet, add the following to your workstation's $HOME/.ssh/config file.
########################################
# reMarkable 2

Host 10.11.99.1 rm rm2 remarkable remarkable2
    Hostname                10.11.99.1
    User                    root
    HostKeyAlgorithms       +ssh-rsa
    PubkeyAcceptedKeyTypes  +ssh-rsa
    ForwardAgent            no
    ForwardX11              no
Note that if you already have a $HOME/.ssh/config file, check to see if it has a Host * section. If so, the Host * section should be the last Host section in the file.
Make sure your workstation has a 10.11.99.x IP
When the tablet is connected to a computer, the computer "sees" a USB ethernet device, with the tablet "plugged into the other end" of the ethernet wire. The tablet assigns itself 10.11.99.1/29, and runs a DHCP server which will assign an address in the 10.11.99.(2-6) range to the computer.
Once the cable is connected, make sure the interface was created on your workstation, and that it has an appropriate IP address. This will generally involve running a command like this:
(jms1@laptop) 205 $ ifconfig -a
...
en6: flags=8863<UP,BROADCAST,SMART,RUNNING,SIMPLEX,MULTICAST> mtu 1500
	options=6467<RXCSUM,TXCSUM,VLAN_MTU,TSO4,TSO6,CHANNEL_IO,PARTIAL_CSUM,ZEROINVERT_CSUM>
	ether 2a:ac:e7:8e:1b:ba
	inet6 fe80::1063:bf1:8d0e:a0eb%en6 prefixlen 64 secured scopeid 0x18
	inet 10.11.99.3 netmask 0xfffffff8 broadcast 10.11.99.7
	nd6 options=201<PERFORMNUD,DAD>
	media: autoselect (100baseTX <full-duplex>)
	status: active
As you can see, this machine's en6 interface has 10.11.99.3 as an inet (IPv4) address.
ℹ️ I don't use ms-windows, but a few people have told me that the equivalent command on ms-windows is
ipconfig /all.
Get the root password
Once your workstation has an IP, you can find the root password in the tablet's settings screens.
-
Menu → Settings → Help
-
Tap "Copyrights and licenses"
-
On the right, below "GPLv3 Compliance", near the bottom, will be a notice saying the following:
The General Public License version 3 and the Lesser General Public
License version 3 also requires you as an end-user to be able to access
your device to be able to modify the copyrighted software licensed
under these licenses running on it.

To do so, this device acts as an USB ethernet device, and you can connect
using the SSH protocol using the username 'root' and the password
'xxxxxxxxxx'.

The IP addresses available to connect to are listed below:

10.11.99.1
SSH into the tablet
Once you have the password, you can SSH into the tablet. The first time you do this, you will need to use the password.
(jms1@laptop) 212 $ ssh root@rm
The authenticity of host '10.11.99.1 (10.11.99.1)' can't be established.
ED25519 key fingerprint is SHA256:aLkWmgMQAF/BmQVaNyOlAz5y6pcOz5TEKM/dW/hFh5A.
This key is not known by any other names.
Are you sure you want to continue connecting (yes/no/[fingerprint])? yes
Warning: Permanently added '10.11.99.1' (ED25519) to the list of known hosts.
root@10.11.99.1's password:
reMarkable
╺━┓┏━╸┏━┓┏━┓   ┏━┓╻ ╻┏━╸┏━┓┏━┓
┏━┛┣╸ ┣┳┛┃ ┃   ┗━┓┃ ┃┃╺┓┣━┫┣┳┛
┗━╸┗━╸╹┗╸┗━┛   ┗━┛┗━┛┗━┛╹ ╹╹┗╸
reMarkable: ~/
According to their Github repo, "zero sugar" is reMarkable's name for the Linux kernel for the rM2, and "gravitas" is the kernel for the rM1. (Also, finding this answer was the first I had seen any mention of reMarkable having any publicly available source code.)
If you're curious, the message is coming from the tablet's
/etc/motdfile.
Create .ssh/authorized_keys
If you don't have an SSH key, and didn't create one above, you can skip this section.
If you DO have an SSH key that you use on a regular basis, you can install the public key in the tablet and then use the secret key to SSH into the tablet without having to enter a password.
You can use the same SSH key pair to access other machines by installing the same public key on those machines, using the same process shown below.
For what it's worth, I use my personal SSH key pair to access about thirty different machines, and I use a different SSH key pair for work which lets me access several hundred machines. (I also store my SSH secret keys on YubiKeys rather than on the computers' disks, but that's a topic for a different web page entirely.)
While I was figuring this out, I was pleasantly surprised to find that the tablet's SSH server supports ed25519 SSH keys. (One of my normal SSH keys is an ed25519 key.) I was also happy to find that nano (my preferred text editor) was also already installed. The vi and vim editors are also installed, if you're more comfortable using them.
-
On your local machine, copy your SSH public key file to the tablet.
(jms1@laptop) 1 ~ $ scp $HOME/.ssh/id_rsa.pub root@rm: id_rsa.pub 100% 763 314.1KB/s 00:00 -
Create the
$HOME/.sshdirectoryreMarkable: ~/ mkdir ~/.ssh -
Move the
id_rsa.pubfile into the.sshdirectory, and at the same time rename it toauthorized_keys.reMarkable: ~/ mv id_rsa.pub ~/.ssh/authorized_keys -
Make sure the file and directory permissions are correct.
reMarkable: ~/ chmod -R go= ~/.ssh/
reMarkable: ~/ ls -laF ~/.ssh/
drwx------    2 root     root          4096 Jun 27 20:26 ./
drwx------    6 root     root          4096 Jun 27 20:21 ../
-rw-------    1 root     root          1570 Jun 27 20:26 authorized_keys
reMarkable: ~/
Once this is done, you should be able to SSH into the tablet using any of the secret keys which correspond to the public keys you stored in the $HOME/.ssh/authorized_keys file.
Test this by opening a new window and trying to SSH in there.
⚠️ Don't exit from this window until you've verified that it works as expected.
If you made a typo somewhere above and you can't log in, you'll still be logged in on this window and it may be the only way you can fix the problem.
(jms1@laptop) 215 $ ssh root@rm
reMarkable
╺━┓┏━╸┏━┓┏━┓   ┏━┓╻ ╻┏━╸┏━┓┏━┓
┏━┛┣╸ ┣┳┛┃ ┃   ┗━┓┃ ┃┃╺┓┣━┫┣┳┛
┗━╸┗━╸╹┗╸┗━┛   ┗━┛┗━┛┗━┛╹ ╹╹┗╸
reMarkable: ~/
There should be no password prompt, although you may be prompted for your SSH key's passphrase, especially if it's the first time you've made an outbound SSH connection using the key.
It is normal to be asked for the key's passphrase one time after logging into the machine. If you are asked for a passphrase every time you try to use the key, you'll need to set up an "SSH agent". This is normally something that your desktop environment does for you automatically. If not, you'll need to do some web searching and figure out how to do it yourself. (I have done it in the past, but it was a long time ago, I don't remember the details.)
Hint: if it's working correctly, running ssh-add -L on your workstation should print your SSH public key.
Customize the shell
This section is optional. At least, it's optional for you, it's required for me.
A "shell" is a program which shows the user a prompt, lets them type in a command, figures out what the user typed, and does whatever the user entered. This could involve running some code within the shell, but in most cases this involves starting a new process. Either way, when that process finishes, the shell goes back and shows the next prompt.
I've been using computers since 1981, and Linux since 1992. I've spent a LOT of time using shells over the years, especially on Linux machines, and have come to expect the shells I use to do certain things. This includes the shell on the reMarkable tablets.
I've been using (and updating) a ".bashrc" file on all of my machines, including macOS workstations, since ... some time around 2003 maybe? On every machine where I use a command line on a semi-regular basis, I make it a point to install my .bashrc file so the shell "feels right".
This includes the reMarkable tablet.
Install my .bashrc file
Like many other Linux systems, the reMarkable tablet's default shell is GNU bash. The shell's location is /bin/sh, but it turns out /bin/sh is a symbolic link (a "pointer", if you will) to a copy of bash.
This means I can copy the same .bashrc file I'm using on all of my other machines, and it will have all of the features I'm used to having.
In each user's home directory may be a file named .bashrc. When bash starts, it reads this file and runs the commands it contains, before showing the first prompt.
The reMarkable tablet already has a .bashrc file in place, and I don't want to lose it, so I'm going to rename it.
reMarkable: ~/ mv .bashrc .bashrc.dist
At this point there is no .bashrc file, so I'm going to copy the file from my laptop.
(jms1@laptop) 17 ~ $ scp .bashrc rm:
Back on the tablet, we can source this file to run the commands it contains, within the current shell. This is the same thing the shell does when it first starts up (when the user logs in).
reMarkable: ~/ source .bashrc
(root@reMarkable) 37 ~ #
Next we log out of the tablet and log back in, to make sure the new .bashrc file "does its thing" when we log in.
reMarkable: ~/ exit
(jms1@laptop) 18 ~ $ ssh rm
reMarkable
╺━┓┏━╸┏━┓┏━┓   ┏━┓╻ ╻┏━╸┏━┓┏━┓
┏━┛┣╸ ┣┳┛┃ ┃   ┗━┓┃ ┃┃╺┓┣━┫┣┳┛
┗━╸┗━╸╹┗╸┗━┛   ┗━┛┗━┛┗━┛╹ ╹╹┗╸
(root@reMarkable) 1 ~ #
Change the hostname
This section is optional. Unless you have two or more tablets and want the command prompt to be different on each one, so you can tell which one is which (as opposed to physically looking at what colour cover is on the tablet at the other end of the wire, which I was doing before I changed my tablets' hostnames.)
At the moment I own two reMarkable tablets. My prompt contains the machine's hostname (so does the default reMarkable prompt), so if I give the two tablets different hostnames, the prompt will serve as a reminder of which tablet I'm working with at the moment.
You may or may not want to do this, or you may want to change the tablet's hostname to some other name. It's up to you.
On each tablet, I did the following ...
-
Choose the hostname(s). I'm using
rm2aandrm2bfor my two tablets. (Update: I later got a used rM1 tablet, its hostname isrm1cif anybody cares.) -
Set the hostname. This is actually done in two places.
-
This command stores the new hostname in the file that the system reads while booting up, to set the hostname.
(root@reMarkable) 4 ~ # echo rm2a > /etc/hostname (root@reMarkable) 5 ~ # -
This command tells the running Linux kernel to use the new hostname.
(root@reMarkable) 5 ~ # hostname rm2a
(root@reMarkable) 6 ~ #
-
-
Start a new shell.
As you can see, neither one of the commands above changed the prompt. This is because
bashreads the hostname from the kernel once when it starts up, and keeps a copy in its own memory. This is faster than reading the hostname from the kernel every time it prints a prompt, and useful because systems' hostnames rarely change once the machine is running.To make
bashuse the new hostname in the prompt, you need to start a newbashshell process. There are a few ways to do this.-
Restart the current shell.
(root@reMarkable) 6 ~ $ exec $SHELL
(root@rm2a) 1 ~ $
As you can see, the "command number" started over from 1 because it's a brand new
bashprocess. -
Log out and log back in.
(root@reMarkable) 6 ~ $ exit
(jms1@laptop) 19 ~ $ ssh rm
reMarkable
╺━┓┏━╸┏━┓┏━┓   ┏━┓╻ ╻┏━╸┏━┓┏━┓
┏━┛┣╸ ┣┳┛┃ ┃   ┗━┓┃ ┃┃╺┓┣━┫┣┳┛
┗━╸┗━╸╹┗╸┗━┛   ┗━┛┗━┛┗━┛╹ ╹╹┗╸
(root@rm2a) 1 ~ $
-
After doing this on both tablets, the other tablet looks like this when I log into it:
(jms1@laptop) 22 ~ $ ssh rm
reMarkable
╺━┓┏━╸┏━┓┏━┓   ┏━┓╻ ╻┏━╸┏━┓┏━┓
┏━┛┣╸ ┣┳┛┃ ┃   ┗━┓┃ ┃┃╺┓┣━┫┣┳┛
┗━╸┗━╸╹┗╸┗━┛   ┗━┛┗━┛┗━┛╹ ╹╹┗╸
(root@rm2b) 1 ~ #
As you can see, the prompts contain the correct serial number, to remind me which tablet I'm working on.
Updating the Firmware
How the update process works
This section explains how the upgrade process normally works, for a tablet which is able to connect to the internet.
I've had mine for about a month, and have yet to actually connect it to any wifi network. I was able to figure this out using remarkable-update to "intercept" the process. The details of how I did this will be covered below.
Tablet asks about updates
The tablet sends an HTTPS POST request to a reMarkable server, asking if an update is available. The body of the request is an XML block containing ...
-
The current firmware version.
-
The tablet's serial number (i.e.
RM110-xxx-xxxxx), along with another machine-specific value calledmachineid. -
A language code. (Mine says "
en-US".) -
Several other pieces of information which, to be honest, I don't know what they're for.
Server responds
The server uses the information in the request to decide which firmware update should be installed next, and replies with an XML block containing ...
-
The URL of the directory containing the firmware image.
-
The filename, size, and hash (a kind of checksum) of the firmware image.
Tablet downloads image
The tablet builds the full URL of the image from the information in the XML response, then does a normal GET request for that URL.
The image files I've seen, including the 3.5.2.1807 image I just downloaded, are on the order of 80 MB.
Tablet processes image
The tablet's storage is partitioned into four partitions, with two of them reserved for copies of the operating system. At any given time, only one of these is marked "active", and contains the OS that the tablet should load when it boots up. Normally this will be the OS which is currently running.
-
The newly downloaded image is processed, and the new OS is written to the non-active partition. (The downloaded image file contains the OS, with other information. The OS needs to be extracted from the image.)
-
The "active" flag is changed to point to the partition where the OS was just written.
-
A black bar is shown at the bottom of the tablet's UI, telling the user to reboot in order to use the updated firmware.
The next time the tablet reboots, it will boot using the newly selected partition, and run the new OS.
Effects of upgrading
In addition to the newer software being available, any files which previously existed outside of the /home/ filesystem will be gone, and will need to be created again. This means ...
The tablet's root password will be changed
If you didn't set up a /home/root/.ssh/authorized_keys file, you will need to go into the "Settings → Help → Copyrights and licenses" screen and get the tablet's new root password, as you've probably done before, and then update wherever you may have saved the password.
The tablet's SSH host keys will be re-generated
If this happens, you may see a message like this, and your client will refuse to connect.
$ ssh root@10.11.99.1
@@@@@@@@@@@@@@@@@@@@@@@@@@@@@@@@@@@@@@@@@@@@@@@@@@@@@@@@@@@
@    WARNING: REMOTE HOST IDENTIFICATION HAS CHANGED!     @
@@@@@@@@@@@@@@@@@@@@@@@@@@@@@@@@@@@@@@@@@@@@@@@@@@@@@@@@@@@
IT IS POSSIBLE THAT SOMEONE IS DOING SOMETHING NASTY!
Someone could be eavesdropping on you right now (man-in-the-middle attack)!
It is also possible that a host key has just been changed.
The fingerprint for the ED25519 key sent by the remote host is
SHA256:oxJFqzp4eH4eI2RhqOy8AR6qIOdrhagfxvww1KKH5g0.
Please contact your system administrator.
Add correct host key in /Users/jms1/.ssh/known_hosts to get rid of this message.
Offending ED25519 key in /Users/jms1/.ssh/known_hosts:14
Host key for 10.11.99.1 has changed and you have requested strict checking.
Host key verification failed.
To clear this message, you need to tell your SSH client to "forget" the previously saved host key.
-
For OpenSSH (standard on Linux/macOS systems), the "
ssh-keygen -R" command does this.$ ssh-keygen -R 10.11.99.1 # Host 10.11.99.1 found: line 14 /Users/jms1/.ssh/known_hosts updated. Original contents retained as /Users/jms1/.ssh/known_hosts.old -
PuTTY apparently stores host keys in the registry, under this location:
HKEY_CURRENT_USER\Software\SimonTatham\PuTTY\SshHostKeysThe only way to delete already-known host keys is to edit the registry by hand.
I don't use windows so I can't really be any more detailed than this. You may want to do a web search for "putty forget host keys", but be careful with the results - a lot of pages talk about user keys, used for authentication, rather than host keys. If you see anything that mentions an
authorized_keysor.ppkfile (I think that's what putty calls the files where it stores user authentication keys?), you're looking at the wrong thing. -
SecureCRT - it looks like it stores the known hosts in a text file called
hostsmap.txt. Find this file, open it in a text editor, remove the line with the old host key, and save it.You should be able to find this file in the following locations:
-
windows: in the "Application Data" folder, which is most commonly ...
C:\Documents and Settings\%user%\Application Data\VanDyke\Known Hosts -
macOS or Linux: no idea. OpenSSH comes with the operating system for free, so other than a brief experiment on Mac OS/X years ago, I've never used SecureCRT on a non-windows platform.
-
-
If you're using some other SSH client, you'll need to figure out the mechanics of how to forget previously known host keys.
❓ If anybody can point me to documentation about how to do this for other SSH clients, or even point out any commonly used SSH clients for other operating systems, let me know and I'll add links here.
Once you've removed the old host key, the next time you SSH into the tablet you will be asked to "accept" the new host key.
$ ssh root@10.11.99.1
The authenticity of host '10.11.99.1 (10.11.99.1)' can't be established.
ED25519 key fingerprint is SHA256:oxJFqzp4eH4eI2RhqOy8AR6qIOdrhagfxvww1KKH5g0.
This key is not known by any other names.
Are you sure you want to continue connecting (yes/no/[fingerprint])? yes
Warning: Permanently added '10.11.99.1' (ED25519) to the list of known hosts.
reMarkable
╺━┓┏━╸┏━┓┏━┓   ┏━┓╻ ╻┏━╸┏━┓┏━┓
┏━┛┣╸ ┣┳┛┃ ┃   ┗━┓┃ ┃┃╺┓┣━┫┣┳┛
┗━╸┗━╸╹┗╸┗━┛   ┗━┛┗━┛┗━┛╹ ╹╹┗╸
reMarkable: ~/
Customizations will be gone
Things like custom templates, static screens, and other "unofficial" customizations will be gone.
If your customizations were installed using RCU ...
-
For custom splash screens, RCU stores copies of your files under the
/home/root/.local/share/davisr/rcu/splash/directory.When RCU connects to the tablet after an upgrade, it will notice that these files are not the same as the ones in
/usr/share/remarkable/directory (where the reMarkable software stores them), and offer to copy them into place for you. -
For custom templates, RCU stores your files in the
/home/root/.local/s hare/remarkable/templates/directory. The/usr/share/remarkable/templates/directory (where the reMarkable software's built-in templates are stored) will contain symbolic links to these files.When RCU connects to the tablet after an upgrade, it will notice the custom files without their corresponding symlinks, and will offer to "re-link" them for you.
Other methods of customizing the tablet may have their own mechanisms to automatically re-install themselves. If worse comes to worst, you may have to just re-upoad the original files.
If you do this, you will then have to go through every notebook in the tablet and find every page which was using the old template. These pages will now have no visible template, because (1) every time RCU uploads a PNG/SVG template, it assigns a random UUID as the filename within the tablet, and (2) the page's metadata will be pointing to the old UUID. As you find each page, you'll need to update them to use the new template from the on-screen menu.
Automatic updates will be enabled
Every OS upgrade will turn on the "Automatic updates" flag.
This is because the files which control whether the automatic update service is running or not, are contained in the filesystem with the OS itself. The files within the image are set up so the service is enabled.
If you don't want this enabled, you will have to remember to disable it after every OS upgrade. If you don't do this, the tablet may download and install OS updates by itself, and you won't know anything about it until you see the black bar at the bottom of the screen, telling you that an update has been installed, and you need to reboot.
If this happens to you, and you don't want to upgrade, the Undo a firmware update section below explains how to undo it.
Upgrade in Steps
At first glance, it seemed to me that reMarkable was going out of their way to prevent people from being able to download firmware images for the tablets. This led to people reverse-engineering the upgrade process (like me, with the page you're reading right now) and building their own "archives" of past software images, and third party utilities to make your tablet install whatever arbitrary firmware image you might want.
I thought this was reMarkable being a "control freak" about the firmware images, but then somebody on the RCU-Develop mailing list pointed out something that I hadn't realized.
The tablets need to be updated in "steps".
For example, you have to update from A→B and then B→C, you can't "jump over" B and upgrade from A→C directly. Or for a more specific example, my tablet started 3.0.5.56 on it, and even though there's a 3.5.2 out there, reMarkable's upgrade server said I should upgrade to 3.2.3.1595.
ℹ️ After I upgraded from
3.0.5.56to3.2.3.1595, the next version it offered me was3.5.2.1807, so I only had to do a total of two upgrades.Not a huge inconvenience, plus it gave me two upgrade processes' worth of information to use in figuring out the details of how upgrades work.
I'm not 100% sure why they require that upgrades be done in "steps", however I do have an educated guess (based on being a software developer for 20+ years). My guess is ...
-
The files stored in the tablet have a certain format, which may or may not change from one firmware release to another.
-
Part of the firmware update process involves converting the existing data files to the format used by the new firmware.
This is why you shouldn't "downgrade" without also doing a factory wipe, because once the data files are converted to a newer format, the older firmware might have problems reading them.
-
The conversion process only knows how to convert from a limited number of "old versions". So in the A-B-C example above, the converter in the "C" firmware may only know how to convert B→C, but not A→C.
Making users upgrade "in steps" means that every user whose files are "version X", arrived there using the same "chain of format upgrades" as everybody else, so there will only be one set of "upgrade code" to have to support.
Getting firmware images without updating
My own tablets don't connect to the internet at large. (They do connect to the wifi network at my house, but my firewall is configured with rules to not forward traffic from the tablets to the outside world. This allows me to SSH into the tablets without a USB cable, and allows my Linux server to automatically back up the tablets whenever they're connected and not sleeping.)
Because of this, I have to use remarkable-update to install firmware updates. However, that still leaves me with the problem of how to get the update images.
The process I use is below.
-
This works with macOS and Linux, and it might work for windows, if the tools are avaliable for it.
-
I'm using the
10.11.99.xIPs which are normally used when the tablet is connected to the computer via USB cable. If you connect to your tablet using wifi, or if you've manually changed the tablet's DHCP server to use a different IP range, you will need to adjust some IP addresses below.
ℹ️ One of the items on my "to-do list" is to write a script which automates this process. This may or may not include installing the new image on a tablet, I'm not sure yet.
⚠️ The reMarkable 1 and reMarkable 2 use different images.
This is because they have different hardware. The rm2 images, for example, don't include support for the three hardware buttons on the rm1.
If you own both models, you will need to do this process once for each model, and you'll need to be careful to install the correct image on each tablet.
Identify your computer's IP address
Before we get into this, there's something that you'll need to understand.
Computers don't have IP addresses.
Computers have interfaces, and INTERFACES have IP addresses.
Every device which talks on a network will have one or more interfaces. The most common examples of this are ethernet ports, wifi connections, and a weird thing called a "localhost" interface which usually has
127.0.0.1or::1as its address, and doesn't connect to anything other than the machine itself.When you connect a reMarkable tablet via USB cable, the computer thinks it's a USB ethernet interface, and uses DHCP to request an IP address. The tablet runs a DHCP server on the USB cable's "network", which assigns the interface at the computer's end of the cable, an IP address in the same IP range as the tablet. Normally the tablet is
10.11.99.1, and the computer will be assigned an address in the10.11.99.(2-6)range.
Identify the IP address to which the tablet will need to connect, in order to reach your laptop.
You can see your computer's IP addresses using a command like "ip -4 addr show" or "ifconfig -a". (For windows I think it's "ipconfig /all" maybe?) You're looking for the IP which is in the same network segment with the tablet - if you're connected via USB cable this will be in the 10.11.99.(2-6) range.
This document will assume the IP is 10.11.99.2, adjust below as necessary.
Start a listener
On the computer, start a copy of either netcat (aka nc) or ncat, listening on a port. One or both should be available from your system's software repositories (i.e. yum, dnf, apt, brew, etc.)
For this document I'll use nc (because it comes with macOS) and 8000 as the port number.
$ nc -ln 10.11.99.2 8000 | tee 01-req.txt
At this point, your computer is listening for incoming network connections. Listening on the 10.11.99.x interface means that only other devices on that network segment (i.e. the tablet) will be able to connect - if something on a wifi or other network tries to connect ro port 8000 they won't be able to.
You won't see any output right away, this is fine. When the tablet sends a request to ask for available upgrades, you will see it in this window, and it will be sent to the 01-req.txt file as well.
Configure the tablet
We need to make the tablet talk to our listener when searching for updates.
SSH into the tablet, and edit the /usr/share/remarkable/update.conf file.
# nano /usr/share/remarkable/update.conf
If this is the first time you've done this (since the last OS upgrade), the file will contain something like this:
[General]
#REMARKABLE_RELEASE_APPID={98DA7DF2-4E3E-4744-9DE6-EC931886ABAB}
#SERVER=https://updates.cloud.remarkable.engineering/service/update2
#GROUP=Prod
#PLATFORM=reMarkable2
REMARKABLE_RELEASE_VERSION=3.5.2.1807
Add a SERVER= line at the bottom which points to our listener. If you already had a SERVER= line which was not commented out, either comment out the existing line, or edit that line.
- Use
http://rather thanhttps://. - Use the IP for the computer, and the port number where your listener is ... listening.
- Copy the rest of the URL from the commented-out
SERVER=line.
When you're finished, the file should look something like this:
[General]
#REMARKABLE_RELEASE_APPID={98DA7DF2-4E3E-4744-9DE6-EC931886ABAB}
#SERVER=https://updates.cloud.remarkable.engineering/service/update2
#GROUP=Prod
#PLATFORM=reMarkable2
REMARKABLE_RELEASE_VERSION=3.5.2.1807
SERVER=http://10.11.99.2:8000/service/update2
Save your changes and exit the editor.
- For
nano, type CONTROL-X. - For
vi, hit ESC then ":wq".
Trigger an update attempt
-
Make sure the "update-engine" service is NOT running.
This is especially important if you've just edited the config file - if it was already running and you don't stop it, it won't know about your config changes and will try to talk to whatever
SERVER=was previously configured in the file.systemctl stop update-engine.serviceThis is the same as turning off the "automatic updates" switch in the tablet's Settings screen.
-
Wait a few seconds, then start the service.
systemctl start update-engine.serviceThis is the same as turning on the "automatic updates" switch in the tablet's Settings screen.
-
Tell the service to check for updates NOW.
/usr/bin/update_engine_client -check_for_updateYou won't see anything happening, but behind the scenes the "update-engine" service will be sending a request for available updates to your listener. (The listener won't answer the request, but that's fine - we're not trying to actually do an update right now.)
-
Wait 5-10 seconds, and then stop the "update-engine" service.
systemctl stop update-engine.serviceWhen you stop the service, the listener on your computer should also stop by itself.
Examine the request
If you're curious, you can look at the request that the tablet sent to your listener (i.e. that it thought it was sending to reMarkable).
$ cat 01-req.txt
POST /service/update2 HTTP/1.1
Host: 10.11.99.2:8000
Accept: */*
Content-Type: text/xml
Content-Length: 883

<?xml version="1.0" encoding="UTF-8"?>
<request protocol="3.0" version="3.5.2.1807" requestid="{nnnnnnnn-nnnn-nnnn-nnnn-nnnnnnnnnnnn}" sessionid="{nnnnnnnn-nnnn-nnnn-nnnn-nnnnnnnnnnnn}" updaterversion="0.4.2" installsource="ondemandupdate" ismachine="1">
    <os version="codex 3.1.266-2" platform="reMarkable2" sp="3.5.2.1807_armv7l" arch="armv7l"></os>
    <app appid="{98DA7DF2-4E3E-4744-9DE6-EC931886ABAB}" version="3.5.2.1807" track="Prod" ap="Prod" bootid="{nnnnnnnn-nnnn-nnnn-nnnn-nnnnnnnnnnnn}" oem="RM110-nnn-nnnnn" oemversion="3.1.266-2" alephversion="3.5.2.1807" machineid="nnnnnnnnnnnnnnnnnnnnnnnnnnnnnnnn" lang="en-US" board="" hardware_class="" delta_okay="false" nextversion="0.0.0" brand="" client="" >
        <ping active="1"></ping>
        <updatecheck></updatecheck>
        <event eventtype="3" eventresult="2" previousversion=""></event>
    </app>
</request>
As you can see, there are two "parts" of the file - headers and body, separated by a blank line. The body is an XML message containing information about the tablet making the request, particularly the "current" firmware version. This is because firmware updates need to be done in "steps", as explained above.
Note that I have obscured some values in the example which could be used to identify the tablets I used as an example while writing this page.
Extract the request body
We're going to send this request to reMarkable. In order to do this, we'll need to extract just the body from the request. You can do this by hand, but it's easier to use sed for this.
sed '1,/^\r*$/d' 01-req.txt > 02-req.txt
This sed command is ...
-
START,END d= delete lines fromSTARTtoEND(inclusive)-
START is "
1", meaning the first line of the file -
END is "
/^\r*$/", meaning the first line in the file which is either empty, or contains only "\r" (the "carriage return" character, ASCII 13).This is because the request that the tablet sends uses "
\r\n" as the line ending. Some versions ofsedmay recognize this as a line ending, but most will only recognize "\n" (the "newline" or "line feed" character, ASCII 10) as the line ending, so that supposedly blank line may actually contain a "\r" character. The pattern "^\r*$" matches either a line containing just "\r", or a line containing nothing at all.
So this command will delete lines from the beginning of the file until the empty line (between the headers and the body), and then copy all other lines as-is.
-
If you're curious, you can inspect the results afterward, and see that it only contains the request body.
$ cat 02-req.txt
<?xml version="1.0" encoding="UTF-8"?>
<request protocol="3.0" version="3.5.2.1807" requestid="{nnnnnnnn-nnnn-nnnn-nnnn-nnnnnnnnnnnn}" sessionid="{nnnnnnnn-nnnn-nnnn-nnnn-nnnnnnnnnnnn}" updaterversion="0.4.2" installsource="ondemandupdate" ismachine="1">
    <os version="codex 3.1.266-2" platform="reMarkable2" sp="3.5.2.1807_armv7l" arch="armv7l"></os>
    <app appid="{98DA7DF2-4E3E-4744-9DE6-EC931886ABAB}" version="3.5.2.1807" track="Prod" ap="Prod" bootid="{nnnnnnnn-nnnn-nnnn-nnnn-nnnnnnnnnnnn}" oem="RM110-nnn-nnnnn" oemversion="3.1.266-2" alephversion="3.5.2.1807" machineid="nnnnnnnnnnnnnnnnnnnnnnnnnnnnnnnn" lang="en-US" board="" hardware_class="" delta_okay="false" nextversion="0.0.0" brand="" client="" >
        <ping active="1"></ping>
        <updatecheck></updatecheck>
        <event eventtype="3" eventresult="2" previousversion=""></event>
    </app>
</request>
Send the request to reMarkable
This will send a POST request to reMarkable, with the original message body that came from the tablet. As far as reMarkable knows, your tablet is sending the request.
curl -XPOST \
   -H 'Content-Type: text/xml' \
   -H "Content-Length: $( wc -c 02-req.txt | awk '{print $1}' )" \
   --data-binary @02-req.txt \
   https://updates.cloud.remarkable.engineering/service/update2 \
   > 03-response.txt
As you can see, this saves reMarkable's response in an 03-response.txt file.
Get the image URL
Look at the response you received from reMarkable.
$ cat 03-response.txt
<?xml version='1.0' encoding='UTF-8'?>
<response protocol="3.0" server="prod">
  <daystart elapsed_seconds="9791" elapsed_days="6142"/>
  <app appid="{98DA7DF2-4E3E-4744-9DE6-EC931886ABAB}" status="ok">
    <event status="ok"/>
    <updatecheck status="ok">
      <urls>
        <url codebase="https://updates-download.cloud.remarkable.engineering:443/build/reMarkable%20Device/reMarkable2/3.7.0.1930/"/>
      </urls>
      <manifest version="3.7.0.1930">
        <packages>
          <package name="3.7.0.1930_reMarkable2-XSMSQgBATy.signed" required="true" size="79221928" hash="WLN5qHEaHxC24dLF65rGGoz8Ma4="/>
        </packages>
        <actions>
          <action event="postinstall" successsaction="default" sha256="3Jl13KQIJvbdU+Z5AFagEo3Xx227lWAB2tDFbUxAil8=" DisablePayloadBackoff="true"/>
        </actions>
      </manifest>
    </updatecheck>
    <ping status="ok"/>
  </app>
</response>
There are two parts of this which need to be extracted:
<url codebase="___" /><package name="___" />
Copy and paste these two values into a single string. The result will look like this:
https://updates-download.cloud.remarkable.engineering:443/build/reMarkable%20Device/reMarkable2/3.7.0.1930/3.7.0.1930_reMarkable2-XSMSQgBATy.signed
This is the URL of the actual image file.
Download the image
Fairly self-explanatory.
Note: the option in this command is an "uppercase letter O", not a "digit zero".
$ curl -LOv https://updates-download.cloud.remarkable.engineering:443/build/reMarkable%20Device/reMarkable2/3.7.0.1930/3.7.0.1930_reMarkable2-XSMSQgBATy.signed
This file can then be installed on a reMarkable tablet using RCU or remarkable-update.
Undo a firmware update
If you suddenly see the black bar at the bottom of the screen telling you that an OS upgrade has been installed, and you don't want to start using that new OS, you may be able to "undo the damage". The upgrade process changes a "firmware variable" that tells the bootloader which partition to load the OS from. You can change the same variable, to control which partition YOU want it to boot into.
-
If you have rebooted since the OS was upgraded, you will already be running the new version. Changing the flags and rebooting will make it boot into the previous OS.
-
If you have not rebooted, the OS upgrade swaps the variables at the end of the process. If you swap them back, the tablet won't boot into the new OS.
Either way, you should check the system to be sure which version is on each partition before changing anything.
ℹ️ Remember that the tablet stores OS images in partition numbers 2 and 3.
Figure out the state of the tablet
-
Figure out which partition your current OS is currently running from.
# rootdev
/dev/mmcblk2p2
In this example, the device name ends with
p2, so the running OS is stored in partition #2. For rM1 and rM2 tablets, this will either be 2 or 3.The OS upgrade process installs the new OS in whichever partition is NOT the currently running system. In this example, the tablet is running from partition 2, so if a new OS was installed, it will be in partition 3. And if a new OS was not installed, partition 3 will contain the previous OS.
-
Figure out which partition the tablet is set to boot from.
# fw_printenv active_partition
active_partition=3
The next time the tablet boots, it will load the OS from this partition.
In this example, the tablet is running from partition 2, and set to boot from partition 3. This usually means that an OS update was installed, and the tablet is waiting for the user to reboot.
Verify which versions are on each partition
You can manually check which version is installed in each partition.
For the running partition, check the file which configures the software update service.
# grep VERSION /usr/share/remarkable/update.conf
REMARKABLE_RELEASE_VERSION=3.8.2.1965
For the other partition, mount that partition read-only (so we can't accidentally change anything there) and read the same file from within that partition. In this example, the tablet is running from partition 2, so we're going to mount partition 3.
# mount -o ro /dev/mmcblk2p3 /mnt
# grep VERSION /mnt/usr/share/remarkable/update.conf
REMARKABLE_RELEASE_VERSION=3.9.3.1986
In this example, the tablet is running 3.8.2, and if we reboot it, it will boot into 3.9.3.
Before we forget, un-mount the other partition.
# umount /mnt
Change which partition the tablet boots from
If you need to change which partition the tablet boots from, you'll need to change a few "firmware variables". These are ...
-
active_partitionis the partition the tablet will boot from. -
fallback_partitionis the partition it will boot from if it can't boot from the active partition. I believe it will try the active partition three times before "falling back". This should be set to the "non-active" partition. -
bootcountis a counter used to monitor how many times the tablet has tried to boot from the active partition. This is incremented each time the bootloader tries to boot Linux from a partition, and if this counter reaches 3(?), it will boot from the fallback partition instead. When the tablet boots successfully, this variable will be set back to 0. -
upgrade_available... unsure, but every script I've seen that involves the OS upgrade process, sets the value to 0. Not sure what effect setting it to another value would have.
For this example, we want the tablet to boot from partition 2, so it doesn't boot into the OS which was just installed without your knowledge.
# fw_setenv active_partition 2
# fw_setenv fallback_partition 3
# fw_setenv bootcount 0
# fw_setenv upgrade_available 0
While we're looking at this stuff, let's also make sure the auto-update flag is turned off.
# systemctl disable --now update-engine.service
Note that thhis command does exactly the same thing as turning the "Automatic updates" switch off in the Settings → General → Software screen.
ℹ️ If you ever want to enable the service, use this command instead:
systemctl enable --now update-engine.service
Reboot
If you changed anything, or if you just want to reboot the tablet, this command will do it.
# systemctl reboot
This will disconnect your SSH session, and a few seconds later you'll see the tablet rebooting.
Templates
The reMarkable tablets offer a selection of "templates" that you can base your notebook pages on. Some of them look like notebook paper, graph paper, a grid of dots, or musical staves. Some look like pages from a "day planner", and some have lines laid out in patterns which can be useful when doing design or art work. There's also a template called "Blank" which, as you might expect, doesn't have anything on it at all.
Every page consists of multiple "layers", whose contents are shown above each other. The template is always the bottom layer, and when you write or type on a page, you're writing or typing into a layer above the template.
The biggest problem I've run into with templates is that the built-in software doesn't offer a way to create, add, remove, or otherwise manage templates. However, it's fairly simple to upload your own templates into the tablet, and if you can edit a JSON file (which is human-readable text, it just has a very specific format) you can add your template to the list used by the reMarkable software, and then use that template with your own notebooks.
This page will explain what I've learned about creating and installing templates. At the very end of the page are links to some of the templates I've created for myself.
⚠️ PDF Files Are Not Templates
A lot of people like to use the word "template" when talking about PDF files.
They are NOT the same thing.
This page explains in more detail.
Useful Pages
-
✅ How to Make Template Files for Your reMarkable - Explains a lot of deatails about templates, including how to load them into the tablet and make the reMarkable software use them.
The page you're reading is probably a "stripped down" version of this page. Even if my page covers everything you need, it's definitely worth taking the time and reading through this page as well.
-
reMarkable Wiki - Customizing the Templates - another good explanation, along with a collection of links to other pages.
Creating a Template File
A template file is an image file with the following properties:
-
Format: PNG
I've seen a few web pages mention using a PDF file as a template. I tried this, and ... it's not a template. What you're actually doing is viewing the PDF, and adding notes on a layer above it.
In addition, the template files that come with the tablet have SVG versions, however I haven't seen SVG mentioned as a usable template file type anywhere, so I don't know if they would work or not. (If I get a chance and remember, I'll try it and update this page with my findings.)
-
Size: 1404x1872 pixels, 226 dpi
-
Colour depth: I normally create them using an 8-bit greyscale colour space. The tablet can handle full-colour images, however it will obviously show them as greyscale.
-
Transparency: I've read reports online saying that there can be issues with templates with a transparency layer (or "alpha channel"). In the templates I've made, I use white as the background and remove the alpha channel.
The zone on the left (or right, if the tablet is in left-handed mode) where the menu bar appears and disappears, was 120 pixels wide in the 3.0 firmware, and was reduced to 104 pixels in 3.5. If the users of your template may want/need to work while the menu bar is on screen, you may want to be sure not to have anything important in this area. In most of my templates I draw a lightly shaded rectangle there, so users don't accidentally draw there without meaning to.
You can create the file using any graphics program which can save a PNG file. For example, I use ..
- ImageMagick for simple scripts.
- Perl with the GD module (which is a wrapper around the GD library) for more complex scripts.
- Graphic Converter or GIMP for "hands on" graphics work.
There are other programs and libraries out there, these are just the ones that I use personally.
Uploading Template Files - Third Party Software
There are two primary methods of uploading templates to the tablet - using a third-party program, or doing it by hand.
RCU
I use a program called RCU to upload templates. It's available for several Linux distributions, as well as FreeBSD, macOS, and windows.
RCU can also be used to download documents in a format which can be uploaded and edited again, i.e. it doesn't "burn" the pen strokes into the PDF like the reMarkable software. It can also be used to upload custom "splash screens", such as the "sleep screen" that the tablet shows when you aren't using it.
When it uploads templates or splash screens, it stores the files in the partition which doesn't get replaced when the firmware is updated, and links the files into the system directories where the reMarkable software looks for them. When the firmware is updated, RCU can detect files which were previously uploaded but are no longer linked, and will offer to re-link them automatically.
It's not free (as in "zero pricetag") but it's not expensive - I believe it's only $12/yr for access to upgrades as they're released, which includes access to the source code and a "developers" mailing list.
With that said, it is open-source, under the GNU AGPLv3 license. The developer has stated that this allows customers to share the source code with the world, however I haven't heard of anybody doing this. Personally, I feel like if you're going to use it, you should pay for it - especially where it's only $12. (Now that I've used it for a while, I would actually be willing to pay more ... but don't tell the developer that.) 😁
Others
At some point I want to look at these ...
- reMarkable Assistant
- free (can't find any mention of which license it uses)
- Last commit 2018-02-17
I know there are others out there, but I don't remember them off the top of my head. I'll update this page if I happen to see them. Or if you happen to know of any, please let me know.
Uploading Template Files - Manually
Custom template files need to be uploaded and stored on the tablet, in the /usr/share/remarkable/templates/ directory. The templates which are built into the reMarkable software are stored here, be careful not to change or delete them by accident.
There are two problems with this:
-
The
/usr/share/remarkable/templates/directory is not under/home/, which means it's in the/filesystem, along with the OS and the reMarkable software. This filesystem is almost full to begin with, and if you upload enough new files to totally fill it, you won't be able to SSH into the tablet at all. -
The
/usr/share/remarkable/templates/directory will be replaced when the tablet's built-in software is updated. Any files you may have uploaded or edited will be gone, the only things left will be whatever the new OS image includes.
You can (mostly) work around these problems using "symbolic links", aka "symlinks". A symlink is a small file which contains the name of a different file, along with a flag which says "this is a symlink". When a program tries to read or write the symlink, the kernel will see that it is a symlink, and will actually read or write the file that the symlink points to.
When I realized that the / filesystem is almost full, I had to think of some other way to upload templates without totally filling it up.
My original solution
What I originally came up with is this:
-
Create a directory under
/home/somewhere, just for custom template files. Because this is under the/home/directory, it will NOT be replaced when the OS is upgraded. -
When uploading or updating a template ...
- Upload the image file to this custom directory.
- In the
/usr/share/remarkable/templates/directory, create a symlink with the same name as the image file, pointing to the actual image file under/home/. - Update the
templates.jsonfile (see below) as usual.
Then, after an OS upgrade, all I would need to do is re-create the symlinks and update the templates.json file. The actual template files would still be on the tablet, just not in the directory where the reMarkable software would be looking for them, so I wouldn't need to upload them from the computer again.
I did get this working, and I was planning to write a program that I could run on the tablet, to scan both directories and build a new JSON file ... but then I started using RCU.
What RCU does
It turns out RCU does more or less the same thing I was doing, i.e. storing the image files in a directory under /home/ and creating symlinks. However, it also stores a small JSON file in the directory with the image files, containing the information that the templates.json file needs about that template (i.e. display name, icon code, categories, etc.)
I'd like to think I would have come up with the same idea, but the truth is, since I started using RCU I've never uploaded a template by hand, and I haven't even thought about my first idea until just now when I wrote this.
Updating the templates.json file
In the /usr/share/remarkable/templates/ directory is a file called templates.json. This is a JSON file containing the filename, description (the caption below the template's icon in the reMarkable software), which icon to use for the template, and which categories should "contain" the template.
The file itself looks like this:
{
  "templates": [
    {
      "name": "Blank",
      "filename": "Blank",
      "iconCode": "\ue9fe",
      "categories": [
        "Creative",
        "Lines",
        "Grids",
        "Life/organize"
      ]
    },
    {
      "name": "Blank",
      "filename": "Blank",
      "iconCode": "\ue9fd",
      "landscape": true,
      "categories": [
        "Creative",
        "Lines",
        "Grids",
        "Life/organize"
      ]
    },

    {
      "name": "Hexagon small",
      "filename": "P Hexagon small",
      "iconCode": "\ue98c",
      "categories": [
        "Grids"
      ]
    }
  ]
}
Within each object are the following items:
-
name= The caption shown below the icon in the "template chooser" interface. -
filename= The filename of PNG/SVG file, without the extension.The built-in templates have both
.pngand.svgfiles. From what I can tell ...- The software looks for a file with this name plus
.svg, in the/usr/share/remarkable/templates/directory. - If it doesn't find one, it looks for a file with this name plus
.png, also in the/usr/share/remarkable/templates/directory. - If it doesn't find either one, it skips that template.
- If the file that it finds is actually a symlink, the software ends up reading whatever file the symlink points to, without knowing that it is a symlink to begin with.
My guess is that with
.svgfiles, the software is able to "repeat" a pattern when doing the "infinite scrolling" thing (i.e. if you scroll the page down to keep writing). - The software looks for a file with this name plus
-
iconCode= Unicode character number used as the template's icon in the "template chooser" interface.The icons are actually characters being shown from a "web font" file. The file is
/usr/share/remarkable/webui/fonts/icomoon.woff.-
reMarkable Wiki has a list of the iconCode values used in system 2.3.0.16. It looks like the same file is being used in later versions, at least up to 3.0.5.56 (which is what was on my tablet when I received it).
-
I haven't checked myself, but I remember reading somewhere that in later versions of the software, the icon codes use different numbers for each image.
-
-
landscape= whether template is meant for landscape mode (i.e. tablet rotated 90°). If this value is not present, the software assumesfalse(i.e. that the template is for portrait mode). -
categories= which tabs in the "template chooser" UI should "contain" this template. The same template can appear in multiple tabs.-
The "All" tab doesn't need to be listed because it already contains every template listed in the file.
-
The tablet combines all of the category names from all of the templates to build the "tabs" along the top of the template chooser interface.
Note that you can add your own tabs, but be careful not to "overflow" the width of the screen. I normally change every instance of "Life/organize" to "LifeOrg" to make room on the screen, and then use "Custom" for all of my own custom templates.
-
Restarting the reMarkable Software
If you've modified templates.json, you will need to restart xochitl.
systemctl restart xochitl
If you watch the tablet, you will see the screen reset and it will look like it's rebooting, although the process doesn't take as long as a full reboot.
Other Sources of Templates
I've seen several places online offering ready-made templates for download, and people are even selling them. The one(s) listed here are the ones that actually seem useful to me.
- Templarian
- GENERATES grids (square) or isometric (triangular), using dots, lines, or anything in between (i.e. "+" marks)
- Adjustable sizes, offsets, and colours
- Javascript, runs in your browser
My Templates
I have created a few templates ... more specifically, I have created scripts which create templates.
See the pages under the "Templates" section on the left.
If you're interested, I also wrote a shell script called generate which I run on my workstation after adding or updating the scripts, to copy the scripts into this directory and generate the .png files.
Basic Templates
The make-templates script is a shell script which uses ImageMagick's magick command to create a few .png templates.

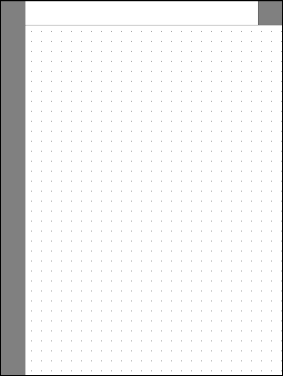
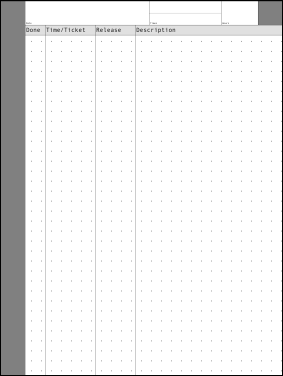
License
This script is too simple to worry about licensing, so...
To the extent possible under law, John Simpson has waived all copyright and related or neighboring rights to this script or the images it produces.
This work is published from the United States of America.

The rm2-template-basic Script
Download ⇒ rm2-template-basic
#!/bin/bash
#
# rm2-template-basic
# John Simpson <jms1@jms1.net> 2023-07-02
#
# Programmatically create PNG files for use as reMarkable 2 templates.
#
# 2023-07-09 jms1 - renamed script

set -e

###############################################################################
#
# Create a basic page with dots every 50 pixels
#
# - Create a 50x50 canvas, filled with white.
# - Draw a 3x3 rectangle at the top left corner.
# - Save that to a "memory buffer" called 'dot'.
# - Delete the canvas.
# - Create a 1404x1872 canvas, filled with the 'dot' memory buffer, tiled.
# - Save the result as 'dots-50.png'

magick \
    -type GrayScale -depth 8 -size 50x50 'xc:white' \
    -fill black \
    -draw 'rectangle 0,0,2,2' \
    -write 'mpr:dot' \
    +delete \
    -type GrayScale -depth 8 -size 1404x1872 'tile:mpr:dot' \
    dots-50.png

###############################################################################
#
# Create what I call a "basic page".
#
# - Create a canvas from the 'dots-50.png' file created above.
# - Remove (draw a white rectangle over) 120 pixels at the top of the image.
# - Draw dark grey rectangles where the menu and "X" button appear.
# - Draw black lines between the different areas of the image.
# - Save the result as 'basic-page.png'.

magick dots-50.png \
    \
    -fill white \
    -draw 'rectangle 0 0 1403 119' \
    \
    -fill '#808080' \
    -draw 'rectangle    0 , 0 ,  119 , 1871' \
    -draw 'rectangle 1284 , 0 , 1403 ,  119' \
    \
    -fill black \
    -draw 'line    0 ,   0 , 1403 ,    0' \
    -draw 'line  120 ,   0 ,  120 , 1871' \
    -draw 'line  120 , 120 , 1403 ,  120' \
    -draw 'line 1284 ,   0 , 1284 ,  120' \
    basic-page.png

###############################################################################
#
# Create my daily worksheet.
#
# - Create a canvas from the 'basic-page.png' file created above.
# - Draw a lighter grey rectangle where the column headings will be.
# - Draw a darker grey line across one of the boxes in the top section.
# - Draw black lines to separate the new parts of the form.
# - Add labels for the column headers.
# - Add smaller labels in the boxes across the top.
# - Save the result as 'daily-work.png'.

magick basic-page.png \
    \
    -fill '#E0E0E0' \
    -draw 'rectangle 121 , 121 , 1403 , 169' \
    \
    -fill '#808080' \
    -draw 'line 740 , 60 , 1100 , 60' \
    \
    -fill black \
    -draw 'line  120 , 170 , 1403 ,  170' \
    -draw 'line  220 , 120 ,  220 , 1871' \
    -draw 'line  470 , 120 ,  470 , 1871' \
    -draw 'line  670 , 120 ,  670 , 1871' \
    -draw 'line  740 ,   0 ,  740 ,  120' \
    -draw 'line 1100 ,   0 , 1100 ,  120' \
    \
    -font 'Andale-Mono' \
    -pointsize 30 \
    -draw 'text 125,155 "Done"' \
    -draw 'text 225,155 "Time/Ticket"' \
    -draw 'text 475,155 "Release"' \
    -draw 'text 675,155 "Description"' \
    \
    -pointsize 12 \
    -draw 'text  125,115 "Date"' \
    -draw 'text  745,115 "Times"' \
    -draw 'text 1105,115 "Hours"' \
    \
    daily-work.png
Simple Cover Page
The rm2-template-cover shell script uses ImageMagick's magick command to create a simple .png template which can be used as a "cover page" for notebooks in a reMarkable tablet. It looks like this ...
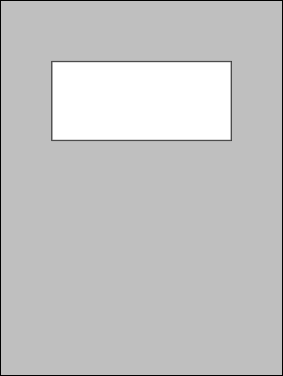

Hey, I said it was simple ... 😁
The script's default settings will generate the rM2 template shown above. You can run it with options to generate an rMPP template instead, change the background colour, and change the height, width, and vertical position of the box. (Of course, you can also edit the script and make it do whatever you like.)
License
This script is licensed under the MIT License.
The MIT License (MIT)
Copyright © 2023-2025 John Simpson
Permission is hereby granted, free of charge, to any person obtaining a copy of this software and associated documentation files (the “Software”), to deal in the Software without restriction, including without limitation the rights to use, copy, modify, merge, publish, distribute, sublicense, and/or sell copies of the Software, and to permit persons to whom the Software is furnished to do so, subject to the following conditions:
The above copyright notice and this permission notice shall be included in all copies or substantial portions of the Software.
THE SOFTWARE IS PROVIDED “AS IS”, WITHOUT WARRANTY OF ANY KIND, EXPRESS OR IMPLIED, INCLUDING BUT NOT LIMITED TO THE WARRANTIES OF MERCHANTABILITY, FITNESS FOR A PARTICULAR PURPOSE AND NONINFRINGEMENT. IN NO EVENT SHALL THE AUTHORS OR COPYRIGHT HOLDERS BE LIABLE FOR ANY CLAIM, DAMAGES OR OTHER LIABILITY, WHETHER IN AN ACTION OF CONTRACT, TORT OR OTHERWISE, ARISING FROM, OUT OF OR IN CONNECTION WITH THE SOFTWARE OR THE USE OR OTHER DEALINGS IN THE SOFTWARE.
Download
⇒ Github
Calendars - Month
This is just a simple monthly calendar. If you're willing to write in your own title (i.e. "July 2023") and numbers in each date's block, it can be used for any month you like.
| Orientation | Right Handed | Left Handed |
|---|---|---|
| Portrait | P-CalendarMo-rh.png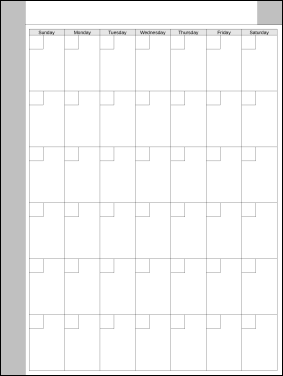 | P-CalendarMo-lh.png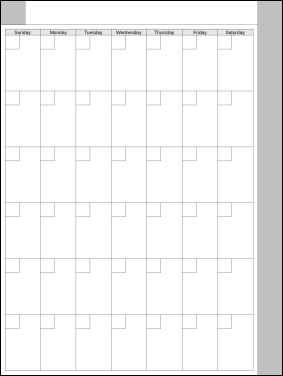 |
| Landscape | L-CalendarMo-rh.png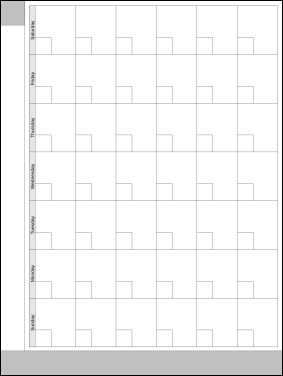 | L-CalendarMo-lh.png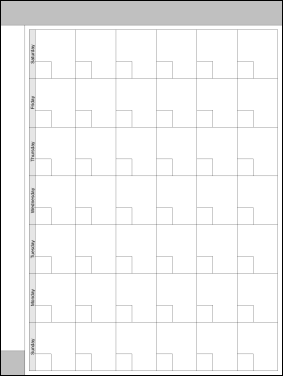 |
This was the first template script where I made both right- and left-handed versions, then a few days later, added Landscape versions. It was also the first template I made using Perl, with the GD graphics library. Now that I've done this one, I suspect that if I make any more templates, I'll be using Perl and GD for those as well.
The script also has an option where, if you give it a year and month, it will fill in a title and the day numbers. I'm not sure how useful the resulting image is as a template, since it could only be used for that one month, but if that's useful to you, feel free to add "-m 2023-07" to the command line.
License
This script is licensed under the MIT License.
The MIT License (MIT)
Copyright © 2023 John Simpson
Permission is hereby granted, free of charge, to any person obtaining a copy of this software and associated documentation files (the “Software”), to deal in the Software without restriction, including without limitation the rights to use, copy, modify, merge, publish, distribute, sublicense, and/or sell copies of the Software, and to permit persons to whom the Software is furnished to do so, subject to the following conditions:
The above copyright notice and this permission notice shall be included in all copies or substantial portions of the Software.
THE SOFTWARE IS PROVIDED “AS IS”, WITHOUT WARRANTY OF ANY KIND, EXPRESS OR IMPLIED, INCLUDING BUT NOT LIMITED TO THE WARRANTIES OF MERCHANTABILITY, FITNESS FOR A PARTICULAR PURPOSE AND NONINFRINGEMENT. IN NO EVENT SHALL THE AUTHORS OR COPYRIGHT HOLDERS BE LIABLE FOR ANY CLAIM, DAMAGES OR OTHER LIABILITY, WHETHER IN AN ACTION OF CONTRACT, TORT OR OTHERWISE, ARISING FROM, OUT OF OR IN CONNECTION WITH THE SOFTWARE OR THE USE OR OTHER DEALINGS IN THE SOFTWARE.
The rm2-template-calendar Script
Download ⇒ rm2-template-calendar
#!/usr/bin/env perl -w
#
# rm2-template-calendar
# John Simpson <jms1@jms1.net> 2023-07-04
#
# 2023-07-09 jms1 - added support for landscape mode, added command line
#   options to choose which of the four images it should generate.
#
###############################################################################
#
# The MIT License (MIT)
#
# Copyright (C) 2023 John Simpson
#
# Permission is hereby granted, free of charge, to any person obtaining a
# copy of this software and associated documentation files (the “Software”),
# to deal in the Software without restriction, including without limitation
# the rights to use, copy, modify, merge, publish, distribute, sublicense,
# and/or sell copies of the Software, and to permit persons to whom the
# Software is furnished to do so, subject to the following conditions:
#
# The above copyright notice and this permission notice shall be included in
# all copies or substantial portions of the Software.
#
# THE SOFTWARE IS PROVIDED “AS IS”, WITHOUT WARRANTY OF ANY KIND, EXPRESS OR
# IMPLIED, INCLUDING BUT NOT LIMITED TO THE WARRANTIES OF MERCHANTABILITY,
# FITNESS FOR A PARTICULAR PURPOSE AND NONINFRINGEMENT. IN NO EVENT SHALL
# THE AUTHORS OR COPYRIGHT HOLDERS BE LIABLE FOR ANY CLAIM, DAMAGES OR OTHER
# LIABILITY, WHETHER IN AN ACTION OF CONTRACT, TORT OR OTHERWISE, ARISING
# FROM, OUT OF OR IN CONNECTION WITH THE SOFTWARE OR THE USE OR OTHER
# DEALINGS IN THE SOFTWARE.
#
###############################################################################

require 5.005 ;
use strict ;
use warnings ;

use GD ;                                # cpan install GD
use GD::Text::Align ;                   # cpan install GD::Text
use Getopt::Std ;                       # (normally installed with Perl itself)
use POSIX 'strftime' ;                  # cpan install POSIX
use Time::Local qw( timegm_posix ) ;    # (normally installed with Perl itself)

########################################
# reMarkable 2 screen attributes

my $rm2_page_w      = 1404 ;    # page width
my $rm2_page_h      = 1872 ;    # page height
my $rm2_menu_w      = 120 ;     # width of menu and close button areas
my $rm2_title_h     = 120 ;     # height of title area

########################################
# Calendar attributes

my $padding     = 20 ;          # blank space around calendar
my $dow_h       = 30 ;          # height of "day of week" labels

my $font_file   = "$ENV{'HOME'}/Library/Fonts/LiberationSans-Regular.ttf" ;
my $font_size   = 18 ;

my @dow = qw( Sunday Monday Tuesday Wednesday Thursday Friday Saturday ) ;

my %dd          = () ;          # "row,col" => day of month
my $title       = '' ;          # Pre-filled calendar title
my $title_size  = 60 ;          # Font size for title
my $dom_size    = 24 ;          # Font size for day of month

########################################
# Other globals

my %opt         = () ;          # getopts()

###############################################################################
#
# Usage

sub usage(;$)
{
    my $msg = ( shift || '' ) ;

    print <<EOF ;
$0 [options]

Create a reMarkable 2 template for a simple monthly calendar.

-l or -r    Left- or Right-handed. Default is Right-handed.

-L or -P    Landscape or Portrait. Default is Portrait.

-m ___      Month to pre-number. Must be "YYYY-MM" format (i.e. "2023-07")
            Default is no month, i.e. no pre-filled dates.

-o ___      Specify the name of the file to write. Default is 'CalendarMo.png'.

-h          Show this help message.

EOF

    if ( $msg ne '' )
    {
        print $msg ;
        exit 1 ;
    }

    exit 0 ;
}

###############################################################################
#
# Center a string around a point

sub center_text($$$$$$)
{
    my $img     = shift ;
    my $tx      = shift ;
    my $ty      = shift ;
    my $size    = shift ;
    my $text    = shift ;
    my $colour  = shift ;

    ########################################
    # Calculate real position for text

    my $a = GD::Text::Align->new( $img ,
        'valign' => 'center' ,
        'halign' => 'center' ,
    ) ;
    $a->set_font( $font_file , $size ) ;
    $a->set_text( $text ) ;

    my @b = $a->bounding_box( $tx , $ty , 0 ) ;

    ########################################
    # DEBUG - print the position
    # - needed this to figure out the correct font size
    #
    # printf "(%4d,%4d) ... (%4d,%4d) (%4d,%4d) (%4d,%4d) (%4d,%4d) %s\n" ,
    #     $tx , $ty , @b[0..7] , $text ;

    ########################################
    # Add the text to the image
    # - (x,y) should be lower left corner

    $img->stringFT( $colour , $font_file , $size , 0 , $b[0] , $b[1] , $text ) ;
}

###############################################################################
#
# Create one calendar image

sub calendar_basic($$$)
{
    my $left_handed = shift ;
    my $landscape   = shift ;
    my $out_file    = shift ;

    ########################################
    # Adjust page size for portrait/landscape mode

    my $page_w  = $landscape ? $rm2_page_h : $rm2_page_w ;
    my $page_h  = $landscape ? $rm2_page_w : $rm2_page_h ;
    my $menu_w  = $rm2_menu_w ;
    my $title_h = $rm2_title_h ;

    ########################################
    # Adjust positions for left/right handedness

    my $dat = $title_h + $padding ; # drawing area, top y (same for lh/rh)
    my $dab = $page_h - $padding ;  # drawing area, bottom y (same for lh/rh)

    my $dal = $menu_w + $padding ;  # drawing area, left x
    my $dar = $page_w - $padding ;  # drawing area, right x

    my $mal = 0 ;                   # menu area, left x
    my $mar = $menu_w - 1 ;         # menu area, right x
    my $msx = $menu_w ;             # menu separator, x
    my $cal = $page_w - $menu_w ;   # close button area, left x
    my $car = $page_w - 1 ;         # close button area, right x
    my $csx = $cal - 1 ;            # close button separator, x

    if ( $left_handed )
    {
        ########################################
        # menu is on right, content area is on left

        $dal = $padding ;                           # drawing area, left x
        $dar = $page_w - $menu_w - $padding - 1 ;   # drawing area, right x

        $mal = $page_w - $menu_w ;                  # menu area, left x
        $mar = $page_w - 1 ;                        # menu area, right x
        $msx = $mal - 1 ;                           # menu separator, x
        $cal = 0 ;                                  # close button area, left x
        $car = $menu_w - 1 ;                        # close button area, right x
        $csx = $menu_w ;                            # close button separator, x
    }

    ############################################################
    # Create canvas

    my $img = new GD::Image( $page_w , $page_h ) ;

    ########################################
    # Allocate colours

    my $white   = $img->colorAllocate( 255 , 255 , 255 ) ;
    my $grey75  = $img->colorAllocate( 192 , 192 , 192 ) ;
    my $grey90  = $img->colorAllocate( 230 , 230 , 230 ) ;
    my $black   = $img->colorAllocate(   0 ,   0 ,   0 ) ;

    ############################################################
    # Menu/title zones

    $img->setThickness( 1 ) ;

    ########################################
    # Grey area under close button, top right/left
    # and line across top of page, bottom of title area

    $img->filledRectangle( $cal , 0 , $car , $title_h-1 , $grey75 ) ;
    $img->line( 0 , $title_h-1 , $page_w-1 , $title_h-1 , $black ) ;
    $img->line( $csx , 0 , $csx , $title_h-1 , $black ) ;

    ########################################
    # Grey area under menu, on left/right, drawn *after* the line across
    # the top of page so it covers whichever end is appropriate

    $img->filledRectangle( $mal , 0 , $mar , $page_h-1 , $grey75 ) ;
    $img->line( $msx , 0 , $msx , $page_h-1 , $black ) ;

    ########################################
    # If we need to add a title, do it

    if ( $title ne '' )
    {
        my $tx = int( $page_w  / 2 ) ;
        my $ty = int( $title_h / 2 ) ;

        center_text( $img , $tx , $ty , $title_size , $title , $black ) ;
    }

    ############################################################
    # Draw boxes for the days

    ########################################
    # Calculate box size

    my $box_w   = int( ( $dar - $dal ) / 7 ) ;
    my $box_h   = int( ( $dab - $dat - $dow_h ) / 6 ) ;

    my $ib_w    = $landscape ? int( $box_w * 0.35 ) : int( $box_w * 0.40 ) ;
    my $ib_h    = $landscape ? int( $box_h * 0.40 ) : int( $box_h * 0.25 ) ;

    ########################################
    # Draw the boxes

    $img->setThickness( 1 ) ;

    for my $r ( 0 .. 5 )
    {
        for my $c ( 0 .. 6 )
        {
            ########################################
            # Coordinates of outer box

            my $ax = $dal + ( $c * $box_w ) ;
            my $ay = $dat + $dow_h + ( $r * $box_h ) ;
            my $bx = $ax + $box_w ;
            my $by = $ay + $box_h ;

            ########################################
            # Inner box lower right corner

            my $dx = $ax + $ib_w ;
            my $dy = $ay + $ib_h ;

            ########################################
            # Draw the two boxes

            $img->rectangle( $ax , $ay , $bx , $by , $black ) ;

            ########################################
            # MAYBE draw inner box

            if ( ( $title eq '' ) || exists( $dd{"$r,$c"} ) )
            {
                $img->rectangle( $ax , $ay , $dx , $dy , $black ) ;

                ########################################
                # If we have a date for this box, add it

                if ( exists( $dd{"$r,$c"} ) )
                {
                    my $tx = $ax + int( $ib_w / 2 ) ;
                    my $ty = $ay + int( $ib_h / 2 ) ;

                    center_text( $img , $tx , $ty , $dom_size , $dd{"$r,$c"} , $black ) ;
                }
            }
        }
    }

    ############################################################
    # Add day-of-week labels

    for my $c ( 0 .. 6 )
    {
        ########################################
        # Box around day of week

        my $ax = $dal + ( $c * $box_w ) ;
        my $ay = $dat ;
        my $bx = $ax + $box_w ;
        my $by = $ay + $dow_h ;

        $img->filledRectangle( $ax , $ay , $bx , $by , $grey90 ) ;
        $img->rectangle( $ax , $ay , $bx , $by , $black ) ;

        ########################################
        # Draw DOW text

        my $tx = $ax + int( $box_w / 2 ) ;
        my $ty = $ay + int( $dow_h / 2 ) ;

        center_text( $img , $tx , $ty , $font_size , $dow[$c] , $black ) ;
    }

    ############################################################
    # If the image is landscape mode, rotate it

    if ( $landscape )
    {
        my $new_img = $img->copyRotate270() ;
        $img = $new_img ;
    }

    ########################################
    # Write the output file

    open( O , '>' , $out_file )
        or die "ERROR: can't create \"$out_file\": $!\n" ;
    binmode O ;
    print O $img->png() ;
    close O ;
}

###############################################################################
#
# How many days in a given month?

sub days_in_month($$)
{
    my $yyyy = shift ;
    my $mm   = shift ;

    ########################################
    # Most months have fixed counts

    my $rv = (31,0,31,30,31,30,31,31,30,31,30,31)[$mm-1] ;
    ( $rv > 0 ) && return $rv ;

    ########################################
    # February rules are weird

    if ( $yyyy %   4 ) { return 28 ; }
    if ( $yyyy % 100 ) { return 29 ; }
    if ( $yyyy % 400 ) { return 28 ; }
    return 29 ;
}

###############################################################################
###############################################################################
###############################################################################

getopts( 'hlrLPo:m:' , \%opt ) ;
$opt{'h'} && usage() ;

########################################
# Left or right handed?

my $lh = 0 ;
if ( $opt{'l'} )
{
    if ( $opt{'r'} )
    {
        usage( "ERROR: cannot use -l and -r together\n" ) ;
    }

    $lh = 1 ;
}

########################################
# Portrait or landscape?

my $landscape = 0 ;
if ( $opt{'L'} )
{
    if ( $opt{'P'} )
    {
        usage( "ERROR: cannot use -L and -P together\n" ) ;
    }

    $landscape = 1 ;
}

########################################
# Output filename

my $outfile = ( $opt{'o'} || 'CalendarMo.png' ) ;

############################################################
# If a month was specified, figure where the extra bits (which make it
# a NOT-blank calendar) will be.

if ( ( $opt{'m'} || '' ) =~ m|^(\d\d\d\d)\-(\d\d?)$| )
{
    my ( $yyyy , $mm ) = ( $1 , $2 ) ;
    $mm =~ s|^0|| ;

    if ( ( $mm < 1 ) || ( $mm > 12 ) )
    {
        die "ERROR: invalid YYYY-MM value '$opt{'m'}'\n" ;
    }

    ########################################
    # Figure out the time_t values

    my $t = timegm_posix( 0 , 0 , 12 , 1 , $mm - 1 , $yyyy - 1900 ) ;
    my @d = gmtime( $t ) ;

    ########################################
    # Remember the human-formatted name of the month/year

    $title = strftime( '%B %Y' , @d ) ;

    ########################################
    # Figure out which row,col each day of the month goes in

    my $x = days_in_month( $yyyy , $mm ) ;

    my $row = 0 ;
    my $col = $d[6] ;

    for my $n ( 1 .. $x )
    {
        $dd{"$row,$col"} = $n ;
        $col ++ ;

        if ( $col > 6 )
        {
            $col = 0 ;
            $row ++ ;
        }
    }
}

############################################################
# Do the deed

calendar_basic( $lh , $landscape , $outfile ) ;
Bowling
The rm2-template-bowling script uses the Perl-GD module (which uses the GD library) to create a form for keeping score in bowling games.
| Right Handed | Left Handed |
|---|---|
Bowling-rh.png | Bowling-lh.png |
The templates I'm using on this page have 4 player rows in each group. If you need more or less player rows, you can use the -p option. For example, if you normally play in a group of five people, you could run the script as rm2-template-bowling -p 5 -o Bowling-5.png to generate a template with five player rows in each group.
I made this script after reading this comment on Reddit and thinking to myself, "you know, it wouldn't be that hard to make a template for bowling scores, and maybe somebody out there could use one" ... two hours later, here it is.
And for the record, I haven't bowled in over twenty years. This was just a fun little programming project for me, and if at least one person out there ends up using these templates, I consider it my good deed for the day.
License
This script is licensed under the MIT License.
The MIT License (MIT)
Copyright © 2023 John Simpson
Permission is hereby granted, free of charge, to any person obtaining a copy of this software and associated documentation files (the “Software”), to deal in the Software without restriction, including without limitation the rights to use, copy, modify, merge, publish, distribute, sublicense, and/or sell copies of the Software, and to permit persons to whom the Software is furnished to do so, subject to the following conditions:
The above copyright notice and this permission notice shall be included in all copies or substantial portions of the Software.
THE SOFTWARE IS PROVIDED “AS IS”, WITHOUT WARRANTY OF ANY KIND, EXPRESS OR IMPLIED, INCLUDING BUT NOT LIMITED TO THE WARRANTIES OF MERCHANTABILITY, FITNESS FOR A PARTICULAR PURPOSE AND NONINFRINGEMENT. IN NO EVENT SHALL THE AUTHORS OR COPYRIGHT HOLDERS BE LIABLE FOR ANY CLAIM, DAMAGES OR OTHER LIABILITY, WHETHER IN AN ACTION OF CONTRACT, TORT OR OTHERWISE, ARISING FROM, OUT OF OR IN CONNECTION WITH THE SOFTWARE OR THE USE OR OTHER DEALINGS IN THE SOFTWARE.
The rm2-template-bowling Script
Download ⇒ rm2-template-bowling
#!/usr/bin/env perl -w
#
# rm2-template-bowling
# John Simpson <jms1@jms1.net> 2023-08-08
#
# Create reMarkable 2 templates for scoring bowling games
#
###############################################################################
#
# The MIT License (MIT)
#
# Copyright (C) 2023 John Simpson
#
# Permission is hereby granted, free of charge, to any person obtaining a
# copy of this software and associated documentation files (the “Software”),
# to deal in the Software without restriction, including without limitation
# the rights to use, copy, modify, merge, publish, distribute, sublicense,
# and/or sell copies of the Software, and to permit persons to whom the
# Software is furnished to do so, subject to the following conditions:
#
# The above copyright notice and this permission notice shall be included in
# all copies or substantial portions of the Software.
#
# THE SOFTWARE IS PROVIDED “AS IS”, WITHOUT WARRANTY OF ANY KIND, EXPRESS OR
# IMPLIED, INCLUDING BUT NOT LIMITED TO THE WARRANTIES OF MERCHANTABILITY,
# FITNESS FOR A PARTICULAR PURPOSE AND NONINFRINGEMENT. IN NO EVENT SHALL
# THE AUTHORS OR COPYRIGHT HOLDERS BE LIABLE FOR ANY CLAIM, DAMAGES OR OTHER
# LIABILITY, WHETHER IN AN ACTION OF CONTRACT, TORT OR OTHERWISE, ARISING
# FROM, OUT OF OR IN CONNECTION WITH THE SOFTWARE OR THE USE OR OTHER
# DEALINGS IN THE SOFTWARE.
#
###############################################################################

require 5.005 ;
use strict ;
use warnings ;

use GD ;
use GD::Text::Align ;
use Getopt::Std ;

########################################
# reMarkable 2 screen attributes

my $rm2_page_w      = 1404 ;            # page width
my $rm2_page_h      = 1872 ;            # page height

########################################
# Margins and other attributes

my $menu_w          = 104 ;             # width of menu and close button areas
my $topbar_h        = 104 ;             # height of title area

my $gl_h            = 30 ;              # group - label row height
my $gp_h            = 90 ;              # group - player row height
my $padding         = 20 ;              # blank space around/between games

my $title           = 'Bowling Scores' ;
my $font_file       = "$ENV{'HOME'}/Library/Fonts/LiberationSans-Regular.ttf" ;
my $title_size      = 48 ;
my $label_size      = 12 ;

########################################
# Other globals

my %opt         = () ;                  # getopts()
my $lh          = 0 ;                   # -l    left handed (menu on right)
my $outfile     = 'Bowling.png' ;       # -o:   output filename
my $ppg         = 4 ;                   # -p:   players per game

my $white       = undef ;
my $grey25      = undef ;
my $grey50      = undef ;
my $grey75      = undef ;
my $black       = undef ;

###############################################################################
#
# Usage

sub usage(;$)
{
    my $msg = ( shift || '' ) ;

    print <<EOF ;
$0 [options]

Create a reMarkable 2 template for a simple monthly calendar.

-l or -r    Left- or Right-handed. Default is Right-handed.

-o ___      Specify the name of the file to write. Default is 'Bowling.png'.

-p ___      Players per game. Default is 4.

-h          Show this help message.

EOF

    if ( $msg ne '' )
    {
        print $msg ;
        exit 1 ;
    }

    exit 0 ;
}

###############################################################################
#
# Function to position a string around a point

sub place_text($$$$$$$$)
{
    my $img     = shift ;
    my $tx      = shift ;
    my $ty      = shift ;
    my $valign  = shift ;
    my $halign  = shift ;
    my $size    = shift ;
    my $text    = shift ;
    my $colour  = shift ;

    ########################################
    # Calculate real position for text

    my $a = GD::Text::Align->new( $img ,
        'valign' => $valign ,
        'halign' => $halign ,
    ) ;
    $a->set_font( $font_file , $size ) ;
    $a->set_text( $text ) ;

    my @b = $a->bounding_box( $tx , $ty , 0 ) ;

    ########################################
    # Add the text to the image
    # - (x,y) should be lower left corner

    $img->stringFT( $colour , $font_file , $size , 0 , $b[0] , $b[1] , $text ) ;
}

###############################################################################
#
# Add a row of labels

sub addrow_labels($$$$$)
{
    my $img     = shift ;
    my $rlx     = shift ;   # row left x
    my $rty     = shift ;   # top top y
    my $rrx     = shift ;   # row right x
    my $rby     = shift ;   # row bottom y

    ########################################
    # Calculate box sizes

    my $fw      = int( ( $rrx - $rlx ) / 13.5 ) ;   # frame width
    my $pw      = 2 * $fw ;                         # player width
    my $ty      = $rty + ( $rby - $rty ) / 2 ;      # text y

    ########################################
    # Player

    $img->setThickness( 1 ) ;
    $img->filledRectangle( $rlx , $rty , $rlx+$pw , $rby , $grey75 ) ;
    $img->rectangle( $rlx , $rty , $rlx+$pw , $rby , $black ) ;

    my $tx = $rlx + ( $pw / 2 ) ;
    place_text( $img , $tx , $ty , 'center' , 'center' , $label_size , 'Player' , $black ) ;

    ########################################
    # Frames

    for my $n ( 0 .. 9 )
    {
        my $flx = $rlx + $pw + $n * $fw ;
        my $frx = $flx + $fw ;

        $img->filledRectangle( $flx , $rty , $frx , $rby , $grey75 ) ;
        $img->rectangle( $flx , $rty , $frx , $rby , $black ) ;

        $tx = $flx + ( $fw / 2 ) ;
        place_text( $img , $tx , $ty , 'center' , 'center' , $label_size , $n+1 , $black ) ;
    }

    ########################################
    # Total

    my $tlx = $rlx + $pw + 10 * $fw ;

    $img->filledRectangle( $tlx , $rty , $rrx , $rby , $grey75 ) ;
    $img->rectangle( $tlx , $rty , $rrx , $rby , $black ) ;

    $tx = $tlx + ( $rrx - $tlx ) / 2 ;
    place_text( $img , $tx , $ty , 'center' , 'center' , $label_size , 'Total' , $black ) ;
}

###############################################################################
#
# Add a row of scoring boxes

sub addrow_scores($$$$$)
{
    my $img     = shift ;
    my $rlx     = shift ;   # row left x
    my $rty     = shift ;   # top top y
    my $rrx     = shift ;   # row right x
    my $rby     = shift ;   # row bottom y

    ########################################
    # Calculate box sizes

    my $fw      = int( ( $rrx - $rlx ) / 13.5 ) ;   # frame width
    my $pw      = 2 * $fw ;                         # player width
    my $sw      = int( $fw / 3 ) ;                  # sub-box width
    my $sh      = $sw ;                             # sub-box height

    ########################################
    # Player

    $img->setThickness( 1 ) ;
    $img->rectangle( $rlx , $rty , $rlx+$pw , $rby , $black ) ;

    ########################################
    # Frames

    for my $n ( 0 .. 9 )
    {
        ########################################
        # Outer box

        my $flx = $rlx + $pw + $n * $fw ;
        my $frx = $flx + $fw ;

        $img->rectangle( $flx , $rty , $frx , $rby , $black ) ;

        ########################################
        # Sub-boxes

        $img->line( $flx +   $sw , $rty , $flx +   $sw , $rty + $sh , $black ) ;
        $img->line( $flx + 2*$sw , $rty , $flx + 2*$sw , $rty + $sh , $black ) ;

        my $bx = $flx + ( ( $n < 9 ) ? $sw : 0 ) ;

        $img->line( $bx , $rty+$sh , $frx , $rty+$sh , $black ) ;
    }

    ########################################
    # Total

    my $tlx = $rlx + $pw + 10 * $fw ;

    $img->rectangle( $tlx , $rty , $rrx , $rby , $black ) ;
}

###############################################################################
###############################################################################
###############################################################################

getopts( 'hlro:p:' , \%opt ) ;
$opt{'h'} && usage() ;
$outfile = ( $opt{'o'} || $outfile ) ;
$ppg     = ( $opt{'p'} || 4 ) ;

########################################
# Left or right handed?

my $dal = $menu_w + $padding ;                  # drawing area left
my $dar = $rm2_page_w - $padding ;              # drawing area right
my $mal = 0 ;                                   # menu area left
my $mar = $menu_w ;                             # menu area right
my $msx = $mar ;                                # menu separator x
my $cal = $rm2_page_w - $menu_w ;               # close area left
my $car = $rm2_page_w - 1 ;                     # close area right
my $csx = $cal ;                                # close separator x

if ( $opt{'l'} )
{
    if ( $opt{'r'} )
    {
        usage( "ERROR: cannot use -l and -r together\n" ) ;
    }

    $dal = $padding ;                           # drawing area left
    $dar = $rm2_page_w - $menu_w - $padding ;   # drawing area right
    $mal = $rm2_page_w - $menu_w ;              # menu area left
    $mar = $rm2_page_w - 1 ;                    # menu area right
    $msx = $mal ;                               # menu separator x
    $cal = 0 ;                                  # close area left
    $car = $menu_w ;                            # close area right
    $csx = $car ;                               # close separator x
}

###############################################################################
#
# Start the image

my $img = new GD::Image( $rm2_page_w , $rm2_page_h ) ;

########################################
# Allocate colours - first colour is used as background

$white  = $img->colorAllocate( 255 , 255 , 255 ) ;
$grey75 = $img->colorAllocate( 192 , 192 , 192 ) ;
$grey50 = $img->colorAllocate( 128 , 128 , 128 ) ;
$grey25 = $img->colorAllocate(  64 ,  64 ,  64 ) ;
$black  = $img->colorAllocate(   0 ,   0 ,   0 ) ;

############################################################
# Menu/title zones

$img->setThickness( 1 ) ;

########################################
# Grey area under close button, top right/left
# and line across top of page, bottom of title area

$img->filledRectangle( $cal , 0 , $car , $topbar_h-1 , $grey75 ) ;
$img->line( 0 , $topbar_h-1 , $rm2_page_w-1 , $topbar_h-1 , $black ) ;
$img->line( $csx , 0 , $csx , $topbar_h-1 , $black ) ;

########################################
# Grey area under menu, on left/right, drawn *after* the line across
# the top of page so it covers whichever end is appropriate

$img->filledRectangle( $mal , 0 , $mar , $rm2_page_h-1 , $grey75 ) ;
$img->line( $msx , 0 , $msx , $rm2_page_h-1 , $black ) ;

########################################
# Add title

my $tx = int( $rm2_page_w / 2 ) ;
my $ty = int( $topbar_h   / 2 ) ;
place_text( $img , $tx , $ty , 'center' , 'center' , $title_size , $title , $black ) ;

###############################################################################
#
# Add groups of rows

my $y = $topbar_h + $padding ;

while ( ( $y + $gl_h + $ppg * $gp_h ) < ( $rm2_page_h - $padding ) )
{
    ########################################
    # Add the group's row of labels

    addrow_labels( $img , $dal , $y , $dar , $y + $gl_h ) ;
    $y += $gl_h ;

    ########################################
    # Add a row of score boxes for each player in the group

    for my $n ( 1 .. $ppg )
    {
        addrow_scores( $img , $dal , $y , $dar , $y+$gp_h ) ;
        $y += $gp_h ;
    }

    ########################################
    # Padding between groups

    $y += $padding ;
}

###############################################################################
#
# Write the output file

open( O , '>' , $outfile )
    or die "ERROR: can't create \"$outfile\": $!\n" ;
binmode O ;
print O $img->png() ;
close O ;
Focus Notes
The rm2-template-focus-notes shell script uses ImageMagick's magick command to create a simple .png template which looks like the "Focus Notes" layout, illustrated in the attachment to this Reddit post.
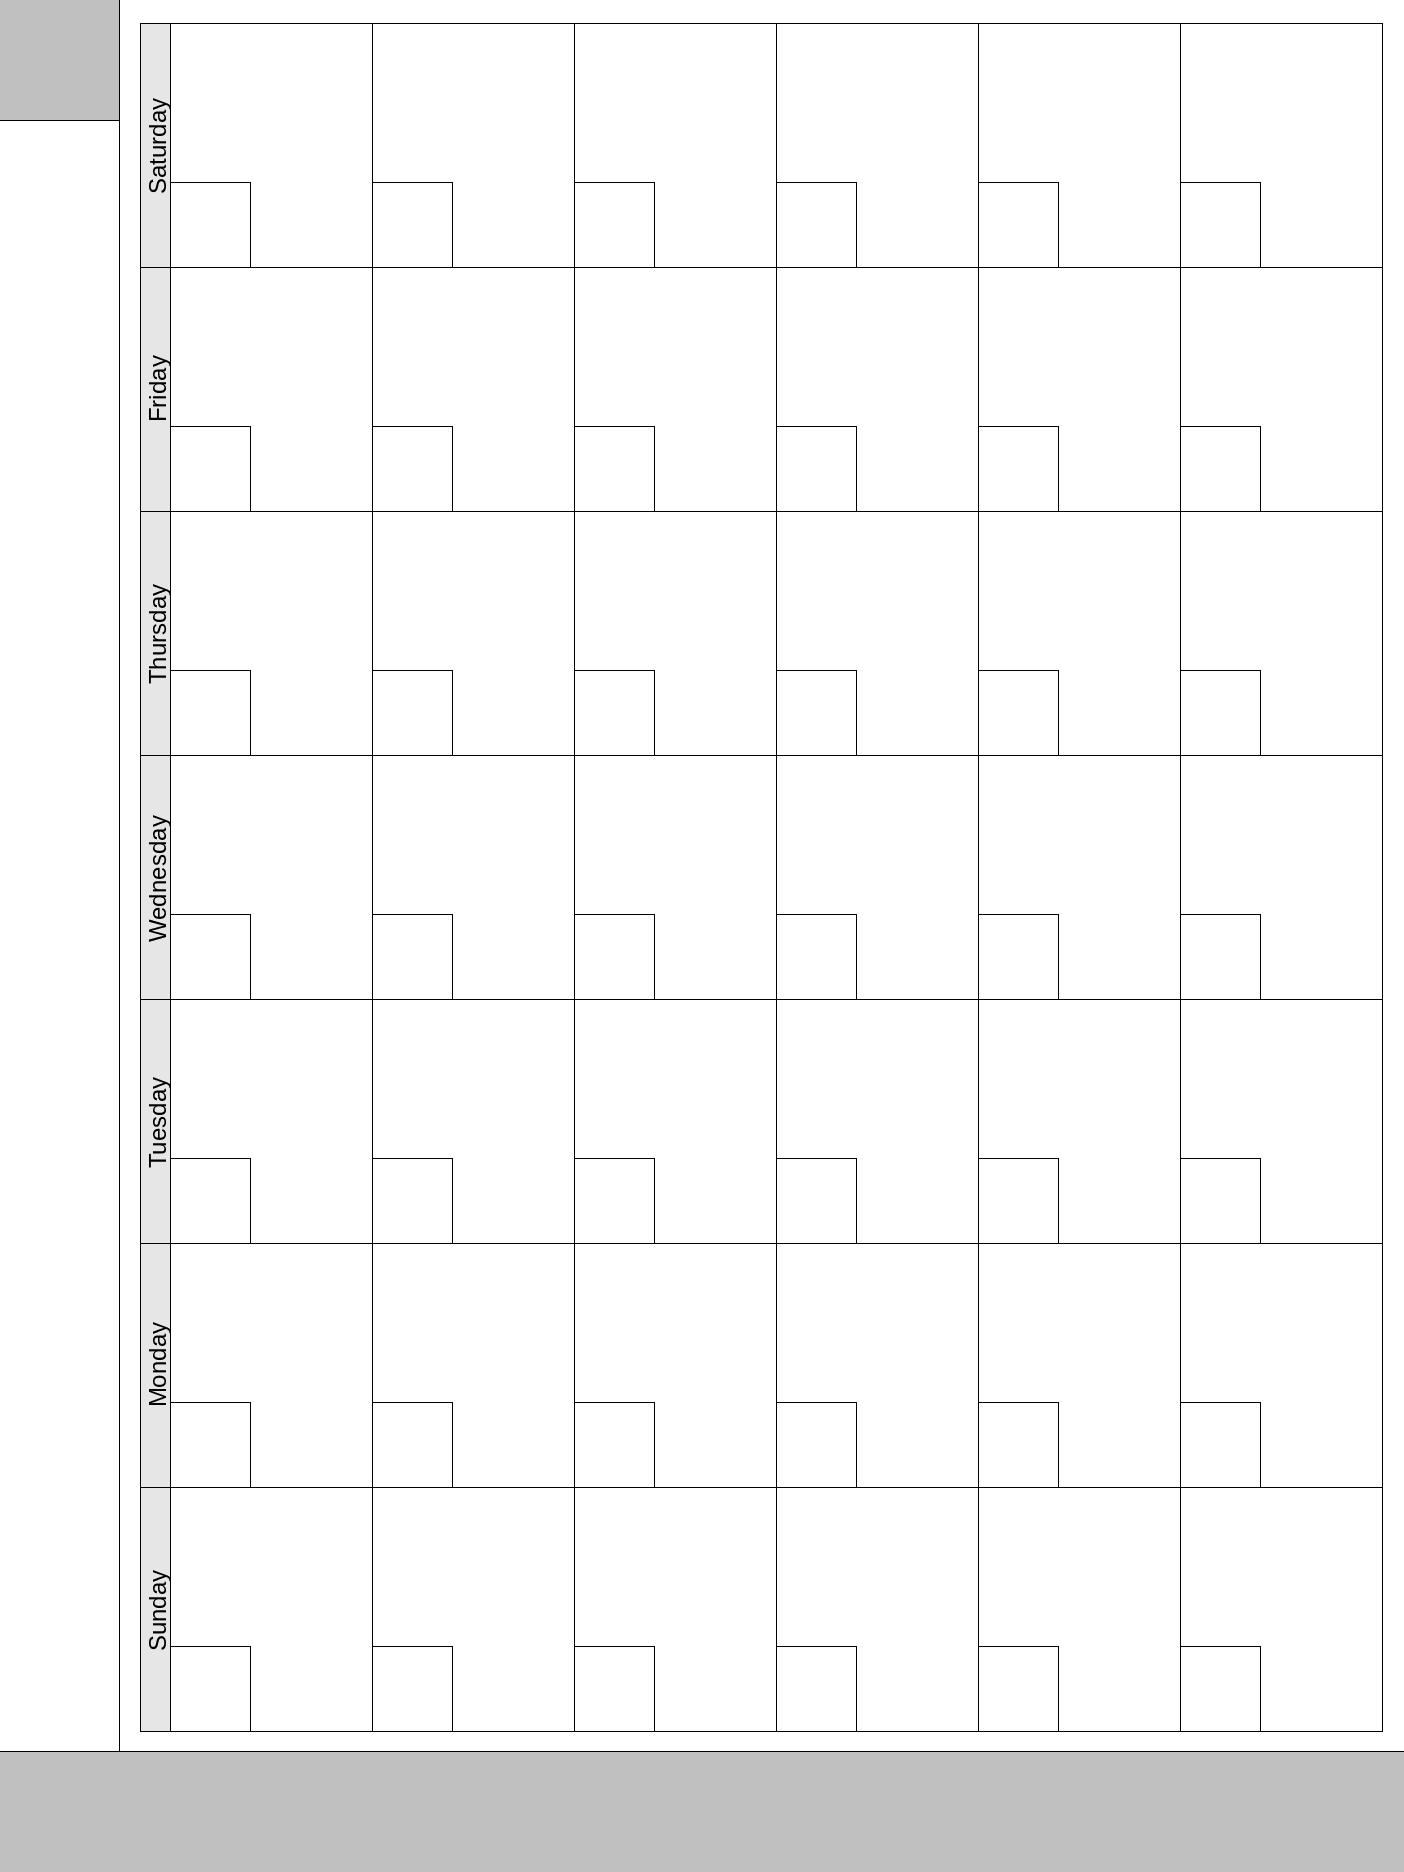
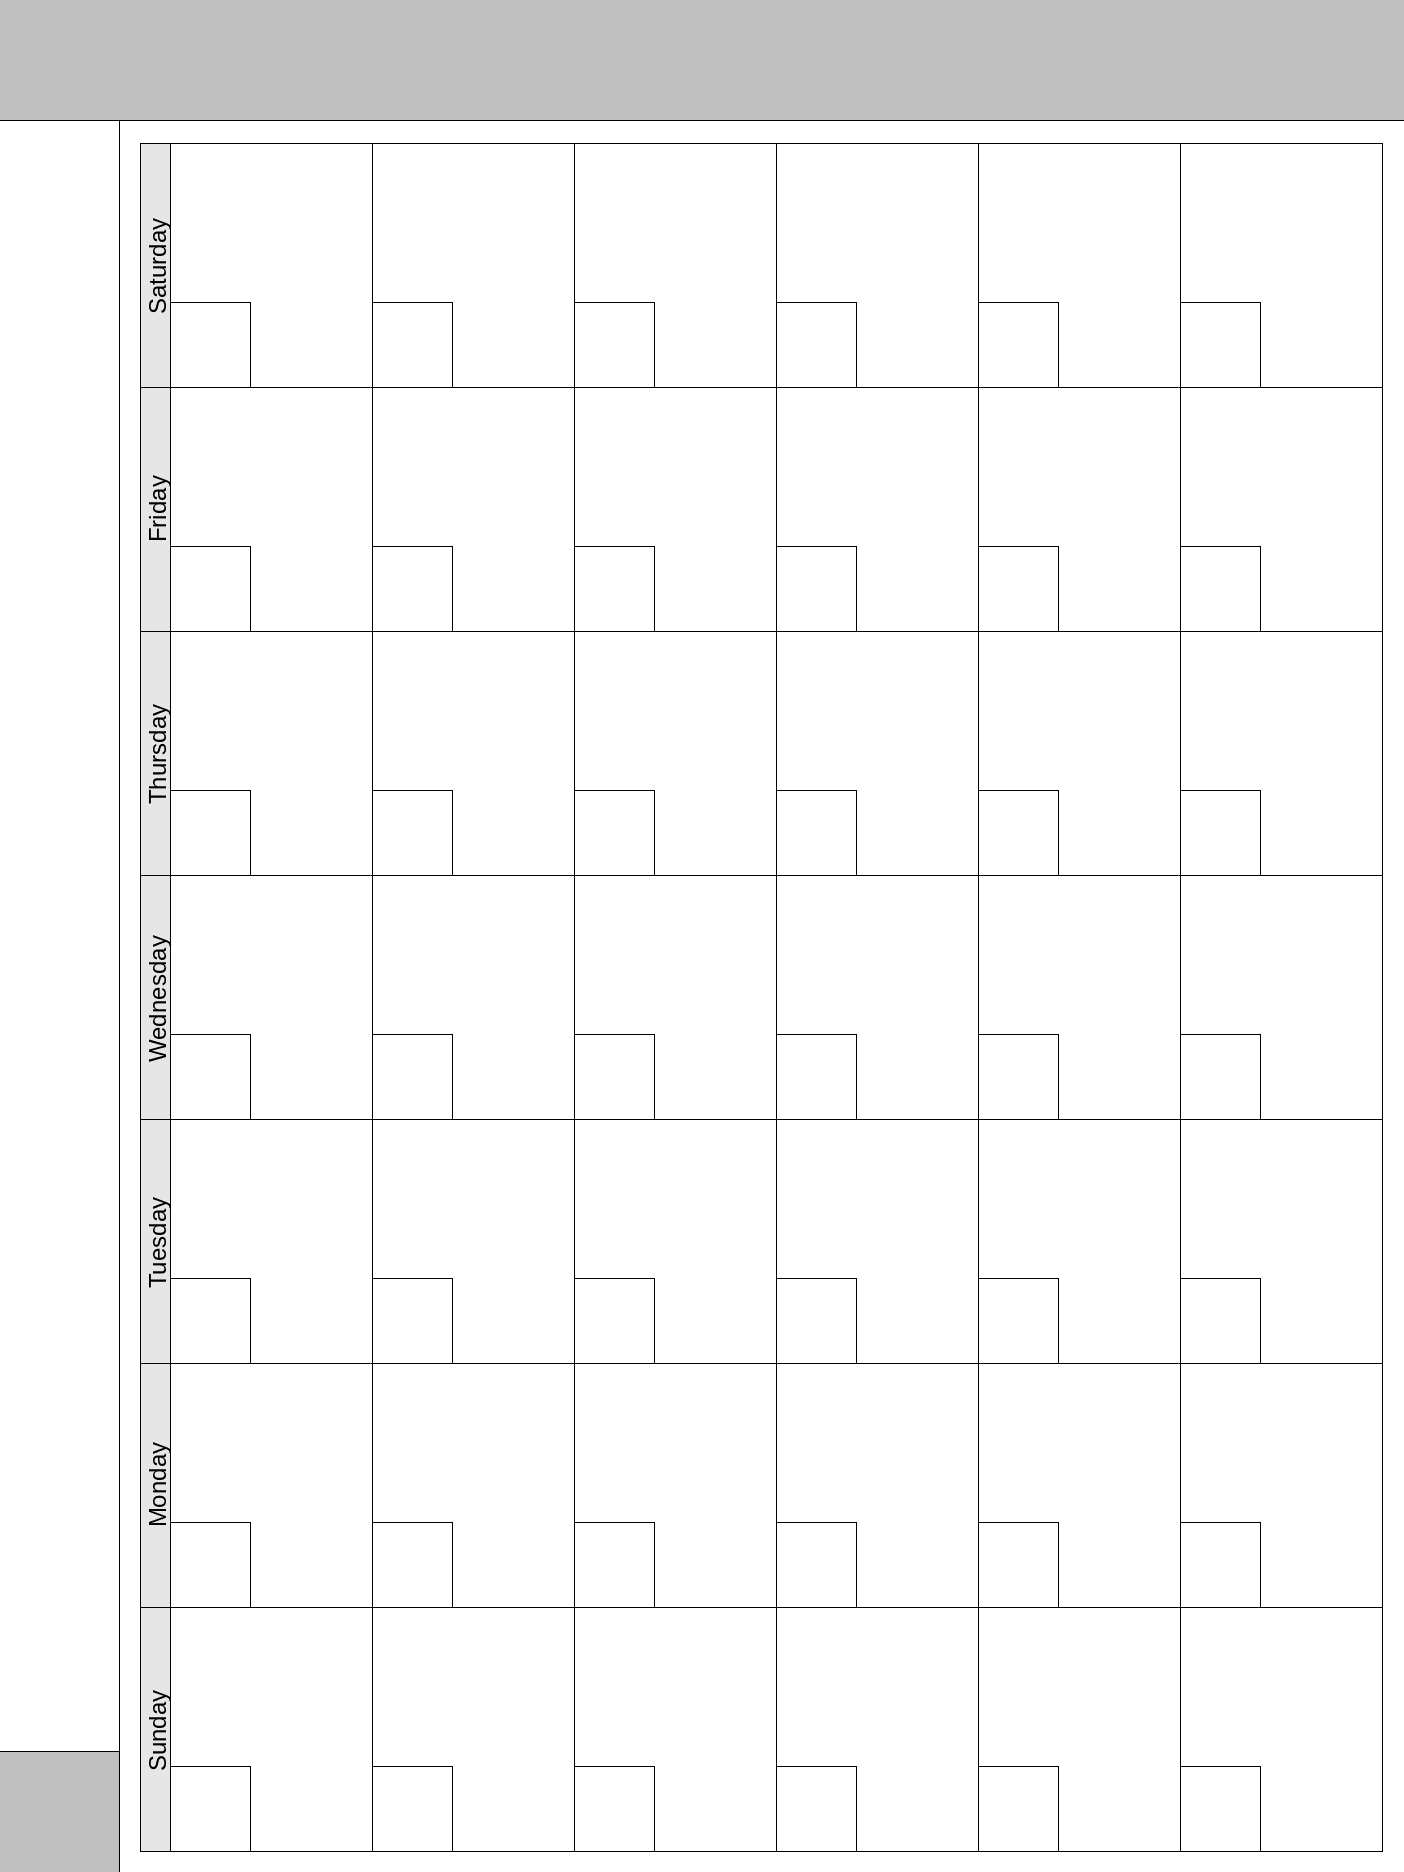
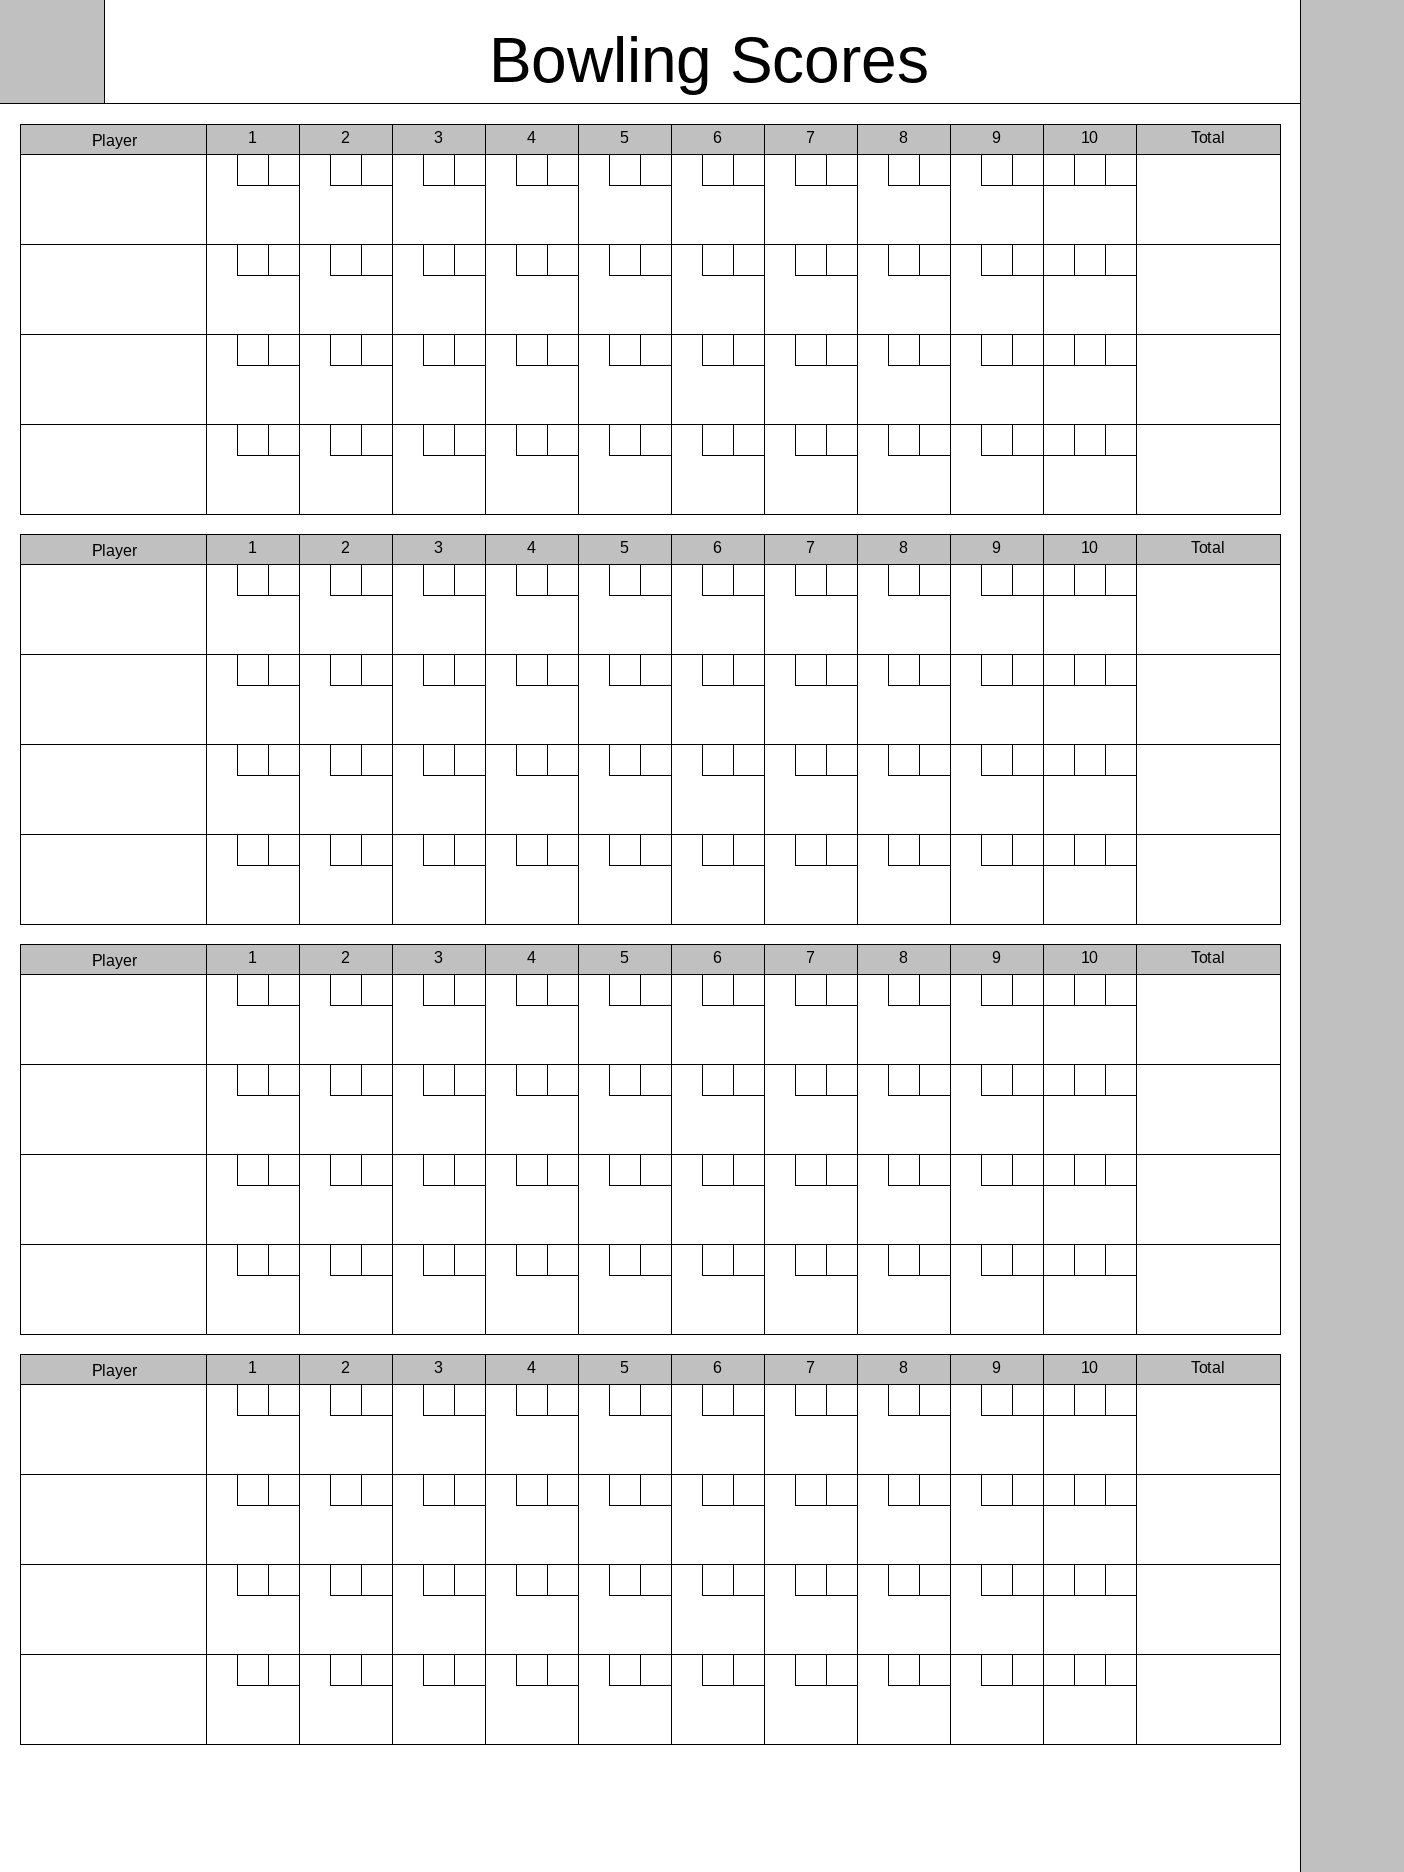
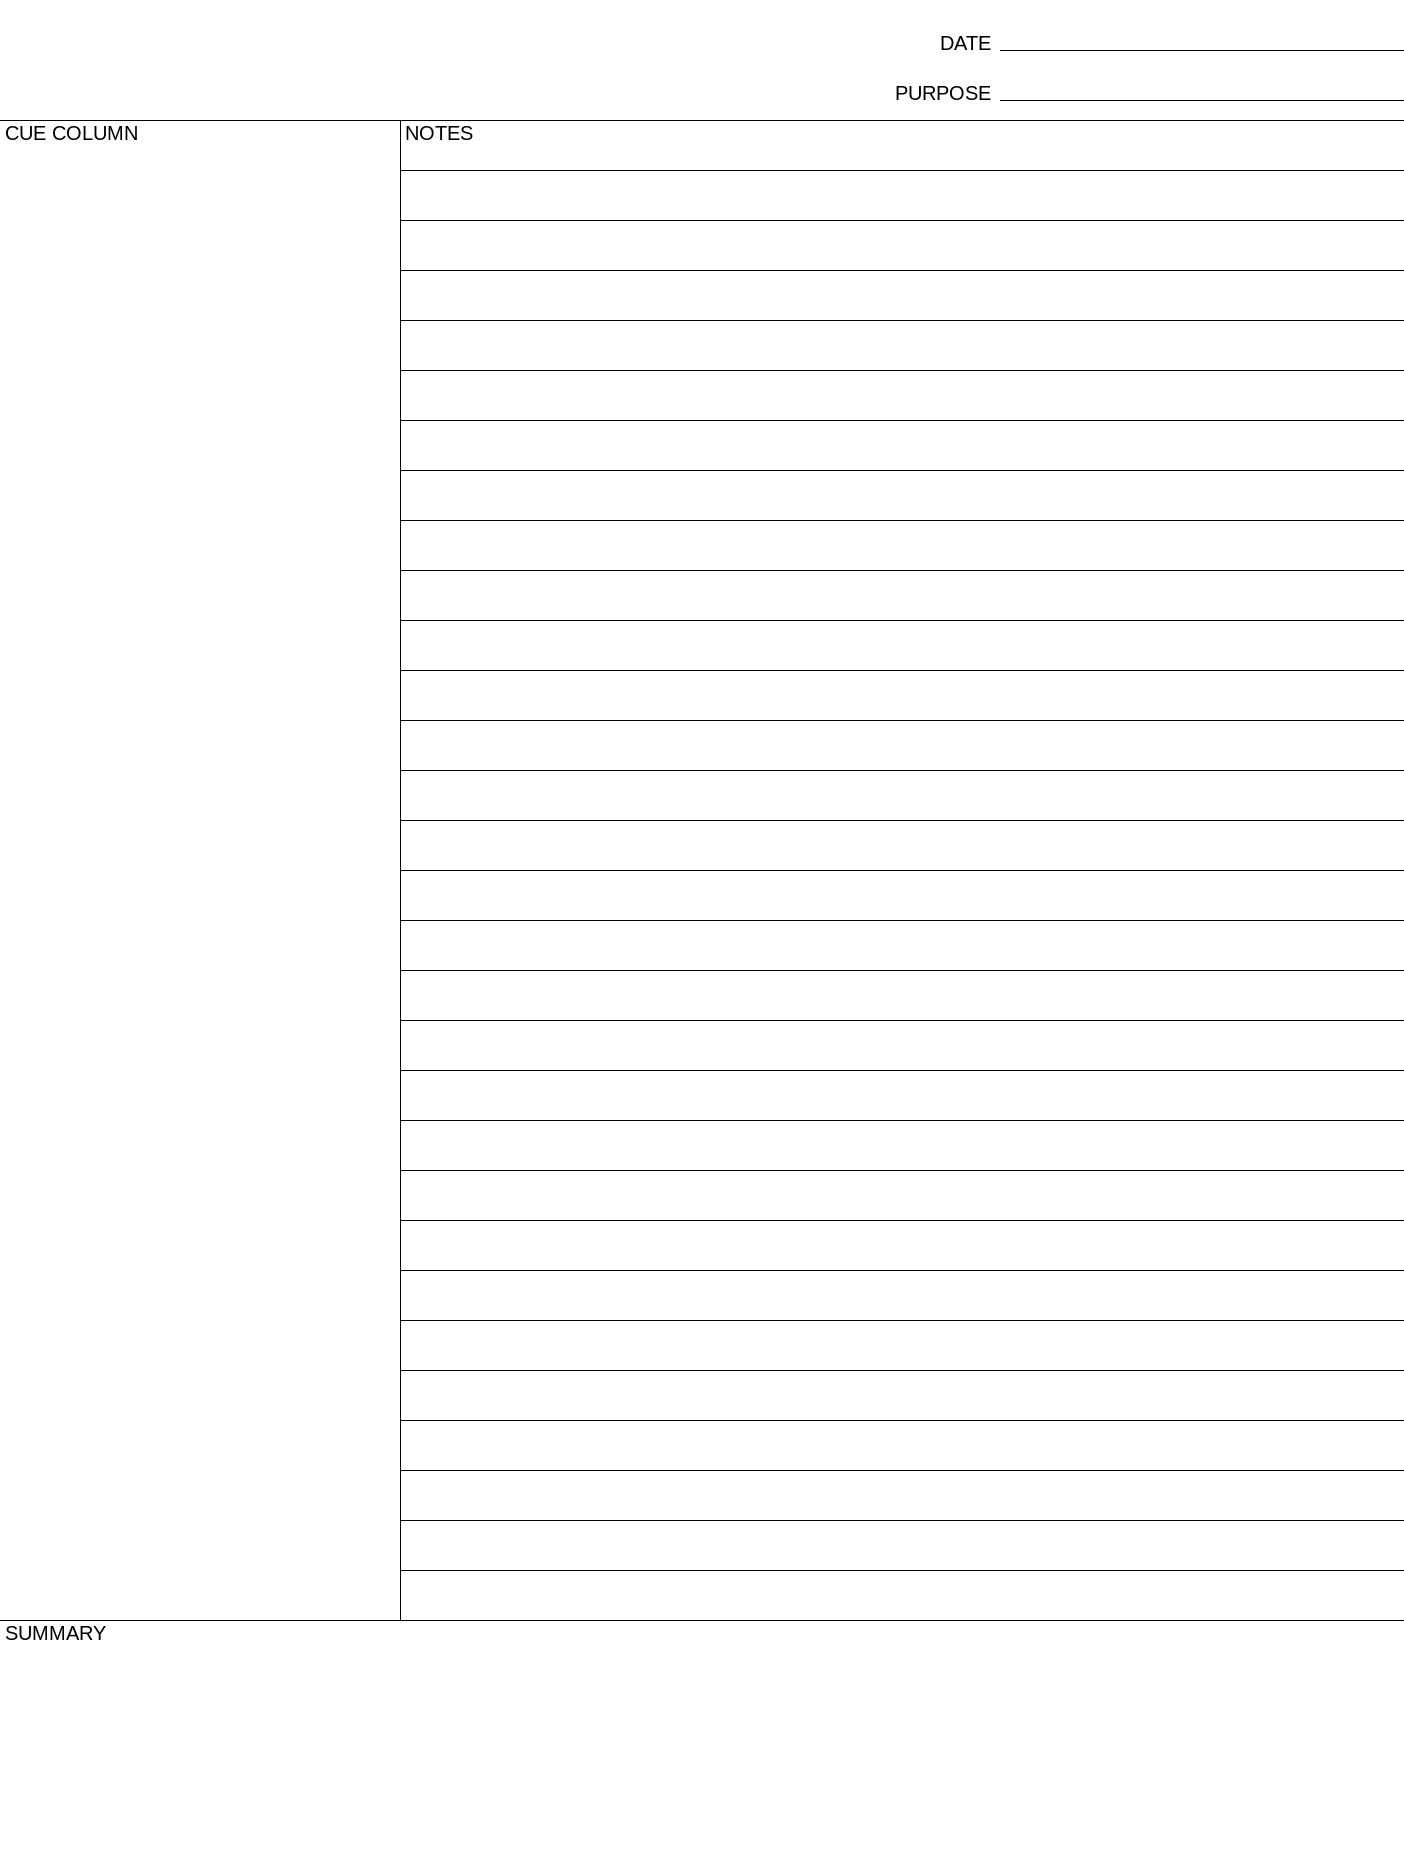
License
This script, and the .png files it creates, are too simple to worry about licensing, so...
To the extent possible under law, John Simpson has waived all copyright and related or neighboring rights to this script and/or the image files it produces.
These works are published from the United States of America.
The rm2-template-focus-notes Script
Download ⇒ rm2-template-focus-notes
#!/bin/bash
#
# rm2-template-focus-notes
# John Simpson <jms1@jms1.net> 2023-09-14
#
# Programmatically create a PNG template for use as a reMarkable 2 template.
#
# ImageMagick: https://imagemagick.org/
# Liberation Fonts: https://github.com/liberationfonts/liberation-fonts

set -e

magick \
    -type GrayScale -depth 8 -size 1404x1872 'xc:white' \
    -fill black \
    -draw 'line 1000 ,   50 , 1403 ,   50' \
    -draw 'line 1000 ,  100 , 1403 ,  100' \
    \
    -draw 'line    0 ,  120 , 1403 ,  120' \
    -draw 'line  400 ,  120 ,  400 , 1620' \
    -draw 'line    0 , 1620 , 1403 , 1620' \
    \
    -draw 'line  400 ,  170 , 1403 ,  170' \
    -draw 'line  400 ,  220 , 1403 ,  220' \
    -draw 'line  400 ,  270 , 1403 ,  270' \
    -draw 'line  400 ,  320 , 1403 ,  320' \
    -draw 'line  400 ,  370 , 1403 ,  370' \
    -draw 'line  400 ,  420 , 1403 ,  420' \
    -draw 'line  400 ,  470 , 1403 ,  470' \
    -draw 'line  400 ,  520 , 1403 ,  520' \
    -draw 'line  400 ,  570 , 1403 ,  570' \
    -draw 'line  400 ,  620 , 1403 ,  620' \
    -draw 'line  400 ,  670 , 1403 ,  670' \
    -draw 'line  400 ,  720 , 1403 ,  720' \
    -draw 'line  400 ,  770 , 1403 ,  770' \
    -draw 'line  400 ,  820 , 1403 ,  820' \
    -draw 'line  400 ,  870 , 1403 ,  870' \
    -draw 'line  400 ,  920 , 1403 ,  920' \
    -draw 'line  400 ,  970 , 1403 ,  970' \
    -draw 'line  400 , 1020 , 1403 , 1020' \
    -draw 'line  400 , 1070 , 1403 , 1070' \
    -draw 'line  400 , 1120 , 1403 , 1120' \
    -draw 'line  400 , 1170 , 1403 , 1170' \
    -draw 'line  400 , 1220 , 1403 , 1220' \
    -draw 'line  400 , 1270 , 1403 , 1270' \
    -draw 'line  400 , 1320 , 1403 , 1320' \
    -draw 'line  400 , 1370 , 1403 , 1370' \
    -draw 'line  400 , 1420 , 1403 , 1420' \
    -draw 'line  400 , 1470 , 1403 , 1470' \
    -draw 'line  400 , 1520 , 1403 , 1520' \
    -draw 'line  400 , 1570 , 1403 , 1570' \
    \
    -font 'Liberation-Sans' \
    -pointsize 20 \
    -draw 'text 940 ,   50 "DATE"' \
    -draw 'text 895 ,  100 "PURPOSE"' \
    -draw 'text   5 ,  140 "CUE COLUMN"' \
    -draw 'text 405 ,  140 "NOTES"' \
    -draw 'text   5 , 1640 "SUMMARY"' \
    \
    focusnotes.png
Scripts
I have written a few scripts to work with the reMarkable tablet, and after the "new tablet smell" wears off, chances are I'll be working on others in the future. This section of the book is where I'll share them with the world.
microsoft windows
I don't use windows anymore. The only windows machine I own is an old laptop infected with windows 7, that I keep around for programming an older ham radio. Since then, CHIRP has added support for those older radios and I can program them from a Mac, so I probably don't even need it anymore.
The fact that I haven't physically touched that laptop in almost two years is another good sign that I don't need it anymore.
I've heard that there are ways to run Linux-ish things on windows these days, but other than running Linux in a VM (using something like VirtualBox) and making sure the USB device for the tablet is passed through to the guess, I can't really tell you how to do it.
Github
Since I started this site, I started a Github repo for these scripts. This ended up being a lot easier for me to manage.
Going forward, all of my reMarkable scripts are being tracked and published there. When I have time, the scripts listed on this site will also be moved there.
SSH Access
Some of these scripts will need access to SSH into the tablet. In addition, the scripts will run more smoothly if you set up an SSH key.
The SSH Access page contains information about how to set this up.
Perl
I write many of my scripts in Perl, mostly because it's what I'm most familiar (and comfortable) with. For the most part, they are designed to run on a macOS or Linux computer, while the reMarkable tablet is connected via USB.
Because of this, you'll need Perl installed on the computer.
Luckily, Perl comes pre-installed on macOS and some Linux systems, and can be installed fairly easily on most others.
$ perl --version

This is perl 5, version 30, subversion 3 (v5.30.3) built for darwin-thread-multi-2level
(with 2 registered patches, see perl -V for more detail)
...
If it's not there, use your system's package manager to install it. This will generally involve a command line "yum install" or "apt install", depending on which Linux distribution you're using.
Perl JSON module
The reMarkable software uses a lot of JSON files, and some of the scripts need to read them. This means you will also need the Perl JSON module.
Again, it may already be installed. To check, run this command: (The last character is "digit ONE", not "lowercase L".)
$ perl -MJSON -e1
If it shows the next command prompt without printing anything, the module is installed.
If it shows a message like this ...
$ perl -MJSON -e1
Can't locate JSON.pm in @INC (you may need to install the JSON module) ...
... then you need to install the module.
If your system's package manager has a package for it, you should install it that way, so it can also keep the package up to date with the rest of your system's packages.
- Debian:
apt install libjson-perl - CentOS:
yum install perl-JSON
If not, you can install it using CPAN.
$ cpan install JSON
Golang
I'm trying to teach myself the Go language (aka "Golang") in my spare time.
Golang allows you to compile a program to run on a different platform than where you're compiling it. For example, I can write and compile a program on macOS and produce executables for a wide assortment of operating systems and CPU types (including windows, if you're into that sort of thing), all without having to figure out a bunch of "cross compilers" and different versions of libraries. And the people who use these programs, don't have to deal with installing a bunch of libraries (like the Perl JSON library) in order to use the program.
Specifically, I have found that a simple "hello world" program written in Go, compiled with the following settings, can be uploaded and executed as-is on the reMarkable 2 tablet.
GOOS=linux GOARCH=arm GOARM=7 go build ...
The reMarkable tablets are running a 32-bit kernel.
Be sure to use
GOARCH=armrather thanGOARCH=arm64.
I mention this because when I get some time, I plan to re-write these Perl scripts in Golang, so people don't have to deal with installing Perl or CPAN modules. Instead, they'll be able to download and use a single binary.
Note that when/if I do this, the Perl versions of the scripts won't be going away. Both versions will continue to be available, possibly from the pages on this site, but definitely from Github - although the different Golang programs will be in their own repos, so I can use Github's "releases" functionality to let users download compiled executables for their own systems.
The rmweb program is an example of this. It's a command line utility which uses the tablet's web interface to list the documents on a tablet, and download them as PDF files. Executables are available for macOS (Intel and ARM), Linux (x86 and x86_64), and ms-windows (Intel 32- and 64-bit).
The rm2-backup Script
This is a shell script which makes backups of the tablet's entire filesystem, under a directory on your workstation. You can control where the backups are written by changing the BACKUP= line near the top of the script.
Each backup will be written to a directory within the BACKUPS= directory, whose name will be the UTC timestamp when the backup started.
Updates
2023-08-05
The script now includes the tablet's serial number in the directory when creating the backup images.
$ cd ~/rm2-backups/
$ ls -la
total 0
drwxr-xr-x@  5 jms1  staff   160 Aug  4 01:33 .
drwxr-x---+ 69 jms1  staff  2208 Aug  5 10:32 ..
drwxr-xr-x@  7 jms1  staff   224 Aug  4 19:12 RM110-147-nnnnn
drwxr-xr-x@ 61 jms1  staff  1952 Aug  5 11:07 RM110-313-nnnnn
There was a version here for a few days which requried that you create a .serial file in order to enable this functionality. This is no longer needed, the script will always include the serial number now.
If you were using an older version of the script which didn't include the serial number, you may want to manually adjust your current backup directory before running the updated script. Otherwise, the first backup using the new script will be a "full" backup, because there won't be a "previous" backup for it to hard-link against.
The process will look something like this:
$ cd ~/rm2-backups/
$ mkdir RM110-313-nnnnn
$ mv 2* latest RM110-313-nnnnn/
After doing this, the script will "find" the previous backup directory correctly and use it for "hard links" to files which haven't changed since that backup.
2023-08-19
The script now has a list of default locations for where to store backups. Currently this list is:
/Volumes/rm2-backups/$HOME/rm2-backups/
I added this because I'm trying to figure out how to store my tablets' backups on a network share at home.
I did finally get things working, but it involved setting up NFS, and unless you're also using a Synology DS-series NAS, most of the directions I could write about it wouldn't really do you much good.
Background
Hard Links and inodes
The script creates "hard-linked" backups.
In order to understand how hard-linked backups work, you first need to understand what hard links and "inodes" are. Feel free to skip ahead if you already know this bit.
Most Unix-type filesystems (including Mac's HFS+ and APFS, as well as ext2/3/4, xfs, btrfs, zfs, and most other Linux filesystems) store different aspects of things called "files" in three different places:
-
Zero or more blocks of disk space store the contents of the file. Obviously, the number of blocks depends on how big the file is.
-
A data structure known as an "inode" (normally written with a lowercase "I"), which contains ...
- A list of the disk blocks containing the file's data.
- The file's size, ownership, permissions, timestamps, and other "metadata".
- inodes do not contain filenames.
-
The filesystem's directory structure contains a list of filenames, along with the inode that each name points to.
- Directories are stored the same way as regular files, i.e. inodes pointing to data blocks. Each data block contains a list of filenames and the inode numbers that name points to.
When two or more filenames point to the same inode, they are said to be "hard links" of each other.
Files which are hard-linked ARE the same file, they just have different names. This is similar to how the terms "The White House" and "1600 Pennsylvania Avenue" are different names for the same building.
The important thing for this discussion is, because hard-linked files are the same file, they only use enough disk blocks to hold one copy of the file, even if there are thousands of names pointing to it.
ℹ️ Symbolic Links
A symbolic link, or "symlink", is a file whose metadata says that it's a symlink, and whose contents are a path to the file it points to. The kernel's filesystem code recognizes the symlink flag and knows how to "follow" the link when accessing files and directories.
How the script works
The script uses a program called rsync, which is used to synchronize one directory into another.
-
When the script runs for the first time, it tells
rsyncto download everything on the tablet. -
After this, the script will tell
rsynccompare each file against the previous backup.-
Files which have changed since, or which didn't exist in, the previous backup, will be downloaded.
-
Files which have not changed will be stored as "hard links" to the same file in the previous backup.
-
Doing this means that, if a certain file never changes, the backup on your workstation will only contain one copy of the file, even if there are hundreds of names (in different directories) pointing to it.
You can see this in action. The df command knows about hard links, and knows not to include "links to a file which has already been counted" in the totals it comes up with.
$ cd ~/rm2-backup/
$ du -sh *
294M	2023-06-29T042646Z
1.6M	2023-06-29T115727Z
1.5M	2023-06-29T130720Z
4.1M	2023-06-30T005227Z
 35M	2023-06-30T133813Z
2.2M	2023-06-30T204714Z
Other than the first directory (which was the first backup I made of the tablet), the sizes shown here for each directory are just the files which changed since the previous backup.
If you run separate du commands for each directory, each execution of du won't be aware of which files were counted by the previous execution, so it will count the files in that directory, without taking other directories into account.
$ cd ~/rm2-backup/
$ for x in 20* ; do du -sh $x ; done
294M	2023-06-29T042646Z
294M	2023-06-29T115727Z
294M	2023-06-29T130720Z
295M	2023-06-30T005227Z
326M	2023-06-30T133813Z
326M	2023-06-30T204714Z
License
This script is licensed under the MIT License.
The MIT License (MIT)
Copyright © 2023 John Simpson
Permission is hereby granted, free of charge, to any person obtaining a copy of this software and associated documentation files (the “Software”), to deal in the Software without restriction, including without limitation the rights to use, copy, modify, merge, publish, distribute, sublicense, and/or sell copies of the Software, and to permit persons to whom the Software is furnished to do so, subject to the following conditions:
The above copyright notice and this permission notice shall be included in all copies or substantial portions of the Software.
THE SOFTWARE IS PROVIDED “AS IS”, WITHOUT WARRANTY OF ANY KIND, EXPRESS OR IMPLIED, INCLUDING BUT NOT LIMITED TO THE WARRANTIES OF MERCHANTABILITY, FITNESS FOR A PARTICULAR PURPOSE AND NONINFRINGEMENT. IN NO EVENT SHALL THE AUTHORS OR COPYRIGHT HOLDERS BE LIABLE FOR ANY CLAIM, DAMAGES OR OTHER LIABILITY, WHETHER IN AN ACTION OF CONTRACT, TORT OR OTHERWISE, ARISING FROM, OUT OF OR IN CONNECTION WITH THE SOFTWARE OR THE USE OR OTHER DEALINGS IN THE SOFTWARE.
Script
⇒ Download
#!/bin/bash
#
# rm2-backup
# John Simpson <jms1@jms1.net> 2023-06-29
#
# Back up the reMarkable 2 tablet, using rsync with the '--link-dest' option
# so each backup only "contains" the files which changed from the previous
# backup.
#
# Requirements:
#
# - SSH access to the tablet. Ideally you should have key-based authentication
#   set up, otherwise you'll have to type the tablet's password when running
#   the script.
#
# - The location where you're storing the backups should be on a UNIX-type
#   filesystem which supports "hard links" (i.e. multiple filenames pointing
#   to the same inode). This is true of most Linux filesytems, as well as the
#   macOS "HFS+" and "APFS" filesystems.
#
# - rsync version 3.1.1 or higher. In earlier versions (such as the version
#   that Apple includes with macOS), the '--link-dest' option didn't use hard
#   links, and every backup conained a full copy of the tablet's filesystem,
#   which took longer and used a LOT more disk space.
#
# If you're using macOS and are stuck with its ancient version of rsync, you
# can install a newer/working version from Homebrew. https://brew.sh/
#
# 2023-07-17 jms1 - Add 'latest' symlink in the backup directory.
#
# 2023-08-04 jms1 - Add serial number to backup directory
#
# 2023-08-05 jms1 - *always* use serial number in backup directory name
#
# 2023-08-18 jms1 - Adding a LIST of default backup directory locations.
#
###############################################################################
#
# The MIT License (MIT)
#
# Copyright (C) 2023 John Simpson
#
# Permission is hereby granted, free of charge, to any person obtaining a
# copy of this software and associated documentation files (the “Software”),
# to deal in the Software without restriction, including without limitation
# the rights to use, copy, modify, merge, publish, distribute, sublicense,
# and/or sell copies of the Software, and to permit persons to whom the
# Software is furnished to do so, subject to the following conditions:
#
# The above copyright notice and this permission notice shall be included in
# all copies or substantial portions of the Software.
#
# THE SOFTWARE IS PROVIDED “AS IS”, WITHOUT WARRANTY OF ANY KIND, EXPRESS OR
# IMPLIED, INCLUDING BUT NOT LIMITED TO THE WARRANTIES OF MERCHANTABILITY,
# FITNESS FOR A PARTICULAR PURPOSE AND NONINFRINGEMENT. IN NO EVENT SHALL
# THE AUTHORS OR COPYRIGHT HOLDERS BE LIABLE FOR ANY CLAIM, DAMAGES OR OTHER
# LIABILITY, WHETHER IN AN ACTION OF CONTRACT, TORT OR OTHERWISE, ARISING
# FROM, OUT OF OR IN CONNECTION WITH THE SOFTWARE OR THE USE OR OTHER
# DEALINGS IN THE SOFTWARE.
#
###############################################################################

########################################
# How to access the tablet.

TABLET="10.11.99.1"

########################################
# Where you plan to store the backup images.
# - The script walks through this list. The first location which exists as a
#   directory, will be used.
# - If none of them exist, the script will fail.
# - The '-b' option overrides this list.

BACKUP_LOCATIONS=(
    "/Volumes/rm2-backups"
    "$HOME/rm2-backups"
)

###############################################################################
#
# Coloured line functions

function blueline {
    if [[ -t 1 ]]
    then
        printf "\e[0;1;37;44m%s\e[0K\e[0m\n" "$*"
    else
        echo "===== $* ====="
    fi
}

###############################################################################
#
# usage

function usage {
    MSG="${*:-}"

    cat <<EOF
$0 [options]

Create a time-based backup of a reMarkable or reMarkable 2 tablet.

Time-based backups are written to directories named after the time when the
backup started. The script will identify the most recent backup, and any files
which have not changed since that backup will be stored as "hard links" to the
same file in the previous backup, rather than copying and storing another copy
of the same file.

-t ___  Specify the tablet's IP address.
        Default: 10.11.99.1

-b ___  Specify the directory in which the time-based backups will be written.
        Default: the first of the following which exists as a directory:
EOF

    for D in ${BACKUP_LOCATIONS[@]}
    do
        echo "        - $D"
    done

    cat <<EOF

-h      Show this help message.

EOF

    if [[ -n "$MSG" ]]
    then
        echo "$MSG"
        exit 1
    fi

    exit 0
}

###############################################################################
###############################################################################
###############################################################################
#
# Handle the command line

BACKUPS=""

while getopts ':hb:t:' OPT
do
    case $OPT in
        h)  usage
            ;;
        b)  BACKUPS="${OPTARG}"
            ;;
        t)  TABLET="${OPTARG}"
            ;;
        *)  usage "ERROR: unknown option '-${OPTARG}'"
            ;;
    esac
done

shift $(( OPTIND - 1 ))

###############################################################################
#
# Figure out where we're storing the backups

if [[ -z "$BACKUPS" ]]
then
    for D in "${BACKUP_LOCATIONS[@]}"
    do
        if [[ -d "$D" ]]
        then
            BACKUPS="$D"
            break
        fi
    done

    if [[ -z "$BACKUPS" ]]
    then
        usage "ERROR: no backup location specified or found, cannot continue"
    fi
fi

########################################
# Make sure the backup location exists
# - may not be true if it was specified using the '-b' option

BACKUPS="${BACKUPS%/}"

if [[ ! -d "$BACKUPS" ]]
then
    usage "ERROR: backup location '$BACKUPS' does not exist or is not a directory, cannot continue"
fi

blueline "Backing up to $BACKUPS"

###############################################################################
#
# Get the connected tablet's serial number

BDEV=$( set -x ; ssh "root@$TABLET" mount | awk '/\/home/{print substr($1,1,index($1,"p")-1)}' )
SERIAL=$( set -x ; ssh "root@$TABLET" "dd if=${BDEV}boot1 bs=1 skip=4 count=15 2>/dev/null" )

########################################
# Make sure the tablet's serial number directory exists

mkdir -p "$BACKUPS/$SERIAL"

########################################
# Get current timestamp, used for the backup directory name.

NOW="$( date -u '+%Y-%m-%dT%H%M%SZ' )"

########################################
# Find the most recent previous backup.
# - This assumes that the timestamps all start with "2", and that the 'ls'
#   command sorts the names correctly. THIS WILL BREAK in the year 3000.

PREV="$( ls -d1 "$BACKUPS/$SERIAL"/2* | tail -1 )"
if [[ -n "$PREV" ]]
then
    LINKPREV="--link-dest=$PREV"
else
    LINKPREV=""
fi

###############################################################################
#
# Back up the files

set -x

rsync -avzHl $LINKPREV  \
    --exclude   /dev    \
    --exclude   /proc   \
    --exclude   /run    \
    --exclude   /sys    \
    "root@$TABLET:/"    \
    "$BACKUPS/$SERIAL/$NOW/"

rm -f "$BACKUPS/$SERIAL/latest"
ln -s "$NOW" "$BACKUPS/$SERIAL/latest"
Calendar PDF script
This script creates a PDF file whose pages can be any of ...
- A calendar for a year
- A calendar for a month
- A page for a single day, in a similar format to the "daily-work" template shown on the Basic Templates page.
I also figured out how to set up "links" from one page to another. The calendars on the various pages all link to the appropriate day, month, or year page, if that day/month/year has a page within the file.
One thing that I wish I had known before spending several days trying to figure out is that, in the terminology used within PDF files, "annotations" are links, and they can jump to other pages (or specific parts of pages) within the same PDF, other PDF files, or URLs on the internet.
Script
⇒ Github - kg4zow/rm2-scripts
The README.md file in Github has more information, and the repo also has sample PDF files which were generated using rm2-cal.
Future
-
Maybe also a "weekly" page of some kind? I personally don't have any need for this, but it seems like something others might need, and it might be fun to write.
-
Maybe have a way to add notes within the PDF for specific days. This could be useful for labelling holidays or birthdays, or if somebody is using this for work, adding reminders for recurring meetings.
The rm2-clean Script
The reMarkable software was designed to synchronize all documents with their cloud service. This includes telling the cloud when things are deleted, and not actually deleting documents until they have also been deleted from the cloud.
If your tablet doesn't synchronize with the cloud, this means that the documents you delete will never actually be deleted from your tablet, and will continue to take up space. If this goes on long enough, the tablet will eventually run out of space.
This script will show, and can remove, these files.
Details
The word "deleted" can mean a few different things.
-
Trash is a special "folder" where documents are moved to when you "delete" them using the reMarkable software. This is the same idea as macOS's Trash, or windows' Recycle Bin.
The reMarkable software will show you these files if you tap "Menu → Trash". While it's showing the Trash folder, you will have an option to restore the file (which puts it into the "root directory", aka "My files"), a "Delete" function which permanently deletes a file, and an "Empty trash" function which permanently deletes all files in the Trash folder.
-
Deleted files are files which have been "permanently deleted" from the Trash folder, but a record of the files' being deleted has not been sync'ed up to the cloud yet.
These appear in the filesystem as one of the following:
-
For earlier firmware versions, the
UUID.metadatafile will exist, and contain the key"deleted" : true. -
Later firmware versions will delete all of the normal
UUID.*files, and instead create aUUID.tombstonefile, whose contents are the timestamp when the trash was deleted.
On a tablet which synchronizes with "the cloud", "permanently deleted" files are not actually deleted from the tablet's filesystem until after the tablet tells "the cloud" that they no longer "exist". I'm assuming this is so that the cloud doesn't sync the files back down to the tablet later on.
The reMarkable software keeps these files around until the next time it syncs against the cloud, and then deletes them... which is not very helpful if the tablet never synchronizes against the cloud.
-
-
Orphans are random files in the tablet's filesystem which are ignored by the reMarkable software. This may include files which were once part of a reMarkable document which no longer "exists", because the
UUID.metadatafile no longer exists.This can happen if the tablet shuts down in the middle of an operation, if somebody is manually tinkering with the filesystem and deletes a
.metadatafile they shouldn't have, or if there's a bug in the reMarkable software.
For tablets which DO synchronize with the cloud, you should use the reMarkable software as it was designed, and let the tablet "sync the deletions" with the cloud. This should cover everything other than orphans.
For tables which DO NOT synchronize with the cloud, you may want to use this script once in a while, to clean up the "permanently deleted" files and to clean up any Orphans which may appear.
Using the script
Setup
- Make sure you're able to SSH into the tablet. Ideally, you should set up an SSH key so you can SSH into the tablet without a password.
Running the script
-
Running the script with no options will list any files on the tablet in any "delete-able" state. These files will be flagged as DELETED or ORPHAN.
$ rm2-clean
UUID                                  Trash  Deleted  Orphan  Name
d67b9d2c-82bf-4448-bc6f-2f8e9384dc6e  TRASH                   /Delete Me
8141cc15-7881-40eb-9456-781dd6b0730a         DELETED          /Derp
8d06afae-3d2b-486d-8758-1b3c1a745cdb         DELETED          /XYZ folder/
                                                      ORPHAN  this-is-an-orphan-file
If the script doesn't print anything, it means there are no DELETED or ORPHAN files.
-
The "
-a" option will list all files on the tablet, including files which are not in any kind of "deleted" state.$ rm2-clean -a UUID Trash Deleted Orphan Name d67b9d2c-82bf-4448-bc6f-2f8e9384dc6e TRASH /Delete Me 8141cc15-7881-40eb-9456-781dd6b0730a DELETED /Derp f67c74d2-7d23-4587-95bd-7a6e8ebaed2c /Ebooks/ a628e45e-e627-42ad-8f0c-049f697ec12b /Ebooks/Stranger in a Strange Land 895bdd6d-1b2e-4c3c-b3c4-48030c26591c /Ebooks/The Art of Unix Programming 702ef913-16a0-47b1-806e-1769f251b06b /Ebooks/The Cathedral & the Bazaar 0573fd9d-277e-400c-a2da-2c2a5fce627f /Ebooks/Walkaway 9e6891eb-2558-4e70-b6fc-d03b2d75614b /Quick sheets 383dad70-b9db-4a04-a275-be17cfc6bc8c /ReMarkable 2 Info 015deb02-0589-462a-bc98-3034d7d23628 /Work/ 636e58a2-1561-4026-811f-df1aa7783bf3 /Work/Daily 2023-06 042b2cfe-af17-4056-a9c3-c46762b7170a /Work/Daily 2023-07 8a4f80b1-7132-4c89-867c-7118f7d0912e /Work/Random Notes 4687cc49-3e59-47b8-a1da-d5f14e6a0318 /Work/Ticket Notes 8d06afae-3d2b-486d-8758-1b3c1a745cdb DELETED /XYZ folder/ ORPHAN this-is-an-orphan-file
TODO
-
recognize/report
UUID.tombstonefiles- UUID in filename was the UUID of a documented that was emptied from the trash
- contents is a timestamp (in
Sun Jul 30 20:16:21 2023format) - replaces
"deleted"attribute inUUID.metadatafiles - also document on filesystem page
-
document other options
-oand-O-dand-D-u ___-x-h
-
options to list only files in one "deleted-ish" state (i.e. orphans only, for tablets which do sync)
- in Trash folder
- deleted (same as "tombstone" files?)
- orphans (both UUID-related and random filenames)
-
Is there a quick way to tell whether or not a given tablet sync's?
- yes, RCU does it
- may be unsafe to delete "deleted" or "tombstone" files if so
-
run with specific options to delete files in different status'es
-Oand-Dalready exist, need to be documented- specific UUID - removes all files relating to that UUID, even if it's not in a "deleted-ish" state
- specific filename (for orphans) - removes just the one file, if directory then removes that directory and its contents
License
This script is licensed under the MIT License.
The MIT License (MIT)
Copyright © 2023 John Simpson
Permission is hereby granted, free of charge, to any person obtaining a copy of this software and associated documentation files (the “Software”), to deal in the Software without restriction, including without limitation the rights to use, copy, modify, merge, publish, distribute, sublicense, and/or sell copies of the Software, and to permit persons to whom the Software is furnished to do so, subject to the following conditions:
The above copyright notice and this permission notice shall be included in all copies or substantial portions of the Software.
THE SOFTWARE IS PROVIDED “AS IS”, WITHOUT WARRANTY OF ANY KIND, EXPRESS OR IMPLIED, INCLUDING BUT NOT LIMITED TO THE WARRANTIES OF MERCHANTABILITY, FITNESS FOR A PARTICULAR PURPOSE AND NONINFRINGEMENT. IN NO EVENT SHALL THE AUTHORS OR COPYRIGHT HOLDERS BE LIABLE FOR ANY CLAIM, DAMAGES OR OTHER LIABILITY, WHETHER IN AN ACTION OF CONTRACT, TORT OR OTHERWISE, ARISING FROM, OUT OF OR IN CONNECTION WITH THE SOFTWARE OR THE USE OR OTHER DEALINGS IN THE SOFTWARE.
The Script
⇒ Download
#!/usr/bin/env perl -w
#
# rm2-clean
# John Simpson <jms1@jms1.net> 2023-06-30
#
# Last updated 2023-07-04
#
# This script can perform a few different kinds of "cleanup" operations on a
# reMarkable tablet.
#
# - Delete files which have been "emptied from the trash", but which have not
#   actually been deleted from the tablet. This happens because ...
#   - When files are deleted (by emptying the trash), the tablet needs to
#     tell the cloud that the file was deleted, otherwise the sync process
#     will think the file was deleted by accident and download the copy
#     from the cloud instead. Once the cloud knows that the file was deleted,
#     the software on the tablet will delete the files "for real".
#   - If the tablet never syncs with the cloud, these files will never be
#     deleted "for real", and eventually the tablet will run out of storage.
#
# - Delete any "orphaned" files or directories. These are files whose names
#   don't "match" an existing "UUID.metadata" file. This can happen if the
#   tablet shuts down or reboots in the middle of another operation.
#
###############################################################################
#
# The MIT License (MIT)
#
# Copyright (C) 2023 John Simpson
#
# Permission is hereby granted, free of charge, to any person obtaining a
# copy of this software and associated documentation files (the “Software”),
# to deal in the Software without restriction, including without limitation
# the rights to use, copy, modify, merge, publish, distribute, sublicense,
# and/or sell copies of the Software, and to permit persons to whom the
# Software is furnished to do so, subject to the following conditions:
#
# The above copyright notice and this permission notice shall be included in
# all copies or substantial portions of the Software.
#
# THE SOFTWARE IS PROVIDED “AS IS”, WITHOUT WARRANTY OF ANY KIND, EXPRESS OR
# IMPLIED, INCLUDING BUT NOT LIMITED TO THE WARRANTIES OF MERCHANTABILITY,
# FITNESS FOR A PARTICULAR PURPOSE AND NONINFRINGEMENT. IN NO EVENT SHALL
# THE AUTHORS OR COPYRIGHT HOLDERS BE LIABLE FOR ANY CLAIM, DAMAGES OR OTHER
# LIABILITY, WHETHER IN AN ACTION OF CONTRACT, TORT OR OTHERWISE, ARISING
# FROM, OUT OF OR IN CONNECTION WITH THE SOFTWARE OR THE USE OR OTHER
# DEALINGS IN THE SOFTWARE.
#
###############################################################################

require 5.005 ;
use strict ;

use File::Temp qw( tempdir ) ;
use Getopt::Std ;
use JSON ;

use Data::Dumper ;

my $xochitl_dir     = '/home/root/.local/share/remarkable/xochitl';

########################################
# globals

my $tablet_ip       = '10.11.99.1' ;
my $workdir         = '' ;
my $using_ssh       = 0 ;

my %metadata        = () ;      # UUID => contents of UUID.metadata file
my %content         = () ;      # UUID => contents of UUID.content file
my %calc            = () ;      # UUID => calculated info for each UUID
my %uuid_files      = () ;      # UUID => array of file/dir names
my %other_files     = () ;      # filename => 1 other random filenames
my %del             = () ;      # filename => 1 to be deleted

my %opt             = () ;      # getopts
my $do_orphans      = 0 ;       # -o/O  (1=show 2=remove) orphans
my $do_delete       = 0 ;       # -d/D  (1=show 2=remove) deleted items
my $do_all          = 0 ;       # -a    remove all avail
my $the_uuid        = '' ;      # -u:   which UUID we're focusing on
my $show_cmds       = 0 ;       # -x    show external commands being run

my $do_debug        = 0 ;       # change to 1 for debug messages

###############################################################################
#
# usage

sub usage(;$)
{
    my $msg = ( shift || '' ) ;

    print <<EOF ;
$0 [options] [DIR]

Clean up files on a reMarkable 2 tablet.

If DIR is specified, it should contain either a copy of, or the live 'sshfs'
mounted, "/home/root/.local/share/remarkable/xochitl/" directory from a
reMarkable tablet.

If DIR is not specified, the script will attempt to SSH into the tablet. This
will depend on SSH being enabled on the tablet, and setting up an SSH key for
authentication (or being ready to type the SSH password while the script is
running.)

If no SHOW/REMOVE options are specified, show a list of all UUIDs and any
properties which might make them eligible to be deleted.

BE CAREFUL. Any deletions other than removing "orphaned" UUIDs can cause
problems with the cloud synchronization process.

Options

-o      SHOW "orphaned" UUIDs and files.
-O      REMOVE "orhaned" UUIDs and files.

-r      SHOW UUIDs which have been "emptied from the trash" but not fully
        deleted from the tablet.
-R      REMOVE files for UUIDs which have been "emptied from the trash" but
        not fully deleted from the tablet.

Other Options

-a      When showing a list, show ALL items rather than just the ones which
        could be deletable.

-u ___  Options which delete files will target ONLY this specific UUID.

-x      Show the SSH command used to read files from the server.

-h      Show this help message.

Options which remove files require either the '-a' or '-u' option.

EOF

    if ( $msg ne '' )
    {
        print $msg ;
        exit 1 ;
    }

    exit 0 ;
}

###############################################################################
#
# Debugging function

sub debug(@)
{
    $do_debug && print @_ ;
}

###############################################################################
#
# Read all UUID.metadata files into memory

sub read_metadata()
{
    for my $f ( glob( "$workdir/*" ) )
    {
        ########################################
        # Remove $workdir from name

        $f =~ s|^$workdir/|| ;

        ########################################
        # Extract the UUID from the filename

        my $uuid = $f ;
        $uuid =~ s|^.*/|| ;
        $uuid =~ s|\..*$|| ;
        $uuid = lc( $uuid ) ;

        ########################################
        # Remember all filenames associated with this UUID

        if ( -f $f || -d $f )
        {
            push( @{$uuid_files{$uuid}} , $f ) ;
        }

        ############################################################
        # If this is a '.metadata' file, read more details

        if ( $f =~ m|\.metadata$| )
        {
            ############################################################
            # Read the UUID.metadata file

            my $mf = "$workdir/$f" ;
            $calc{$uuid}->{'metadata_file'} = $mf ;

            open( M , '<' , $mf )
                or die "ERROR: open('$mf'): $!\n" ;

            my $jtext = '' ;
            while ( my $line = <M> )
            {
                $jtext .= $line ;
            }
            close M ;

            ########################################
            # Parse contents as JSON

            my $j = decode_json( $jtext )
                or die "ERROR: cannot parse contents of '$mf' as JSON\n$jtext\n" ;

            ########################################
            # Store what we found

            $metadata{$uuid} = $j ;

            ############################################################
            # Also read the corresponding UUID.content file

            my $cf = "$workdir/$uuid.content" ;

            $calc{$uuid}->{'content_file'} = $cf ;

            ########################################
            # Read the file into memory

            open( C , '<' , $cf )
                or die "ERROR: open('$cf'): $!\n" ;

            $jtext = '' ;
            while ( my $line = <C> )
            {
                $jtext .= $line ;
            }
            close C ;

            ########################################
            # Parse contents as JSON

            $j = decode_json( $jtext )
                or die "ERROR: cannot parse contents of '$cf' as JSON\n$jtext\n" ;

            ########################################
            # Store what we found

            $content{$uuid} = $j ;

            ############################################################
            # Count/store "deleted" pages

            my $pages   = 0 ;
            my $dp      = 0 ;

            for my $p ( @{$j->{'cPages'}->{'pages'}} )
            {
                if ( exists $p->{'deleted'} )
                {
                    $dp ++ ;
                }
                else
                {
                    $pages ++ ;
                }
            }

            $calc{$uuid}->{'pages'} = $pages ;
            $calc{$uuid}->{'dp'}    = $dp ;
        }
    }
}

###############################################################################
#
# Return the full name, with "path", of a UUID

sub fullname($) ;
sub fullname($)
{
    my $uuid    = shift ;
    my $parent  = '' ;
    my $name    = '' ;

    ########################################
    # If the item has no metadata, it's an orphan (has no visibleName)

    unless ( exists $metadata{$uuid} )
    {
        return '(ORPHAN)' ;
    }

    ########################################
    # Build parent's name

    if ( $metadata{$uuid}->{'parent'} eq '' )
    {
        $parent = '' ;
    }
    elsif ( $metadata{$uuid}->{'parent'} eq 'trash' )
    {
        $parent = 'Trash' ;
    }
    else
    {
        $parent = fullname( $metadata{$uuid}->{'parent'} ) ;
    }

    ########################################
    # Build return value

    $name = $metadata{$uuid}->{'visibleName'} ;

    return "$parent/$name" ;
}

###############################################################################
#
# Sort function - by fullname

sub by_fullname($$)
{
    my $a = shift ;
    my $b = shift ;

    my $an = fullname( $a ) ;
    my $bn = fullname( $b ) ;

    return ( $an cmp $bn ) ;
}

###############################################################################
#
# Deleting files is done in two phases.
# - Main program will call remove_uuid() to build a list of the file/directory
#   names needing to be deleted.
# - It will then call delete_files(), which will either remove them locally or
#   via SSH, depending on whether or not SSH is being used to talk to a tablet.
#
# The delete_files() function builds a list of filenames to be deleted. When
# the list becomes too big, or when it reaches the end of the list, it calls
# delete_batch() to actually run the command to delete the files which are on
# the list so far.

sub delete_batch($)
{
    my $list = shift ;

    ########################################
    # Build the correct command line depending on whethere we are
    # using SSH or not.

    my $run = $using_ssh
        ? "ssh root\@$tablet_ip \"cd $xochitl_dir && rm -r$list\""
        :                        "cd $workdir     && rm -r$list"  ;

    ########################################
    # Run the command

    $show_cmds && print "+ $run\n" ;

    my $rv = system( $run ) ;
    if ( $rv )
    {
        print "RV=$rv early exit\n" ;
        exit ( $rv >> 8 ) ;
    }
}

sub delete_files()
{
    print "\n===== Deleting files =====\n" ;

    my $list    = '' ;
    my $count   = 0 ;

    ########################################
    # Processing names in reverse order so that files within directories
    # will be deleted before the directories themselves.

    for my $f ( reverse sort keys %del )
    {
        ########################################
        # Add this to the list of things to be deleted

        $list .= " '$f'" ;
        $count ++ ;

        ########################################
        # Command lines can only be a certain length, and we don't know how
        # long it's going to be when it's done. If the list of filenames is
        # 32K or longer, run the command and empty the list.

        if ( length( $list ) >= 32768 )
        {
            delete_batch( $list ) ;
            $list = '' ;
        }
    }

    ########################################
    # If any filenames remain to be deleted, run the command.

    if ( $list ne '' )
    {
        delete_batch( $list ) ;
        $list = '' ;
    }

    print "files deleted: $count\n" ;
}

###############################################################################
#
# Add the files/dirs for a UUID to the deletion list

sub remove_uuid($)
{
    my $uuid = shift ;

    if ( exists $uuid_files{$uuid} )
    {
        for my $f ( sort @{$uuid_files{$uuid}} )
        {
            $del{$f} = 1 ;
        }
    }

    if ( exists $other_files{$uuid} )
    {
        $del{$uuid} = 1 ;
    }
}

###############################################################################
###############################################################################
###############################################################################
#
# Process command line

getopts( 'hOoDdau:xI:' , \%opt ) ;
$opt{'h'} && usage() ;

$do_orphans = ( $opt{'O'} ? 2 : ( $opt{'o'} ? 1 : 0 ) ) ;
$do_delete  = ( $opt{'D'} ? 2 : ( $opt{'d'} ? 1 : 0 ) ) ;
$do_all     = ( $opt{'a'} ? 1 : 0 ) ;
$the_uuid   = lc ( $opt{'u'} || '' ) ;
$show_cmds  = ( $opt{'x'} ? 1 : 0 ) ;
$tablet_ip  = ( $opt{'I'} || $tablet_ip ) ;

$workdir    = ( shift || '' ) ;

########################################
# If the command line didn't mention specific file types,
# we are just showing a list.

my $do_list = ( $do_orphans || $do_delete ) ? 0 : 1 ;

###############################################################################
#
# If $workdir is empty, we need to create a temp directory, then SSH into
# the tablet and copy the *.metadata and *.content files there.

if ( $workdir eq '' )
{
    $using_ssh = 1 ;

    ########################################
    # Create a temp directory and work from there

    my $temp_dir = tempdir( CLEANUP => 1 ) ;
    chdir( $temp_dir )
        or die "ERROR: chdir('$temp_dir'): $!\n" ;
    $workdir = $temp_dir ;

    ########################################
    # Download all *.metadata and *.content files into temp directory

    my $tablet_cmd = "cd $xochitl_dir ; tar cf - *.metadata *.content" ;

    my $cmd = "ssh -ax"
        . " -o 'HostKeyAlgorithms +ssh-rsa'"
        . " -o 'PubkeyAcceptedKeyTypes +ssh-rsa'"
        . " root\@$tablet_ip"
        . " '$tablet_cmd'"
        . " | tar xf -" ;

    $show_cmds && print "+ $cmd\n" ;
    system $cmd ;

    ########################################
    # Look at all file/directory names which *exist* on the tablet
    # - we need the names but not the contents

    $tablet_cmd = "cd $xochitl_dir ; find ." ;

    $cmd = "ssh -ax"
        . " -o 'HostKeyAlgorithms +ssh-rsa'"
        . " -o 'PubkeyAcceptedKeyTypes +ssh-rsa'"
        . " root\@$tablet_ip"
        . " '$tablet_cmd'" ;

    $show_cmds && print "+ $cmd\n" ;

    open( F , "$cmd |" )
        or die "ERROR: $cmd: $!\n" ;

    while ( my $line = <F> )
    {
        chomp $line ;
        next unless ( $line =~ s|^\./|| ) ;

        ########################################
        # If the name starts with a UUID, and a "UUID.metadata" file exists,
        # remember that

        my $uuid = '' ;
        if ( $line =~ m|^([0-9a-f]{8}\-[0-9a-f]{4}\-[0-9a-f]{4}\-[0-9a-f]{4}\-[0-9a-f]{12})|i )
        {
            my $u = $1 ;
            if ( -f "$u.metadata" )
            {
                $uuid = lc( $1 ) ;
            }
        }

        ########################################
        # If a UUID was found, associate this file with it

        if ( $uuid ne '' )
        {
            push( @{$uuid_files{$uuid}} , $line ) ;
        }

        ########################################
        # Otherwise, this is a loose "orphan" file

        else
        {
            $other_files{$line} = 1 ;
        }
    }

    close F ;
}

###############################################################################
#
# Scan that directory

read_metadata() ;

########################################
# Build a "tree" representing the directory structure

for my $uuid ( sort keys %metadata )
{
    my $parent = $metadata{$uuid}->{'parent'} ;
    push( @{$calc{$parent}->{'children'}} , $uuid ) ;
}

###############################################################################
#
# Whatever we're doing, the output will be a list.

########################################
# Figure out the list of UUIDs we'll be looking at

my @sorted_uuids = () ;

if ( $the_uuid )
{
    @sorted_uuids = ( $the_uuid ) ;
}
else
{
    @sorted_uuids = sort by_fullname keys %uuid_files ;
}

push( @sorted_uuids , sort keys %other_files ) ;

############################################################
# Process the list

my $shown       = 0 ;
my $deleting    = 0 ;

for my $uuid ( @sorted_uuids )
{
    ########################################
    # Figure out the status of this UUID

    my $name    = '' ;
    my $orphan  = 0 ;
    my $deleted = 0 ;
    my $trash   = 0 ;

    if ( exists $metadata{$uuid} )
    {
        my $m   = $metadata{$uuid} ;

        $name   = fullname( $uuid ) ;
        if ( $metadata{$uuid}->{'type'} eq 'CollectionType' )
        {
            $name .= '/' ;
        }

        if ( $name =~ m|^Trash/| )
        {
            $trash = 1 ;
        }

        $deleted    = ( $m->{'deleted'} || 0 ) ;
    }
    else
    {
        $orphan = 1 ;
        $name   = $uuid ;
    }

    ########################################
    # Make sure this is a file we care about
    # - If any of the "delete" options were specified, only show UUIDs which
    #   match the criteria for deletion.
    # - If none of the "delete" options were specified, $do_list will be set
    #   instead, and we'll show everything but then

    my $show = 0 ;

    if ( $do_orphans )
    {
        if ( $orphan )
        {
            $show = 1 ;
        }
    }

    if ( $do_delete )
    {
        if ( $deleted )
        {
            $show = 1 ;
        }
    }

    if ( $do_list )
    {
        if ( $do_all || $orphan || $deleted )
        {
            $show = 1 ;
        }
    }

    next unless ( $show ) ;

    ############################################################
    # Show the entry

    ########################################
    # Maybe show the header line first

    unless ( $shown )
    {
        printf "%-37s %-6s %-8s %-7s %s\n" ,
            'UUID' , 'Trash' , 'Deleted' , 'Orphan' , 'Name' ;
    }
    $shown ++ ;

    ########################################
    # Print what we figured out

    printf "%-37s %-6s %-8s %-7s %s\n" ,
        ( $orphan ? '' : $uuid ) ,
        ( $trash   ? 'TRASH'   : '' ) ,
        ( $deleted ? 'DELETED' : '' ) ,
        ( $orphan  ? 'ORPHAN'  : '' ) ,
        $name ;

    ############################################################
    # If we're CHANGING anything, do it.

    ########################################
    # If we're removing "orphaned" UUIDs/files, add this one to the list

    if ( ( $do_orphans > 1 ) && $orphan )
    {
        remove_uuid( $uuid ) ;
        $deleting ++ ;
    }

    ########################################
    # If we're removing deleted UUIDs, add this one to the list

    elsif ( ( $do_delete > 1 ) && $deleted )
    {
        remove_uuid( $uuid ) ;
        $deleting ++ ;
    }
}

###############################################################################
#
# Do the deed

if ( $deleting > 0 )
{
    delete_files() ;
}
The rm2-list Script
This Perl script shows a list of the documents stored in the tablet, as presented by the reMarkable UI. This is different from how documents are actually stored in the tablet.
This script works by first copying all of the *.metadata and *.content files from the tablet, then reading those files to build the list. It can also read the files directly from a directory, if you want to examine the contents of a filesystem backup (like what rm2-backup creates), or if you've mounted the tablet's filesystem directly using sshfs.
License
This script is licensed under the MIT License.
The MIT License (MIT)
Copyright © 2023 John Simpson
Permission is hereby granted, free of charge, to any person obtaining a copy of this software and associated documentation files (the “Software”), to deal in the Software without restriction, including without limitation the rights to use, copy, modify, merge, publish, distribute, sublicense, and/or sell copies of the Software, and to permit persons to whom the Software is furnished to do so, subject to the following conditions:
The above copyright notice and this permission notice shall be included in all copies or substantial portions of the Software.
THE SOFTWARE IS PROVIDED “AS IS”, WITHOUT WARRANTY OF ANY KIND, EXPRESS OR IMPLIED, INCLUDING BUT NOT LIMITED TO THE WARRANTIES OF MERCHANTABILITY, FITNESS FOR A PARTICULAR PURPOSE AND NONINFRINGEMENT. IN NO EVENT SHALL THE AUTHORS OR COPYRIGHT HOLDERS BE LIABLE FOR ANY CLAIM, DAMAGES OR OTHER LIABILITY, WHETHER IN AN ACTION OF CONTRACT, TORT OR OTHERWISE, ARISING FROM, OUT OF OR IN CONNECTION WITH THE SOFTWARE OR THE USE OR OTHER DEALINGS IN THE SOFTWARE.
The Script
⇒ Download
#!/usr/bin/env perl -w
#
# rm2-list
# John Simpson <jms1@jms1.net> 2023-06-30
#
# The reMarkable tablet presents a "filesystem" in the UI, but the files in
# the tablet have names based on UUIDs, all stored in a single directory.
# This script scans these UUID files and prints a list showing the directory
# structure and filenames as presented in the UI.
#
# I wrote this to make sure I understand how the "filesystem" on the tablet
# works, before writing other scripts which will DO things with the "files"
# in the tablet.
#
# 2023-07-20 jms1 - adjusting for UUID.metadata files whose "parent" element
#   is missing or null.
#
# 2023-08-21 jms1 - fix sort so directories appear before files
#
# 2023-12-26 jms1 - write output in UTF-8 mode (prevents "wide character"
#   warnings if display names contain multi-byte characters)
#
###############################################################################
#
# The MIT License (MIT)
#
# Copyright (C) 2023 John Simpson
#
# Permission is hereby granted, free of charge, to any person obtaining a
# copy of this software and associated documentation files (the “Software”),
# to deal in the Software without restriction, including without limitation
# the rights to use, copy, modify, merge, publish, distribute, sublicense,
# and/or sell copies of the Software, and to permit persons to whom the
# Software is furnished to do so, subject to the following conditions:
#
# The above copyright notice and this permission notice shall be included in
# all copies or substantial portions of the Software.
#
# THE SOFTWARE IS PROVIDED “AS IS”, WITHOUT WARRANTY OF ANY KIND, EXPRESS OR
# IMPLIED, INCLUDING BUT NOT LIMITED TO THE WARRANTIES OF MERCHANTABILITY,
# FITNESS FOR A PARTICULAR PURPOSE AND NONINFRINGEMENT. IN NO EVENT SHALL
# THE AUTHORS OR COPYRIGHT HOLDERS BE LIABLE FOR ANY CLAIM, DAMAGES OR OTHER
# LIABILITY, WHETHER IN AN ACTION OF CONTRACT, TORT OR OTHERWISE, ARISING
# FROM, OUT OF OR IN CONNECTION WITH THE SOFTWARE OR THE USE OR OTHER
# DEALINGS IN THE SOFTWARE.
#
###############################################################################

require 5.005 ;
use strict ;

use File::Temp qw( tempdir ) ;
use Getopt::Std ;
use JSON ;

########################################
# globals

my $tablet_ip       = '10.11.99.1' ;
my $workdir         = '' ;
my $using_ssh       = 0 ;

my %metadata        = () ;      # UUID => contents of UUID.metadata file
my %content         = () ;      # UUID => contents of UUID.content file
my %calc            = () ;      # UUID => calculated info (list of children)

my %opt             = () ;      # getopts
my $show_all        = 0 ;       # -a    Show deleted items
my $show_uuid       = 0 ;       # -u    Show UUIDs
my $show_cmds       = 0 ;       # -x    Show commands being executed

###############################################################################
#
# usage

sub usage(;$)
{
    my $msg = ( shift || '' ) ;

    print <<EOF ;
$0 [options] [DIR]

Show the contents of a reMarkable tablet (or a full backup of one), as shown
by the tablet's  "My Files" interface.

If DIR is specified, it should contain either a copy of, or the live 'sshfs'
mounted, "/home/root/.local/share/remarkable/xochitl/" directory from a
reMarkable tablet.

If DIR is not specified, the script will attempt to SSH into the tablet. This
will depend on SSH being enabled on the tablet, and setting up an SSH key for
authentication (or being ready to type the SSH password while the script is
running.)

Options

-I ___  Specify the tablet's IPv4 address. Default: 10.11.99.1.

-a      Show all files, including deleted files.

-u      Show UUIDs

-x      Show the SSH command used to read files from the server.

EOF

    if ( $msg ne '' )
    {
        print $msg ;
        exit 1 ;
    }

    exit 0 ;
}

###############################################################################
#
# Read all UUID.metadata and UUID.content files into memory

sub read_metadata()
{
    for my $f ( glob( "$workdir/*.metadata" ) )
    {
        ########################################
        # Extract the UUID from the filename

        my $uuid = $f ;
        $uuid =~ s|^.*/|| ;
        $uuid =~ s|\.metadata$|| ;
        $uuid = lc( $uuid ) ;

        ############################################################
        # Read the UUID.metadata file

        open( M , '<' , $f )
            or die "ERROR: open('$f'): $!\n" ;

        my $jtext = '' ;
        while ( my $line = <M> )
        {
            $jtext .= $line ;
        }
        close M ;

        ########################################
        # Parse contents as JSON

        my $j = decode_json( $jtext )
            or die "ERROR: cannot parse contents of '$workdir/$f' as JSON\n$jtext\n" ;

        ########################################
        # Sanity checks
        # - if 'parent' is undef, make it an empty string

        $j->{'parent'} = ( $j->{'parent'} || '' ) ;

        ########################################
        # Store what we found

        $metadata{$uuid} = $j ;

        ############################################################
        # Read the corresponding UUID.content file

        my $file = "$workdir/$uuid.content" ;

        ########################################
        # Read the file into memory

        open( C , '<' , $file )
            or die "ERROR: open('$file'): $!\n" ;

        $jtext = '' ;
        while ( my $line = <C> )
        {
            $jtext .= $line ;
        }
        close C ;

        ########################################
        # Parse contents as JSON

        $j = decode_json( $jtext )
            or die "ERROR: cannot parse contents of '$file' as JSON\n$jtext\n" ;

        ########################################
        # Store what we found

        $content{$uuid} = $j ;
    }
}

###############################################################################
#
# Return the full name, with "path", of a UUID

sub fullname($) ;
sub fullname($)
{
    my $uuid    = shift ;
    my $parent  = '' ;
    my $name    = '' ;

    ########################################
    # If the item has no metadata, it's an orphan (has no visibleName)

    unless ( exists $metadata{$uuid} )
    {
        return '(ORPHAN)' ;
    }

    ########################################
    # Build parent's name

    if ( $metadata{$uuid}->{'parent'} eq '' )
    {
        $parent = '' ;
    }
    elsif ( $metadata{$uuid}->{'parent'} eq 'trash' )
    {
        $parent = 'Trash' ;
    }
    else
    {
        $parent = fullname( $metadata{$uuid}->{'parent'} ) ;
    }

    ########################################
    # Build return value

    $name = $metadata{$uuid}->{'visibleName'} ;

    return "$parent/$name" ;
}

###############################################################################
#
# Sort function - by fullname

sub by_fullname($$)
{
    my $a = shift ;
    my $b = shift ;

    my $an = fullname( $a ) . " $a" ;
    my $bn = fullname( $b ) . " $b" ;

    return ( ( lc $an ) cmp ( lc $bn ) ) ;
}

###############################################################################
#
# Show one entry

sub show_uuid($)
{
    my $uuid    = shift ;
    my $prefix  = shift ;

    my $name    = ( $metadata{$uuid}->{'visibleName'} || '(visibleName?)' ) ;
    my $type    = ( $metadata{$uuid}->{'type'}        || '(type?)' ) ;
    my $deleted = ( $metadata{$uuid}->{'deleted'}     || 0 ) ;
    my $pinned  = ( $metadata{$uuid}->{'pinned'}      || 0 ) ;

    if ( $show_all || ( ! $deleted ) )
    {
        my $fname = fullname( $uuid ) ;

        ########################################
        # Figure out what to show after the name

        if ( $uuid eq 'trash' )
        {
            $name = '(Trash)' ;
            $type = '/' ;
        }
        elsif ( $type eq 'DocumentType' )
        {
            $type = '' ;
        }
        elsif ( $type eq 'CollectionType' )
        {
            $type = '/' ;
        }
        else
        {
            $type = " (type='$type')" ;
        }

        ########################################
        # Figure out how many pages are in a notebook

        my $pg      = 0 ;
        my $pd      = 0 ;
        my $pages   = '' ;

        if ( exists $content{$uuid}->{'cPages'}->{'pages'} )
        {
            for my $p ( @{$content{$uuid}->{'cPages'}->{'pages'}} )
            {
                if ( exists $p->{'deleted'} )
                {
                    $pd ++ ;
                }
                else
                {
                    $pg ++ ;
                }
            }

            if ( $pd > 0 )
            {
                $pages = "$pg+$pd" ;
            }
            elsif ( $pg > 0 )
            {
                $pages = $pg ;
            }
        }

        ########################################
        # Print the output

        $show_uuid && printf '%-37s ' , $uuid ;

        printf "%-7s %-5s %-3s %7s %s%s\n" ,
            ( $deleted ? 'DELETED' : '' ) ,
            ( $fname =~ m|^Trash/| ? 'TRASH' : '' ) ,
            ( $pinned  ? ' *'  : '' ) ,
            $pages ,
            $fname ,
            $type ;
    }
}

###############################################################################
###############################################################################
###############################################################################
#
# Process command line

getopts( 'hauxI:' , \%opt ) ;
$opt{'h'} && usage() ;
$show_all   = ( $opt{'a'} ? 1 : 0 ) ;
$show_uuid  = ( $opt{'u'} ? 1 : 0 ) ;
$show_cmds  = ( $opt{'x'} ? 1 : 0 ) ;
$tablet_ip  = ( $opt{'I'} || $tablet_ip ) ;

$workdir    = ( shift || '' ) ;

binmode( STDOUT , ":encoding(UTF-8)" ) ;

###############################################################################
#
# If $workdir is empty, we need to SSH into the tablet and copy the files.

if ( $workdir eq '' )
{
    $using_ssh = 1 ;

    ########################################
    # Create a temp directory and work from there

    my $temp_dir = tempdir( CLEANUP => 1 ) ;
    chdir( $temp_dir )
        or die "ERROR: chdir('$temp_dir'): $!\n" ;
    $workdir = $temp_dir ;

    ########################################
    # Download all *.metadata and *.content files into temp directory

    my $tablet_cmd = 'cd /home/root/.local/share/remarkable/xochitl'
        . ' ; tar cf - *.metadata *.content' ;

    my $cmd = "ssh -ax"
        . " -o 'HostKeyAlgorithms +ssh-rsa'"
        . " -o 'PubkeyAcceptedKeyTypes +ssh-rsa'"
        . " root\@$tablet_ip"
        . " '$tablet_cmd'"
        . " | tar xf -" ;

    $show_cmds && print "+ $cmd\n" ;
    system $cmd ;
}

###############################################################################
#
# Scan that directory

read_metadata() ;

###############################################################################
#
# Build a "tree" representing the directory structure

for my $uuid ( sort keys %metadata )
{
    my $parent = $metadata{$uuid}->{'parent'} ;
    push( @{$calc{$parent}->{'children'}} , $uuid ) ;
}

###############################################################################
#
# Show the output

$show_uuid && printf '%-37s ' , 'UUID' ;

print <<EOF ;
Deleted Trash Pin   Pages Name
EOF

for my $uuid ( sort by_fullname keys %metadata )
{
    show_uuid( $uuid ) ;
}
The rm2-make-pdf Script
This is a shell script which uses Calibre's ebook-convert utility to convert any file that Calibre knows how to read, into a PDF with the right settings to look good on a reMarkable tablet.
The Calibre page explains what this script does, and includes instructions for how to use Calibre's GUI to convert the files "by hand".
Details
Run the script with the name of the file you want to convert to PDF.
If the file you're converting from doesn't have metadata (HTML, Markdown, plain text, etc.) or if you want to change the title or author (the only two metadata fields used by reMarkable tablets, as far as I can tell) you can add command line options to set the values in the PDF file.
-
-tsets the title. If the title contains any spaces, you will need to quote the value. -
-asets the author. If the author contains any spaces, you will need to quote the value. -
-ssets the "base" font size used in the PDF. Changing this value will make the overall text in the PDF larger or smaller. If not specified, the script will default to 12.This value relates to the base font size specified in the input file (i.e. if the input file says that the base font size is 11 and you use "
-s 12", all of the text in the file will be a bit bigger than what the input file called for.Because of this, I normally start by creating a PDF using the default size 12, and viewing the PDF on the computer. If the text needs to be bigger or smaller, I'll delete the PDF and run the script, specifying a larger or smaller size.
-
-pFor input document types which have a document structure whose "section headings" translate to<H1>elements, using the-poption will insert a page break just before this element. This ensures that "top level" sections, such as chapters in a book, always start on a new page.This is not normally an issue when converting EPUB files, however it does come up a lot when I convert Markdown files. (Most of the documentation I write is authored using Markdown.)
Note that the
ebook-convertcommand's default behaviour is to add the page breaks. This script normally adds options to disable the page breaks, UNLESS you specify the-poption.
Example
$ rm2-make-pdf -a 'Cory Doctorow' -t 'Little Brother' little-brother.epub
This will create a file called "little-brother.pdf".
License
This script is licensed under the MIT License.
The MIT License (MIT)
Copyright © 2023 John Simpson
Permission is hereby granted, free of charge, to any person obtaining a copy of this software and associated documentation files (the “Software”), to deal in the Software without restriction, including without limitation the rights to use, copy, modify, merge, publish, distribute, sublicense, and/or sell copies of the Software, and to permit persons to whom the Software is furnished to do so, subject to the following conditions:
The above copyright notice and this permission notice shall be included in all copies or substantial portions of the Software.
THE SOFTWARE IS PROVIDED “AS IS”, WITHOUT WARRANTY OF ANY KIND, EXPRESS OR IMPLIED, INCLUDING BUT NOT LIMITED TO THE WARRANTIES OF MERCHANTABILITY, FITNESS FOR A PARTICULAR PURPOSE AND NONINFRINGEMENT. IN NO EVENT SHALL THE AUTHORS OR COPYRIGHT HOLDERS BE LIABLE FOR ANY CLAIM, DAMAGES OR OTHER LIABILITY, WHETHER IN AN ACTION OF CONTRACT, TORT OR OTHERWISE, ARISING FROM, OUT OF OR IN CONNECTION WITH THE SOFTWARE OR THE USE OR OTHER DEALINGS IN THE SOFTWARE.
Script
⇒ Download
#!/bin/bash
#
# rm2-make-pdf
# John Simpson <jms1@jms1.net> 2023-08-13
#
# Use Calibre's "ebook-convert" to convert an input file to a PDF, using
# settings that I think look good on a reMarkable 2 tablet.
#
# Requirements:
# - OS: macOS or Linux. This *might* also work on windows, if you install
#   whatever "Linux-ish" things you need to run it on.
# - Calibre.
#   https://calibre-ebook.com/
# - reMarkable tablet, or some other device or program to view the resulting
#   PDF file with.
#   https://remarkable.com/
#
# 2023-08-15 jms1 - fixed handling of title/author values containing spaces
#
# 2023-09-10 jms1 - show usage message if no input filename
#
###############################################################################
#
# The MIT License (MIT)
#
# Copyright (C) 2023 John Simpson
#
# Permission is hereby granted, free of charge, to any person obtaining a
# copy of this software and associated documentation files (the “Software”),
# to deal in the Software without restriction, including without limitation
# the rights to use, copy, modify, merge, publish, distribute, sublicense,
# and/or sell copies of the Software, and to permit persons to whom the
# Software is furnished to do so, subject to the following conditions:
#
# The above copyright notice and this permission notice shall be included in
# all copies or substantial portions of the Software.
#
# THE SOFTWARE IS PROVIDED “AS IS”, WITHOUT WARRANTY OF ANY KIND, EXPRESS OR
# IMPLIED, INCLUDING BUT NOT LIMITED TO THE WARRANTIES OF MERCHANTABILITY,
# FITNESS FOR A PARTICULAR PURPOSE AND NONINFRINGEMENT. IN NO EVENT SHALL
# THE AUTHORS OR COPYRIGHT HOLDERS BE LIABLE FOR ANY CLAIM, DAMAGES OR OTHER
# LIABILITY, WHETHER IN AN ACTION OF CONTRACT, TORT OR OTHERWISE, ARISING
# FROM, OUT OF OR IN CONNECTION WITH THE SOFTWARE OR THE USE OR OTHER
# DEALINGS IN THE SOFTWARE.
#
###############################################################################

########################################
# Possible locations for the 'ebook-convert' executable. The first of these
# which exists will be used.

EBC_MAYBE="
/Applications/calibre.app/Contents/MacOS/ebook-convert
/opt/calibre/ebook-convert
/usr/local/bin/ebook-convert
/usr/bin/ebook-convert
"

###############################################################################
#
# usage

function usage {
    MSG="${1:-}"

    cat <<EOF
$0 [options] INFILE [OUTFILE]

Use Calibre's 'ebook-convert' to convert an input file to a PDF, using
settings that I think look good on a reMarkable 2 tablet.

-t ___  Specify the title in the PDF's metadata.

-a ___  Specify the author in the PDF's metadata.

-s ___  Specify the document's base font size. Default is 12.

-p      For input documents which have "H1" section headers (HTML, Markdown,
        etc.) start a new page for each H1 section.

If the input file has metadata, the '-t' and '-a' options will override the
values from the input file.

If OUTFILE is specified, it must end with '.pdf'.

EOF

    if [[ -n "$MSG" ]]
    then
        echo "$MSG"
        exit 1
    fi

    exit 0
}

###############################################################################
###############################################################################
###############################################################################
#
# Process the command line

SET_X=false
TITLE=''
AUTHOR=''
SIZE='12'
H1_NO_SPLIT=true

while getopts ':hxt:a:s:p' OPT
do
    case $OPT in
        h)  usage
            ;;
        x)  SET_X=true
            ;;
        t)  TITLE="$OPTARG"
            ;;
        a)  AUTHOR="$OPTARG"
            ;;
        s)  SIZE="$OPTARG"
            ;;
        p)  H1_NO_SPLIT=false
            ;;
        *)  usage "ERROR: unknown option '-$OPTARG'"
            ;;
    esac
done
shift $((OPTIND-1))

########################################
# Get the input filename

INFILE="${1:-}"
if [[ -z "$INFILE" ]]
then
    usage
fi

OUTFILE="${2:-.pdf}"
if [[ ! "$OUTFILE" =~ \.pdf$ ]]
then
    usage "ERROR: output filename must end with '.pdf'"
fi

########################################
# Find the 'ebook-convert' executable

for X in $EBC_MAYBE
do
    if [[ -x "$X" ]]
    then
        EBOOK_CONVERT="$X"
        continue
    fi
done

if [[ -z "$EBOOK_CONVERT" ]]
then
    echo "ERROR: unable to locate 'ebook-convert' executable, cannot continue"
    exit 1
fi

########################################
# Build a string containing options which may or may not need to be included
# in the final 'ebook-convert' command line.

# Array of options
OPTA=()

if [[ -n "$TITLE" ]]
then
    OPTA+=( '--title' )
    OPTA+=( "$TITLE" )
fi

if [[ -n "$AUTHOR" ]]
then
    OPTA+=( '--authors' )
    OPTA+=( "$AUTHOR" )
fi

if $H1_NO_SPLIT
then
    OPTA+=( '--page-breaks-before' '/' )
    OPTA+=( '--chapter' '/' )
fi

###############################################################################
#
# Do the deed
#
# 'ebook-convert' command line option reference:
#   https://manual.calibre-ebook.com/generated/en/ebook-convert.html

if $SET_X
then
    set -x
fi

"$EBOOK_CONVERT" "$INFILE" "$OUTFILE" \
    --input-profile                 default \
    --output-profile                generic_eink_hd \
    --base-font-size                $SIZE \
    --embed-all-fonts               \
    --subset-embedded-fonts         \
    --unsmarten-punctuation         \
    "${OPTA[@]}"                    \
    --custom-size                   1404x1872 \
    --unit                          devicepixel \
    --pdf-sans-family               'Liberation Sans' \
    --pdf-serif-family              'Liberation Serif' \
    --pdf-mono-family               'Liberation Mono' \
    --pdf-standard-font             serif \
    --pdf-mono-font-size            $SIZE \
    --pdf-page-margin-left          72 \
    --pdf-page-margin-right         18 \
    --pdf-page-margin-top           18 \
    --pdf-page-margin-bottom        18 \
    --preserve-cover-aspect-ratio
Other Programs
This section contains pages about other programs that I find useful when working with reMarkable tablets.
Calibre
Calibre is an ebook library manager. It does a LOT of useful things when it comes to ebooks. (See the page for more information.)
goMarkableStream
goMarkableStream is a program which runs on the reMarkable tablet, and streams the contents of the display to a web browser on your computer. I've used it a few times to "share" the tablet's display in work meetings, by sharing the browser window where I was streaming the tablet.
⇒ https://github.com/owulveryck/goMarkableStream
RCU
RCU (reMarkable Connection Utility) is "All-in-one management software for reMarkable e-paper tablets". It does a LOT of useful things when it comes to reMarkable tablets. (See the page for more information.)
⇒ http://www.davisr.me/projects/rcu/
Calibre
Calibre is a free, open-source program for working with ebook files. This includes ...
-
A "library", where you can store and organize your ebook files.
-
An ebook reader, where you can read your ebooks on the computer.
-
An ebook editor for EPUB and AZW3 (Kindle) files. This allows you to edit the HTML and CSS files within the EPUB/AZW3 files, and see a live preview of your changes while you're making them.
-
A metadata editor, where you can set and change a book's title, author, cover image, descriptions, ISBN numbers, and just about any other kind of metadata the books may have.
-
A metadata download tool, which can find cover images, descriptions, ISBN numbers, and other data online, and download them to the ebook file.
-
Converting ebook files between different formats. For example, if you have a book as an EPUB, Calibre can convert it to PDF.
-
Copying ebook files to, and in some cases from, most "ebook reader" devices.
Calibre also has a plug-in framework which allows third-party developers to add functionality to Calibre. This includes things like support for new ebook readers and support for new file formats.
The awesome-reMarkable list has two different Calibre plug-ins for reMarkable tablets.
-
Calibre-Remarkable-Device-Driver-Plugin works by SSH'ing into the tablet.
As of the time I'm writing this (2023-08-03), this plug-in hasn't been updated since April 2022, the Github repo has been "archived", and the plug-in doesn't work with tablets running firmware 3.x or later.
-
send_by_rmapi works by using rmapi to upload files to the reMarkable cloud, which would then sync the file to your tablet.
EPUB and PDF files
The reMarkable tablets allow you to upload ebooks in EPUB and PDF formats.
-
PDF files contain pages. Each page contains instructions like "draw this text in this position" or "draw this picture in this position". In many PDF files, the page contains a single "draw this picture" instruction, and the picture contains all of the text and other content, already laid out as a page-sized BMP, GIF, or JPG file.
-
EPUB files contain text with formatting instructions. These include things like which words should be bold or italic, where each paragraph starts and ends, when each chapter starts and ends, and so forth. EPUB file are actually ZIP files containing HTML and CSS files, so when you're reading an EPUB file you're actually looking at a web page.
In cases where the same document is available as both an EPUB and a PDF, it's always better to have the EPUB file, for a couple of reasons:
-
If you have an EPUB, you can use Calibre to create a PDF. (Or HTML, Markdown, plain text, or another ebook format like MOBI, if you want to read it on an amazon "kindle" device.)
-
EPUB files contain text, which means they can be processed by assistive reading devices, so that people who are blind or otherwise can't read them, are still able to "consume" them.
When you upload an EPUB file to a reMarkable tablet, the tablet converts it to PDF internally. When you "read" the file on the tablet, you are actually reading the PDF file. reMarkable set it up this way because they wanted to allow users to be able to "write" on top of EPUB files, the same way they can with PDF files.
Most ebook readers allow EPUB files to be re-formatted on the fly. This would be a problem for the reMarkable tablet, because they want to allow the user to write "on top of" the file.
-
Pen strokes are always stored at the position on the page where they were written.
-
Some annotations are made because of where they are relative to the page. For example, somebody might write in an empty space at the bottom of a page, because that part of the page happens to be empty.
-
Other annotations are made at a position relative to the text in the underlying file. For example, if you highlight a sentence or draw a circle around a word, that annotation "belongs with" that part of the text.
Think about what would happen if the text were re-formatted on the fly. For example, if the font was made larger, the lines of text would "shift down" on each page, and the text at the bottom of a page would be moved to the top of the next page. And later in the document, text may end up moving several pages away from where it started.
There is no way for the tablet to know why each pen stroke was placed where it was, so it won't know which pen strokes need to move with the text, which ones need to move to "a blank space at the bottom of the page containing ___", or which should stay exactly where they are.
This is why, when you re-format an EPUB file on the tablet, it warns you about your pen strokes (or "annotations", as it calls them) possibly not being in the right positions anymore.
Conversion on the tablet
This conversions done by the tablet, ... have issues. This is true for conversions done when uploading an EPUB file and conversions done when re-formatting an existing file.
I had two different books where some of the diagrams were missing when I read the file on my tablet. And in one of these files, the text was so large that tables of pre-formatted text ended up being "wrapped" on the page and almost unreadable. Being able to make the text smaller (a little bit smaller anyway) would have made that particular table a lot easier to read. (Both of the files where this happened are copyrighted, otherwise I would include them here so you can see for yourself what happened.)
At first I didn't think the tablet had a way to change the text formatting, because it's hidden in a sub-menu that otherwise never gets used. However, when I pointed this out on Reddit, somebody pointed out that they were looking at the menu where these settings could be changed, so I went back and searched again. I finally found them, hidden in a sub-menu.
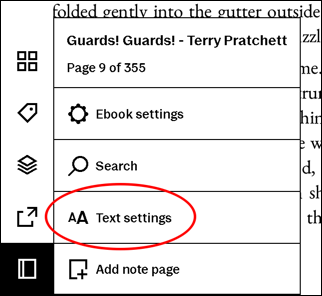
On this panel, you can change the text size, font, turn justification on/off, set margins (small/medium/large), and set line spacing (tight/normal/wide). The list of fonts isn't huge, although I've read that you can upload additional fonts under /usr/share/fonts/, however I don't see where there would be room for more than one additional font on this panel. (At some point I'll have to try adding more fonts and see if the panel re-sizes to allow more font names on the screen.)
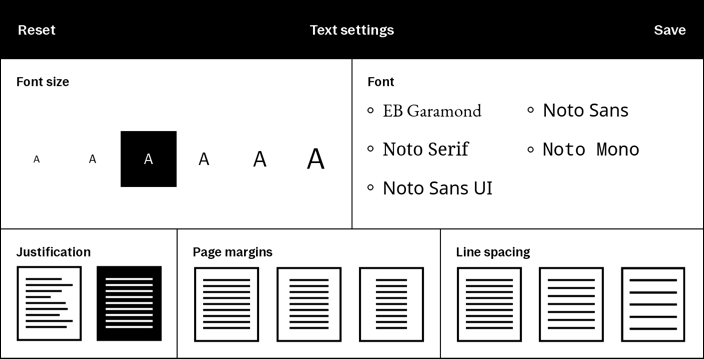
The first time you try to change anything, the tablet will warn you that if you continue, your existing annotations may end up not being in the same locations relative to the text.
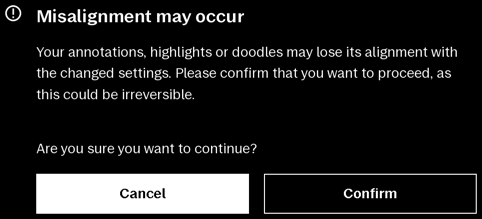
While you're changing settings, you will not see a "live preview" of what the page will look like. After you save changes, the tablet will generate a new PDF, but it won't use the new PDF (i.e. you won't see the new settings on-screen) until you close the file, open a new file, close that, and re-open the first file.
Because of the limited formatting options, I normally convert EPUB files to PDF on a computer, and then upload the PDFs to the tablet.
This allows me to use any fonts that I have on my computer, as well as control the text size, line spacing, and margins a lot more precisely than what the tablet offers. Also, Calibre's EPUB-to-PDF conversion process has never left me with diagrams missing, and I can preview the results of the conversion on the computer's screen before uploading the PDF to the tablet.
Converting EPUB files to PDF
There are several programs out there which can convert EPUB files to PDF. The two I've used are Pandoc and Calibre. It's been several years so it's possible things have changed, but from what I remember, I didn't really like the results I got from Pandoc when I tried it. So ever since then I've stuck with Calibre.
Calibre - Command Line
Calibre comes with a collection of command line tools, which Calibre uses to run the the "jobs" that it performs in the background. Once of these is called ebook-convert, which (as the name suggests) converts ebook files from one format to another.
All of the options that you can set via the GUI, can also be set using command line options when running the command. The Calibre documentation explains the command line options available. Note that some options are only available depending on the input and output file types.
Rather than trying to memorize all of the options I normally use, I wrote a script which generates the right command line.
Calibre - GUI
If you're more comfortable using the GUI to do it by hand, here's my attempt at documenting the options.
I'm a "command line guy" by nature, I don't normally write documentation about using a GUI like this. If you notice anything I missed or which isn't explained clearly, please let me know so I can update this page.
Start by adding the EPUB (or other ebook) file to Calibre's library. In my case this is easy, because I use Calbre as the primary place to store all of my ebooks, and I make it a point to have EPUB versions of every book where that is possible. (The only time it's not is when I've purchased a book which is only available as a PDF.)
Right-click on the file you want to convert, "Convert books" → "Convert individually".
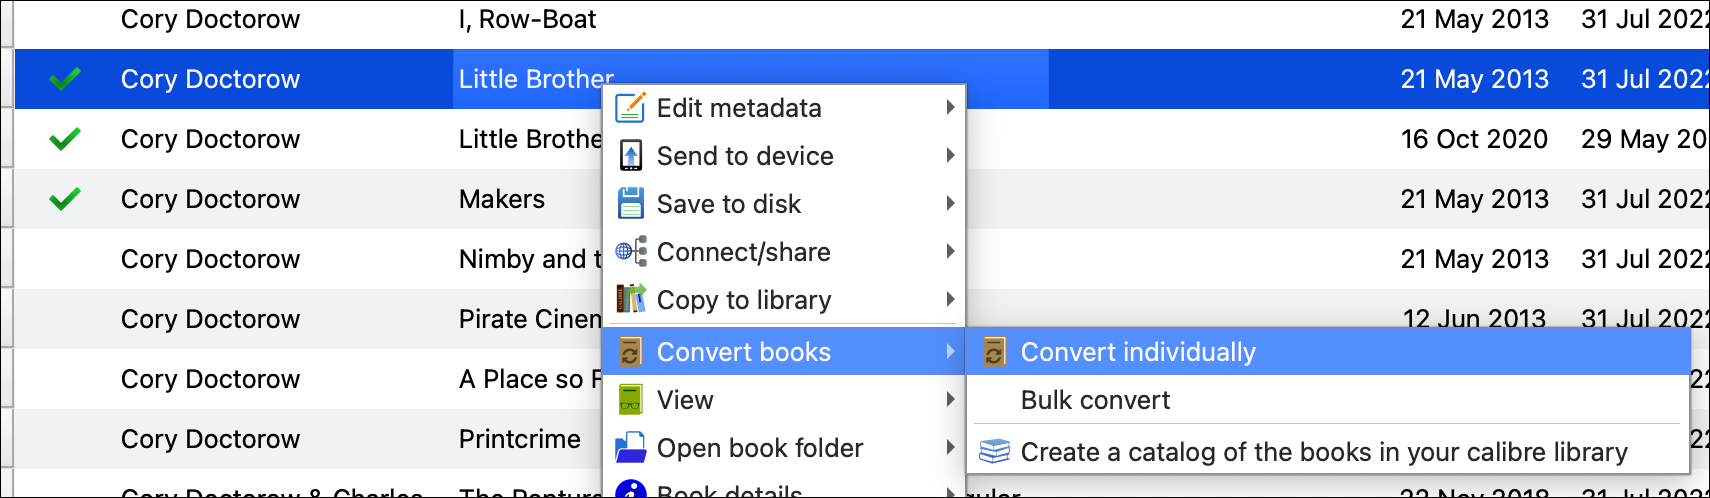
The "Convert (title)" window will appear. This window has a LOT of settings, accessible in pages using the columns on the left, and some pages have tabs across the top.
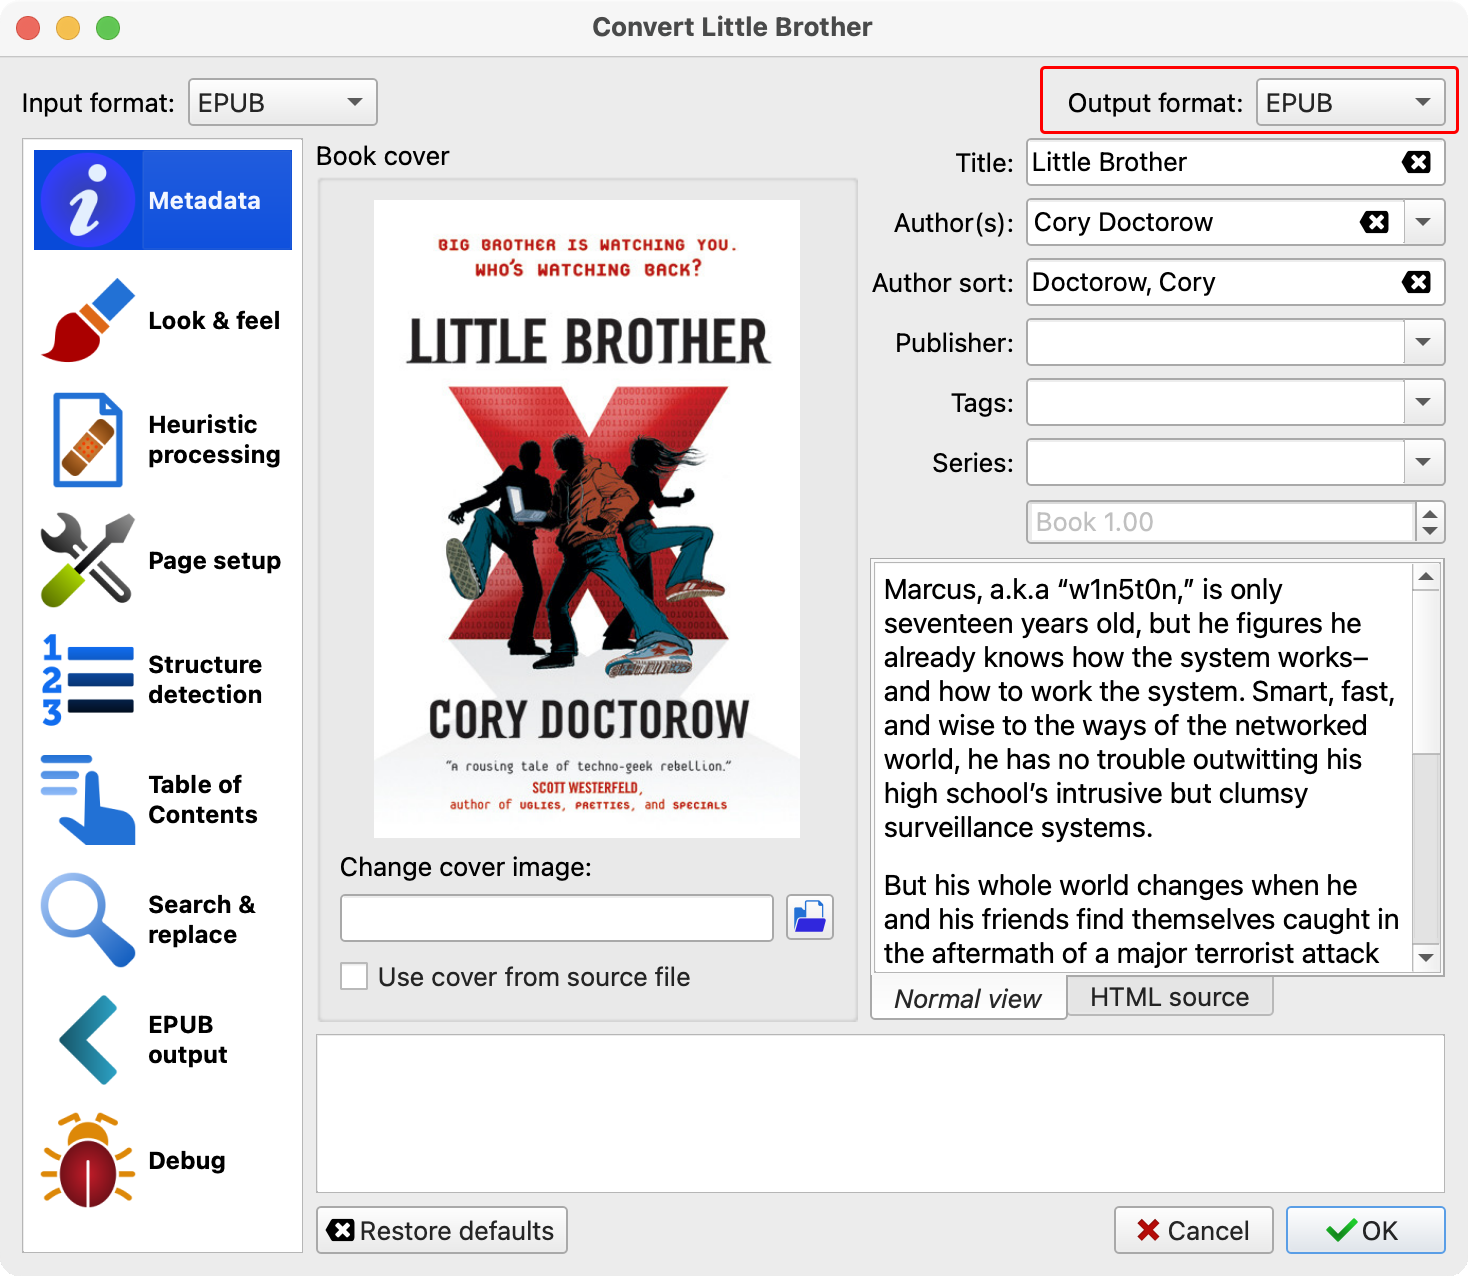
The important and/or useful settings are:
-
At the top right, Output format: PDF
-
Look & feel
- Disable font size rescaling: NO
- Base font size: 12pt (try this first and preview the resulting PDF, both on the computer screen and then later on the tablet. Adjust up/down as needed, to make things look right to you.)
-
Page setup
- Output profile: Generic e-ink HD
- Input profile: Default profile
-
PDF output
- Custom size:
1404x1872Unit:devicepixel - Preserve aspect ratio of cover: YES
- Serif family: (font for text with serifs, such as "Liberation Serif")
- Sans family: (font for text without serifs, such as "Liberation Sans")
- Monospace family: (font for mono-spaced text, such as "Liberation Mono")
- Standard font: which font "family" to use by default (serif/sans/mono)
- Default font size: 20px
- Monospace font size: 16px
- At the bottom, under "Page margins", set the page margins. I normally use
72pt(1 inch, 25.4mm) for whichever edge the menu appears on (i.e. left edge, if the tablet is set for "right handed"), and18pt(¼ inch, 6.35mm) for the others.
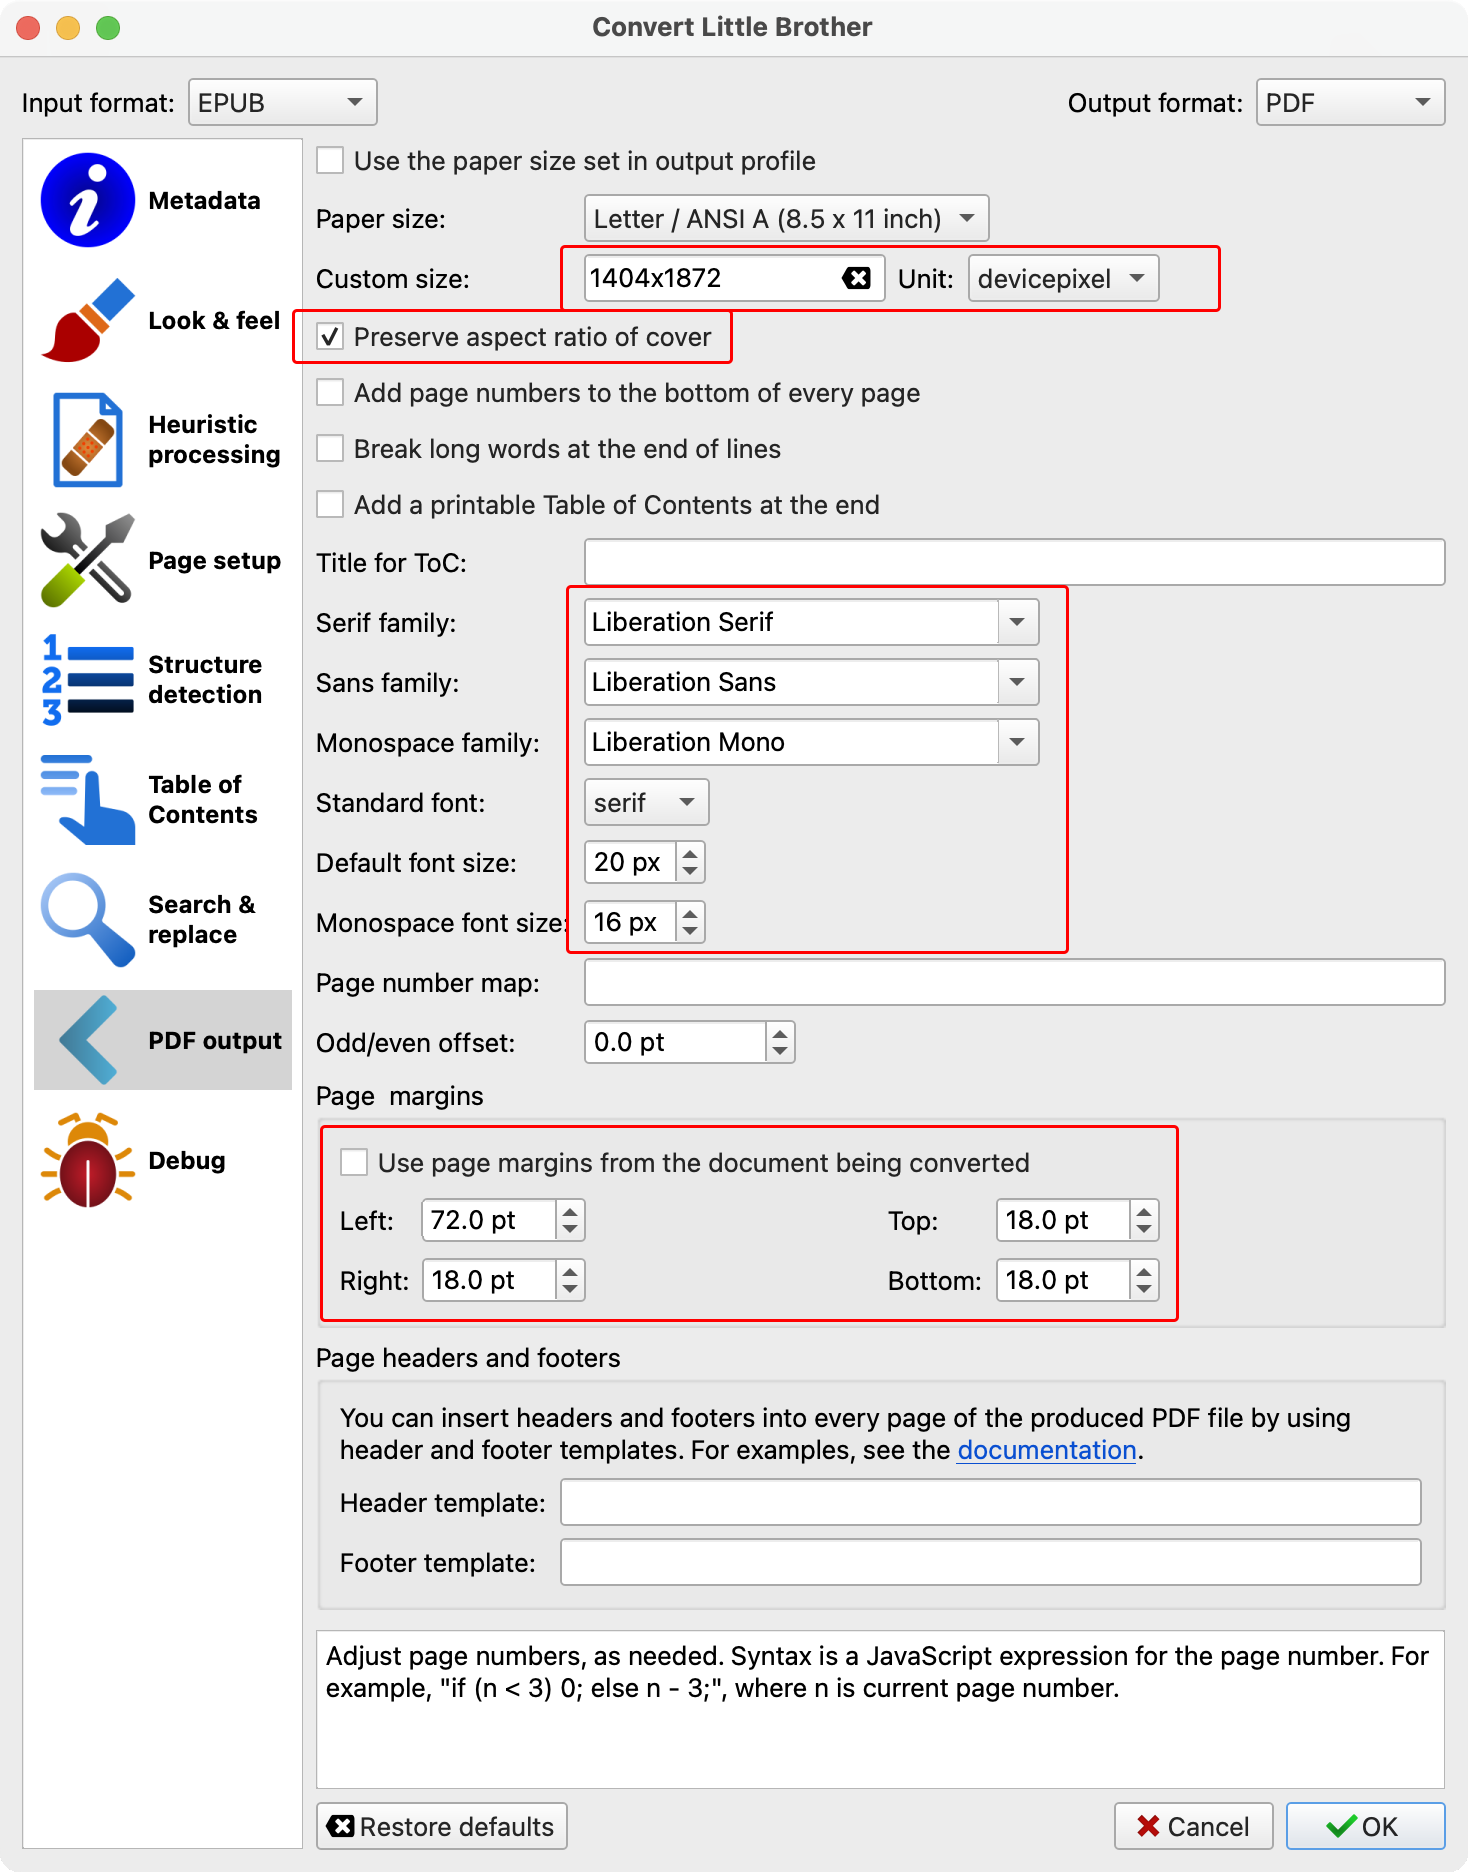
- Custom size:
-
Check other pages and make whatever other adjustments you need.
-
Click "OK" at the bottom right.
Calibre will start a background job to do the conversion. When it finishes, the information panel (usually on the right, but it can be configured to be on the bottom) will show the original format and PDF.
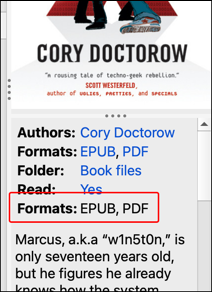
Once the PDF has been created, right-click the file again, and choose "Save to disk" → "Save single format to disk..."
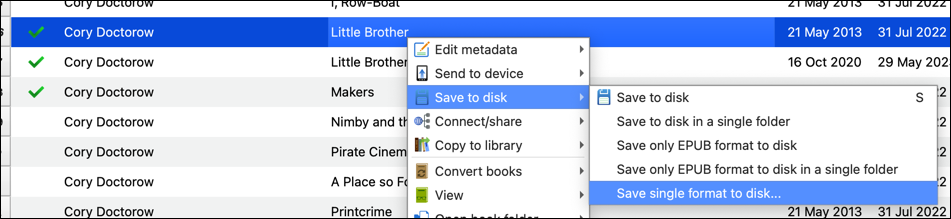
Choose PDF as the format, and click "OK".
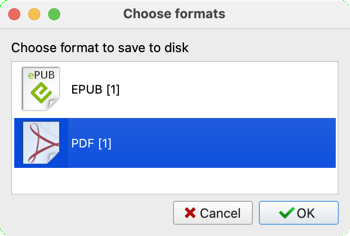
Save the file where you want it. (I normally choose my "Desktop" folder so I know where to find it.) Calibre creates a directory named after the author, containing a directory named after the book title, which contains the PDF file (and possibly a few other related files, like a copy of the cover art as a JPG file).
Upload the PDF file to your tablet.
Notes
-
Liberation Fonts are open-source fonts whose characters are designed to have the exact same metrics (character sizes, spacing, etc.) as "Times New Roman", "Arial", and "Courier New", all of which are copyrighted and cannot legally be distributed in a PDF file. I use them in the PDFs I create, both for legal reasons and because I like how they look.
-
Little Brother (the book I used as an example in the screenshots) is copyrighted. The author, Cory Doctorow, is an even bigger believer in "open source" than I am, and offers free downloads of the ebook versions of many of his books, including "Little Brother".
goMarkableStream
goMarkableStream (or "goMS") is a program which "streams" the contents of your tablet's screen to a web browser on your workstation. This can be useful if you need to record something from the tablet, or if you need to share the tablet's screen as part of an online meeting.
⇒ Quick demo - screen capture of Safari streaming my tablet's screen
Image Format
Version 3.4 of the reMarkable firmware stores the screen using a different format than earlier versions. I don't know the technical details, something about how many bits are used for each pixel, I'm just going to call them the old and new formats.
-
My own tablet, with firmware 3.0.5.56, uses the old format.
-
goMS
v0.8.6and later, use the new format.
Using the v0.9.0 software (the "latest" version as I'm writing this on 2023-07-15) on a tablet using pre-3.4 firmware results in a stream whose image is scrambled (see here for an example).
ℹ️ After testing with several versions, I have found that v0.8.5 is the last version which supports the "old" image format. This is what I'm using on my own tablet, at least until I update the firmware (which may not happen at all, unless I can find a way to do so without connecting it to wifi).
Which version?
If you're interested in using goMarkableStream ...
-
If your tablet's firmware is earlier than 3.4, use v0.8.5.
-
If your tablet's firmware is 3.4 or later, use the "latest" release, at the top of the list of releases.
I've suggested to the author that a future version could somehow detect which image format (old or new) is needed for the tablet's firmware, and be able to work with either.
Install goMarkableStream on the tablet
You will need to do this once, and then again whenever you want to upgrade to a newer version of goMS.
On your workstation
After downloading the appropriate version, expand the tarball.
$ tar xvzf goMarkableStream_0.8.5_linux_arm.tar.gz
x goMarkableStream_0.8.5_linux_arm/LICENSE
x goMarkableStream_0.8.5_linux_arm/README.md
x goMarkableStream_0.8.5_linux_arm/goMarkableStream
$
Copy the goMarkableStream executable to the tablet.
$ scp goMarkableStream_0.8.5_linux_arm/goMarkableStream root@10.11.99.1:
SSH into the tablet.
$ ssh root@10.11.99.1
reMarkable: ~/
On the tablet
Make sure the permissions are correct.
reMarkable: ~/ chmod 0755 goMarkableStream
reMarkable: ~/
Using goMarkableStream
On the tablet
Run the program.
reMarkable: ~/ ./goMarkableStream
Local IP address: 10.11.99.1
Leave this running.
Optional
On my own tablet, which never connects to any network other than the USB cable, I disable HTTPS (so I don't have to "accept" an otherwise untrusted SSL certificate) and the username/password requirement. I also explicitly set the IP where goMS listens, so that if I ever do connect it to a wifi network in the future, the stream would only be accessible via the USB cable.
To make this easier, I wrote a little shell script on the tablet which sets some environment variables before running the program, and runs the command with the --unsafe option to not require a username and password.
reMarkable: ~/ cat stream
#!/bin/bash

export RK_SERVER_BIND_ADDR="10.11.99.1:2000"
export RK_HTTPS="false"
export RK_COMPRESSION="false"

cat <<EOF

Visit http://$RK_SERVER_BIND_ADDR/

EOF

./goMarkableStream --unsafe
And then when I want to stream the display, I run the script, like so:
reMarkable: ~/ ./stream

Visit http://10.11.99.1:2000/

Local IP address: 10.11.99.1
I added the "Visit ..." message to the script because I use iTerm, and if I hold down ⌘ the URL becomes clickable. It's just easier than having to type the URL.
On your workstation
Once the goMarkableStream program is running on the tablet, visit https://10.11.99.1:2001/ in a browser. (If you used environment variables or options to change how the program listens, the URL, username, or password may be different.)
- Username:
admin - Password:
password
You should see the contents of your tablet's display. If you do something on the tablet which changes the contents of the display (i.e. drawing, pulling up a menu, etc.) you should see those changes mirrored in the browser window almost immediately.
When I first connect, the display in the browser window will be in landscape mode, even if the display is currently in portrait mode. If this is the case ...
- At the left edge of the browser window is a grey bar.
- Move your mouse over this bar, it should expand and have two buttons.
- Click the "Rotate" button.
The image should now be in portrait mode, and match the tablet's display.
When you're finished
When you're finished streaming the screen ...
-
Close the browser window/tab where you're watching the screen.
-
Return to the terminal window where you SSH'd into the tablet and ran the command.
-
Press CONTROL-C. You will see
^C, and then it will return to the command prompt.reMarkable: ~/ ./goMarkableStream-v0.8.5 Local IP address: 10.11.99.1 2023/07/15 15:56:23 http: TLS handshake error from 10.11.99.2:59885: EOF 2023/07/15 15:56:23 http: TLS handshake error from 10.11.99.2:59886: EOF ^C reMarkable: ~/
If you're finished in the tablet, type exit and hit ENTER to close the SSH connection.
RCU - reMarkable Connection Utility
reMarkable Connection Utility, or RCU, is a third-party program to manage reMarkable tablets without using the reMarkable cloud service.
I'm not going to try and list everything it does, but the features that I use the most are ...
-
Uploading and managing custom templates. This can be done by hand, however RCU makes it a lot easier.
-
Moving notebooks, EPUB, and PDF files beween folders. Again, this can be done by hand, however RCU makes it easier.
-
Virtual Printer. When the computer "prints" to it, the print job is saved as a PDF on the tablet.
-
Screenshots. RCU is able to read the contents of the display and save it as a
.pngimage file.
RCU isn't free, but it isn't expensive - I paid all of $12 for it.
Customers are able to download and run the program on as many machines as they like. They are also able to download the source code, access the git repository, and participate in a private "developer" mailing list. They're also entitled to free updates for a year - and to be honest, as long as the price stays the same, I'm fine with paying what amounts to a $12/yr subscription.
So far I've been very happy with it. If you have any interest in being able to do more with your reMarkable tablet than what the built-in software supports, or if you're using a tablet which doesn't sync with the reMarkable cloud, I highly recommend it.
ℹ️ reMarkable Paper Pro
As I'm writing this (2024-10-06), the rMPP is still very new. RCU's developer had to order one and wait for it to arrive, just like everybody else. He does have it now, and is working on updating RCU to support it.
I believe his plan is to make the current "develop" build, which supports the rM1 and rM2, into the "release" build, and start a new "develop" release which will support the rMPP.
Hacks
The reMarkable tablets are running Linux, and they provide an easy way to SSH into the tablet as root, so unlike many other devices, there's no need to "root" or otherwise "break into" the tablet.
Because of this, there's a whole community of people who have come up with ways to modify how the unit works.
I already know that I'll be SSH'ing into mine and customizing things, and I've started collecting bookmarks for some of these "hacks". As I look at each one in more detail, I'll update this page or, if it makes sense, add separate pages for some of them.
List of Hacks
awesome-reMarkable is a list of hacks compiled by others. Almost all of the hacks I've seen are linked from this page.
ℹ️ To be totally clear, I am NOT trying to start my own "index of hacks" here. When I'm finished (or if I'm finished?) this site will contain information about the hacks I actually use on my own tablet, and maybe the ones that I look at but decide not to use.
Please do not look at this page as "the ultimate list of reMarkable hacks".
Hacks - On My Tablet
So far the only "hack-ish" things I've done with my tablet are ...
-
Enabling SSH access.
The ability to SSH into the tablet is built into the reMarkable software, so I don't really think of this as a "hack". It's just something that reMarkable, unlike most other consumer electronics companies, decided not to prevent users from doing.
⇒ The SSH Access page documents this.
For the record, this was also a big part of what convinced me to spend the money. If SSH access was not easily available, I wouldn't have bought the tablet.
-
Created some scripts.
These are simple "system administration" scripts that I use to make backups of my tablet, list the contents, and clean up some files that the built-in software doesn't delete if the tablet isn't linked to a cloud account.
⇒ Scripts
-
Created some templates.
I read through How to Make Template Files for Your reMarkable, which includes a LOT of information, including what I needed - details about the file formats, where to upload them, and how to make the reMarkable software use them.
-
Started using RCU (reMarkable Connection Utility). This is a GUI for managing the RM1/RM2 tablets without using the reMarkable cloud.
It's not free, but ... it's only $12, which isn't bad.
⇒ RCU - my page, on this site
⇒ RCU - official web site, where you can find documentation, and buy and download it yourself.
-
goMarkableStream is a program which runs on the tablet, which streams the contents of the display to a web browser running on your computer. I had a minor issue getting it to work, but the developer pointed out what I was doing wrong, and a few minutes later it was working perfectly.
Hacks - Not Tried Yet
This is a list of "hacks" that look interesting to me. I plan to look at them in more detail in the future.
In no particular order ...
-
Toltec looks like a third party software repository for the reMarkable tablets, similar to Homebrew for macOS. Some of the "hacks" I've looked at so far say they require packages installed from it.
-
regitable - Make the tablet automatically commit and upload backups to a git repo. Uses git-lfs to store large files outside the repo itself, so the files in the
.gitdirectory don't contain duplicate copies of larger files.Obviously this means that the tablet needs a network connection in order to push changes to the repo. My tablet has never connected to wifi at all, so I haven't been able to try this yet.
Also ...
gitworks by storing copies of past commits on the local machine. Usinggit-lfsshould mean that it will only be storing pointers to past files, so that'll help, but the tablet only has about 6.5 GB of available storage, so ... depending on how long it's been since you started the repo history, I can see this as yet another thing competing for the limited storage space on the tablet itself. -
recept - Uses an
LD_PRELOADhack to intercept the communications with the screen digitizer (which reads the pen) and "averages" the sample positions to "smooth out" the lines. (Not super easy to explain, but the page has an example which shows the difference.) -
rM-signature-patch - modifies the
xochitlexecutable (the reMarkable software itself) to remove the advertisement that it adds to the bottom of every email it sends out.This one is also a simple script, and in fact I've opened a pull request against it, to only require
opkg(the Toltec package installer) ifperlneeds to be installed. (I'm sure Toltec isn't the only way to install Perl on the tablet.) -
Calibre Remarkable Device Driver Plugin - a plugin for Calibre which allows it to manage ebook files on the tablet, the same way it manages other ebook readers (i.e. kobo, kindle, nook, etc.)
❌ This doesn't work with the reMarkable 3.x firmware, so I can't use it right now. If it gets updated to work with the newer firmware, I am very interested in trying it out.
Hacks I Am Not Using
Nothing against them, they're just not for me. I'm listing them here because I did look at them, and they could be suitable for you. (For the record, if I look at any hacks and decide that I don't like them for some reason, they will not be listed here at all.)
-
rm-sync - Shell script which uses
curlto upload files to the tablet, andscpto download/backup files from the tablet. It looks simple enough, but I already have anrsync-based backup solution that I've been using for 15+ years, and I'm able to manually restore files if I ever need to, so I'm sticking with what I know.With that said, the idea of using
curlto upload EPUB/PDF files is now in the back of my brain, and if I need to write a script for that, I'll probably come back and use the samecurlcommand line he's using to do it. -
reMarkable Printer - makes the tablet emulate a printer. When a computer "prints" to it, the output is saved as a new document (PDF?) on the tablet. (The same thing can be done using the "Print to PDF" functionality built into macOS, then uploading the PDF to the tablet.)
This functionality is built into RCU, so unless something happens and I decide to stop using RCU, I probably won't actually try this one.
-
reStream - Stream your reMarkable screen over SSH. Can be used with a screen-capture utility to record movies of what's on the tablet's screen.
I'm using goMarkableStream for this, so I probably won't look at reStream in detail.
rm2-download script
Idea
Command line script to download documents and templates from rM tablet. Write the same archive files as RCU.
-
download documents to
.rmnfiles -
download templates to
.rmtfiles -
download folders to
.rmffiles (placeholders for UUIDs, so documents can be uploaded back to the same folder they were originally in) -
options to download "all documents", "all templates", "just custom templates", "everything"
-
.rmnand.rmtfiles can be uploaded using RCU
Status
85% done, still a few minor bugs
When I started writing this script I didn't realize that RCU had a command line interface. Now that I'm invested in the rm2-download script, I want to get it (and the rm2-upload script) finished. The act of writing these scripts is helping me better understand how documents are stored on the tablet, which I think will come in handy when/if I start on other ideas.
rm2-upload script
Idea
Command line script to upload archived documents/templates to a tablet, works with rm2-download or with files downloaded using RCU
-
upload
.rmnfiles- to original folder (by UUID) if it exists on the tablet
- to root otherwise
-
upload
.rmtfiles- store in same place RCU stores them, create symlinks, update
templates.json - convert SVG to PNG
- does rM need both files?
- why doesn't
.rmtfile contain both?
- store in same place RCU stores them, create symlinks, update
-
upload
.rmffiles- so that documents can be upload back to their original folders
-
upload multiple files
- always upload
.rmt, then.rmf, then.rmn - option to recursively upload all files in a directory tree
- always upload
Status
20% done - .rmf seems to be working, others partly written and not even tried yet.
rmssh Golang program
One of the problems I can see people running into when using my scripts is that, for some of them, they might need to install a bunch of third-party dependencies, or in some cases (i.e. Perl) the language itself.
Also ... ms-windows.
Outside of various "day jobs" (where a company pays me a regular salary to do stuff for them) I haven't used ms-windows since around the time "windows xp" came out (aaaaargh, soooo much unnecessary eye-candy, just thinking about it makes me feel like I need to wash my eyeballs out with bleach).
If you can't tell, I am not a fan of ms-windows, however I understand that some people are forced to use it, and others might actually like it. I look at it this way ... what you do with your computer is on you. It doesn't affect me, so ... you do you.
Golang
One of the things I'm trying to learn is Golang, aka the "Go" language. It looked interesting when I first found out about it, and at one point it looked like I was going to need it for something at $DAYJOB. That ended up not happening, but I did write one simple program using it - probably not the cleanest Golang code, but it does seem to work.
One of the big advantages of Golang is that, at least for command line programs, you can compile the same source code to run on any of several dozen different platforms, including both 32- and 64-bit versions of ms-windows.
I did some playing around with a way to build the same Golang program for a list of different architectures. This repo talks about how to do it, and includes a Makefile that
Idea
The idea I have is to write a single command line program which can be used instead of the existing rm2-xxx scripts. I'm not sure if I want to include the template scripts, but I think it makes sense for the others (rm2-list, rm2-backup, rm2-clean, etc.) to be included.
Because the program will use SSH, and will work with both rM1 and rM2 tablets, my current thinking is to call it rmssh.
Each rm2-xxx script would become a sub-command, so rm2-list would become "rmssh list".
Obviously the resulting rmssh (or rmssh.exe) executables would be available for the architecture that people commonly use, and could be available for every architecture that Golang supports. The source code would be available under an open-source license.
Status
As of 2024-07-13: just barely started.
When I first got rmweb working, I copied the "skeleton" to another golang program called "rmssh", which doesn't curently do anything other than show its own version number.
The idea behind "rmssh" is exactly what I described above - a single command line program which can list, download, and upload files from/to rM1 and rM2 tablets. The only thing it won't be able to do via SSH is download PDF files, so that may end up only being available when the tablet's web interface is enabled and accessible (which usually means "when the tablet is connected via USB cable", although I've read that there are ways to make the web interface also accessible via wifi).
Building PDF files
A "stretch goal" might be to figure out how to build a PDF file from scratch, using the raw files downloaded from the tablet. If so, I can see that being part of "rmssh" (and the web interface wouldn't be needed at all), but also available as a separate command line utility which "converts" from .rmn or .rmdoc files to PDF.